
7 Front Porch Christmas Decor Ideas DIY Cheap and Beautiful
The magic of Christmas starts right at your front door, and let me tell you, after three boys tracking in mud and snow all season long, I’ve learned that porch decor needs to be both beautiful AND practical! Creating a warm, welcoming entrance for the holidays doesn’t have to drain your wallet or take days of your precious time.
With just a few simple materials and a little creativity, you can design front porch christmas decor ideas diy cheap that’ll make your neighbors stop and stare!
For more budget-friendly ways to create a beautiful seasonal entrance, browse these affordable front porch Christmas ideas!!
I’ve spent years perfecting budget-friendly decorating tricks that survive my boys’ constant door-slamming and snowball fights, and I’m so excited to share these ideas with you! Whether you’re working with a tiny stoop or a sprawling wraparound porch, these seven projects are forgiving, fun, and totally doable during naptime or after bedtime. Let’s dive into these festive ideas that’ll transform your entrance into a Christmas wonderland without the hefty price tag!
Mason Jar Lanterns with Evergreen Sprigs
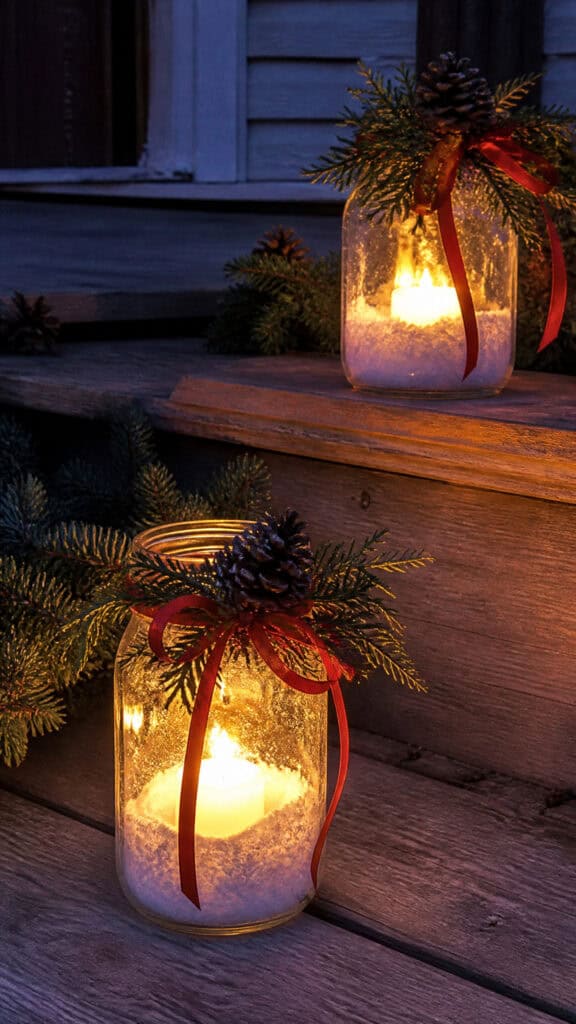


Mason jars are seriously my best friend when it comes to decorating on a budget! I always have a stash of these versatile containers under my sink, and they transform into the most charming Christmas lanterns with just a few simple additions. The soft glow they create is absolutely magical when guests arrive for holiday gatherings, and my middle son loves helping me arrange them on the porch steps!
Start by gathering mason jars in various sizes – I usually hit up thrift stores or use old pasta sauce jars that I’ve saved throughout the year. Clean them thoroughly and remove any labels with a little soap and hot water. Fill the bottom of each jar with about two inches of Epsom salt to create a snowy base, then nestle a battery-operated tea light or votive candle right in the center. The Epsom salt trick is genius because it looks just like fresh snow and costs practically nothing!
Now for the festive touch that makes these lanterns extra special! Tie a piece of twine or red ribbon around the neck of each jar, and tuck in some fresh evergreen sprigs, pinecones, or even a cinnamon stick. I love raiding our backyard for pine branches because they’re free and smell absolutely incredible! If you don’t have evergreens nearby, most craft stores sell small bundles for just a couple of dollars. Arrange these glowing beauties along your porch steps, cluster them near your front door, or even hang them from shepherd’s hooks if you want to get fancy!
The best part about these lanterns is that they’re completely weatherproof if you use battery-operated lights, and they last the entire season! My boys know not to touch them (well, most of the time), and they add such a warm, welcoming ambiance to our front porch. You can make a dozen of these for under ten dollars, and they look like something straight out of a fancy holiday catalog!
DIY Wooden Crate Christmas Tree Display
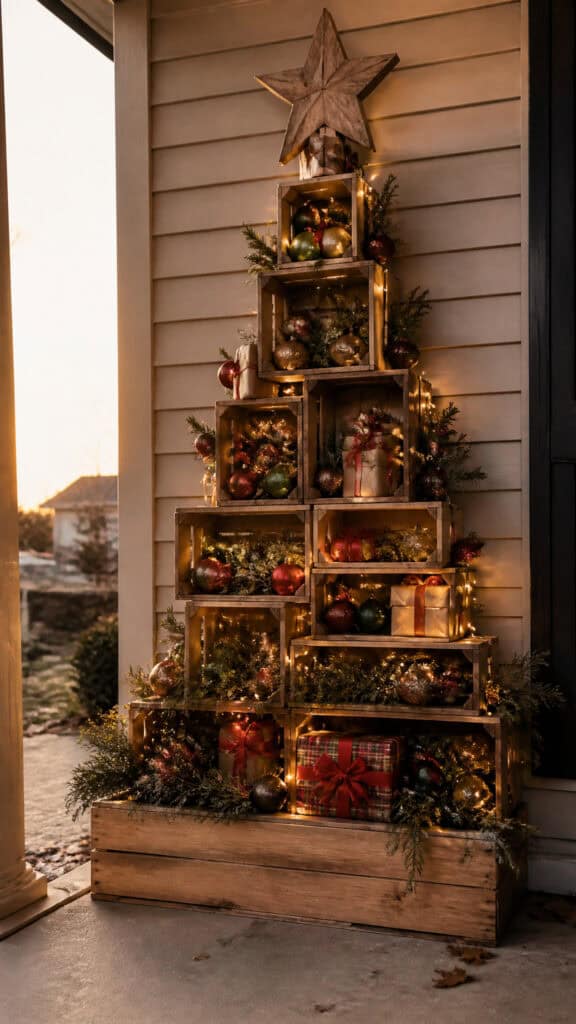
Wooden crates are absolutely everywhere these days, and they make the perfect foundation for a unique Christmas tree alternative on your porch! I found a stack of old crates at a garage sale for five dollars total, and they’ve been my go-to decorating element ever since. This project is so forgiving that even if you’re not particularly crafty, you’ll end up with something that looks professionally designed!
Stack two or three wooden crates in a pyramid shape – one on the bottom, then one or two on top, creating a tree-like silhouette. You can secure them with a little rope or just let gravity do its job if your porch is sheltered from wind. Once you have your basic structure, the fun part begins! Fill the crates with an assortment of Christmas ornaments, string lights, pinecones, faux presents wrapped in festive paper, and evergreen branches. I like to weave battery-operated string lights throughout the entire display so it glows beautifully at night!
To make this display even more special, add a rustic wooden star on top that you can cut from scrap wood or find at the dollar store. Paint it gold or leave it natural for that farmhouse-chic look that’s so popular right now! I also love tucking in some plaid fabric or burlap for texture – just stuff it into the corners and let it drape naturally. My oldest son helped me arrange ornaments by color, and it became a fun family activity that got everyone excited about the holidays!
This wooden crate tree is incredibly versatile because you can adjust the contents based on what you already have at home. Too many ornaments that don’t fit on your indoor tree? Perfect! Old Christmas books or vintage decorations? Even better! The whole project typically costs less than fifteen dollars if you’re starting from scratch, and you can reuse everything year after year. Plus, it’s sturdy enough to withstand my boys’ football games in the front yard!
Candy Cane Pathway Markers
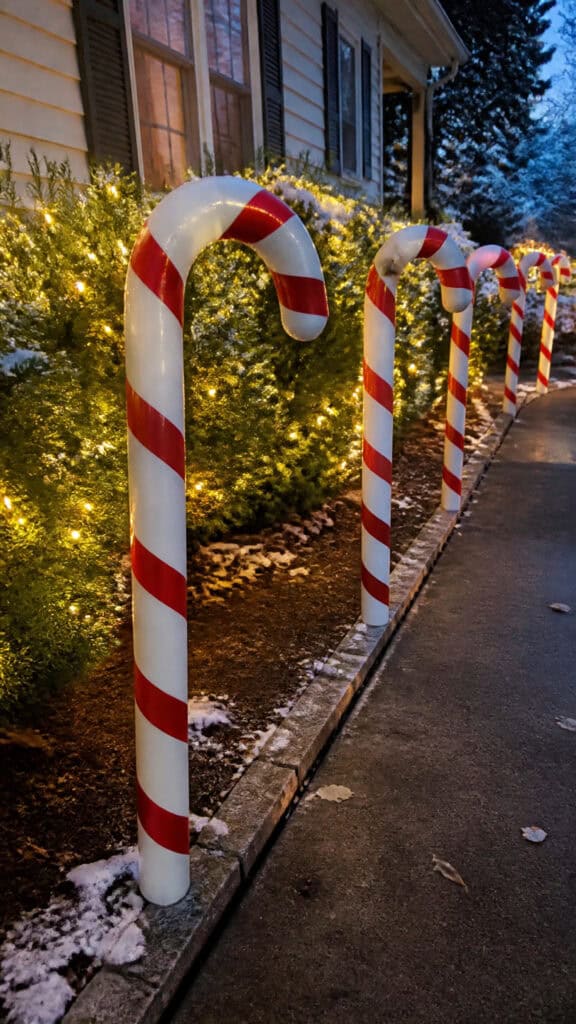
Nothing says Christmas quite like candy canes, and these oversized pathway markers are ridiculously easy to make! I came up with this idea when I realized how much PVC pipe was sitting in our garage from various abandoned projects, and now it’s become a neighborhood favorite. Every time we pull into our driveway, my youngest squeals with delight at our candy cane lane!
You’ll need white PVC pipes (about three to four feet tall and two to three inches in diameter), red duct tape or outdoor spray paint, and something to anchor them in the ground. Cut your PVC pipes to your desired height using a simple hand saw – my husband did this part in about ten minutes total. Then comes the fun part that the kids can help with! Wrap red duct tape in a spiral pattern around each pipe, starting at the top and working your way down. If you’re using spray paint instead, use painter’s tape to create diagonal stripes, paint the exposed areas red, and remove the tape once it’s dry.
To create the iconic candy cane curve at the top, you have a couple of options! The easiest method is to use a heat gun or hair dryer to carefully warm the top section of the pipe until it becomes pliable, then gently bend it into a hook shape. Hold it in position until it cools and sets – this takes just a few minutes! If that sounds too complicated, you can also buy pre-curved PVC elbow joints at the hardware store and attach them to the top of straight pipes. Either way works beautifully!
Anchor your candy canes along your walkway or porch steps by pushing them into the ground, or if you have a concrete porch like we do, secure them in large flower pots filled with sand or gravel. I wrapped mine with extra string lights for nighttime sparkle, and they look absolutely enchanting! The entire project costs around twenty dollars for materials, and these candy canes are durable enough to last for years. Store them in the garage during the off-season, and you’ve got instant Christmas cheer ready to go next year!
Repurposed Pallet Welcome Sign
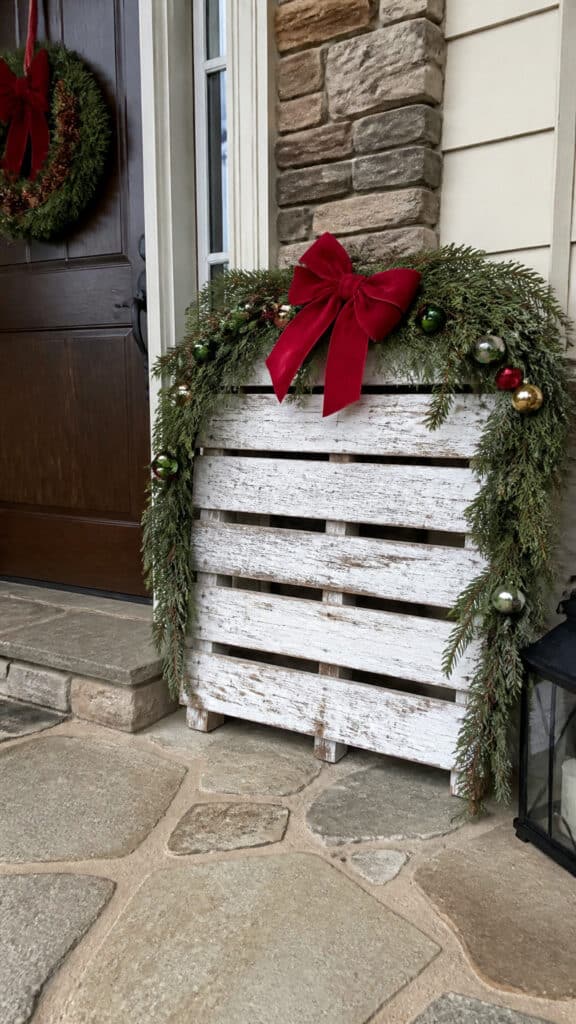
Pallets are my absolute favorite free resource for DIY projects! You can find them behind stores, at construction sites, or even listed for free on community marketplaces. I’ve made everything from toy boxes to garden planters with pallets, and this Christmas welcome sign is one of my proudest creations! It adds such a personal, handmade touch to our porch, and visitors always comment on how charming it looks!
Start by finding a pallet in decent condition – you want one that’s relatively clean and doesn’t have too many broken slats. Give it a good scrub with soap and water, then let it dry completely in the sun. You can leave the wood natural for a rustic look, or paint it white, red, or green to match your holiday color scheme. I went with white because it makes the lettering pop, and a single can of spray paint did the trick for under five dollars!
Now for the fun part – adding your festive message! You can stencil words like “Merry Christmas,” “Joy,” “Let it Snow,” or “Welcome” using paint and letter stencils from the craft store. If you’re not confident in your painting skills (trust me, I get it!), try using vinyl letter stickers instead – they’re super affordable and look professionally done! I used red and green paint for my lettering, and added some simple snowflake designs in the corners using a small sponge brush. My boys even added their handprints in white paint at the bottom, which made it extra special!
To complete your sign, attach some evergreen garland across the top or bottom using a staple gun or small nails. Add a big red bow, some battery-operated lights, or even small ornaments for extra pizzazz! Lean your finished sign against your porch railing, hang it on the wall next to your front door, or prop it up on an easel. The whole project takes maybe two hours from start to finish, costs less than ten dollars, and you’ll have a one-of-a-kind decoration that showcases your creativity! Plus, it’s heavy enough that it won’t blow away in winter winds – a major bonus!
Tin Can Luminaries with Christmas Cutouts
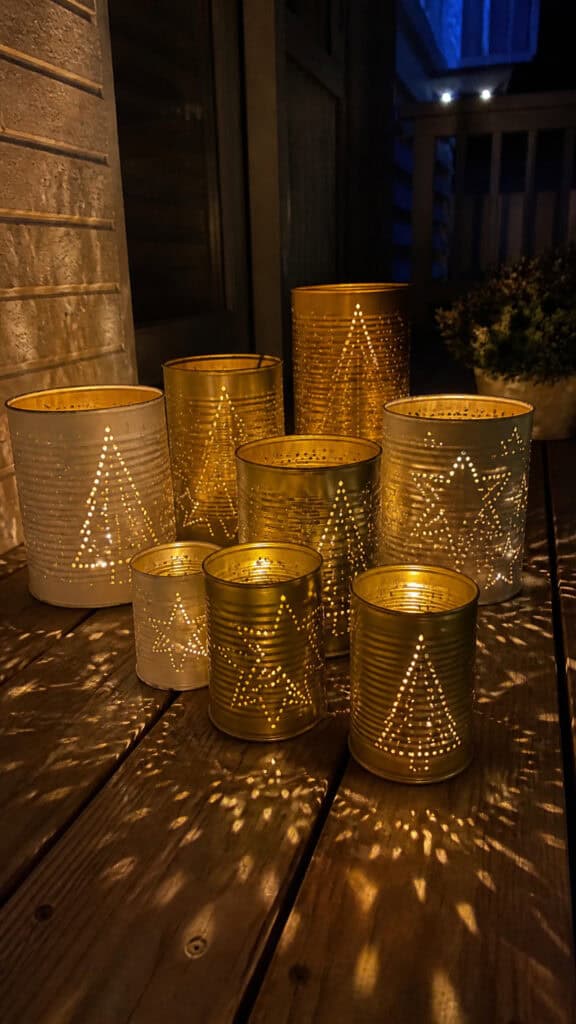
I never throw away tin cans anymore because they’re absolute gold for crafting! This luminary project is so simple that it’s almost embarrassing how gorgeous the results are. My middle son’s preschool teacher actually asked if I bought them from a boutique shop, and I was thrilled to tell her they cost me exactly zero dollars! These luminaries cast the most beautiful patterned light across your porch, creating a magical atmosphere that makes even the coldest winter evening feel cozy!
Start collecting tin cans in various sizes – soup cans, coffee cans, vegetable cans, whatever you’ve got! Remove the labels and clean them thoroughly, making sure there are no sharp edges around the top. Fill each can completely with water and freeze them solid overnight – this is the secret trick that makes the whole project work! The ice inside prevents the can from collapsing when you punch holes in it. Once frozen, use a hammer and various sized nails to create your design by tapping holes through the metal. You can make Christmas trees, stars, snowflakes, or even spell out words!
If you want to get really fancy, draw your design on paper first, tape it around the can, and use it as a guide for your hole placement. I like to work on a folded towel in the garage to muffle the hammering noise – especially important when the boys are napping! After you’ve created your pattern, let the ice melt completely and dry the cans thoroughly. Now comes the transformation! Spray paint your cans in festive colors like gold, silver, red, or white, or leave them natural for an industrial look. I did a mix of metallic gold and white, and they look so elegant!
Place battery-operated tea lights inside each luminary, and arrange them along your porch steps, railings, or clustered near your front door. When the lights shine through the punched holes, they create the most stunning patterns that dance across your porch! You can also add ribbon around the top edge or attach a wire handle if you want to hang them. This project is perfect for using up those front porch christmas decor ideas diy cheap materials you already have at home, and the luminaries are weatherproof and reusable year after year!
Burlap and Pinecone Garland
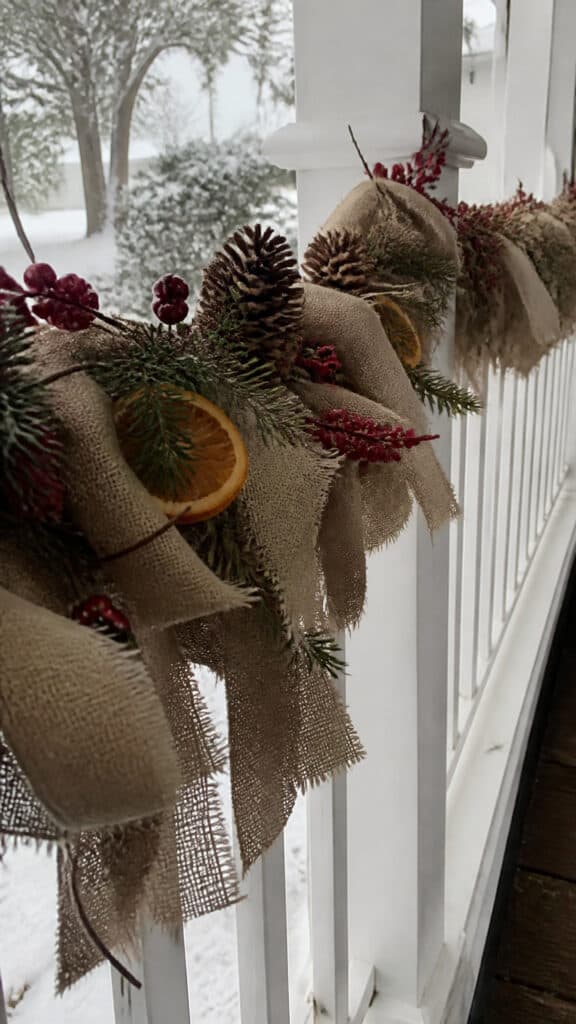
Garland is essential for Christmas decorating, but store-bought versions can cost a fortune! Making your own garland from natural materials is not only budget-friendly but also gives your porch that cozy, rustic charm that I absolutely love. This project is so relaxing to make – I usually work on it while the boys watch a Christmas movie, and it’s become one of my favorite holiday traditions! The natural textures of burlap and pinecones create such a warm, welcoming look that perfectly complements any front porch style!
Start by collecting pinecones from your yard, a nearby park, or even asking friends and family to save them for you! I usually gather way more than I think I’ll need because they’re free and it’s fun to have extras. Bake your pinecones on a low temperature (around 200 degrees) for about thirty minutes to kill any bugs and open them up fully – trust me, this step is important! While they’re cooling, cut burlap into strips about four inches wide and as long as you want your garland. You can find burlap at craft stores for a few dollars per yard, or even repurpose old burlap coffee bags!
To assemble your garland, start with a long piece of twine or jute rope as your base. Tie strips of burlap along the length of the rope, spacing them about six inches apart and letting them hang naturally for that shabby-chic look. Then, use hot glue or wire to attach pinecones between the burlap strips. I like to vary the sizes of pinecones for visual interest! You can also add in other natural elements like cinnamon sticks, dried orange slices, small ornaments, or even cranberries threaded on wire for pops of color!
For extra sparkle, lightly spray your finished garland with white spray paint to create a snow-dusted effect, or leave it completely natural – both look amazing! Drape your garland along porch railings, around doorways, or swag it across windows. I made a ten-foot garland for under eight dollars, and it’s held up beautifully through rain, snow, and my boys’ constant door slamming! The natural scent of the pinecones and burlap adds such a wonderful earthy fragrance to our porch, and it’s become one of my signature decorations that friends always ask about!
Upcycled Ladder Christmas Card Display
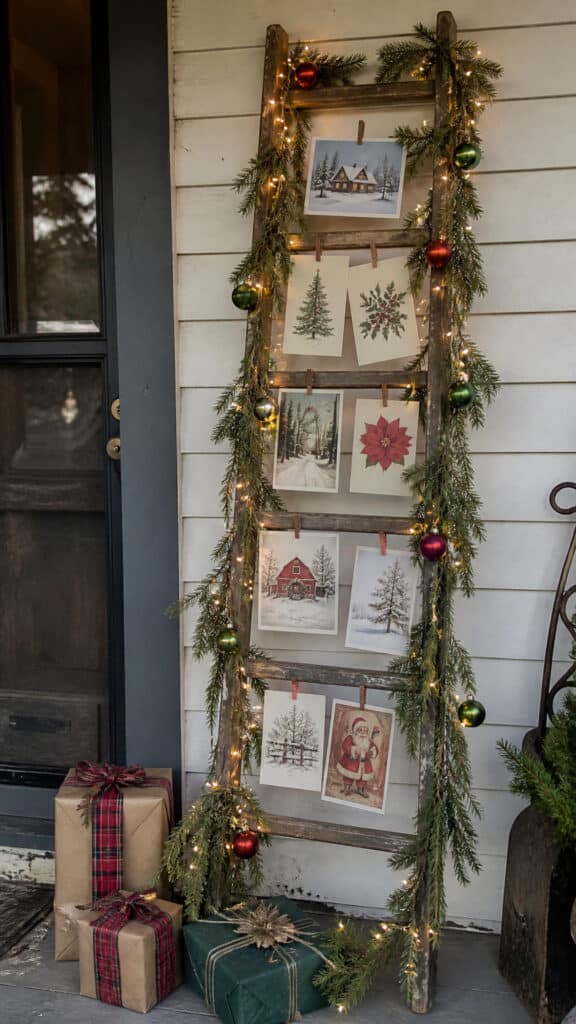
Old wooden ladders are such a treasure for decorating, and this idea has become my favorite way to display all the Christmas cards we receive each year! Instead of letting them pile up on the counter or get lost in the shuffle, they become part of our front porch decor! I found an old wooden ladder at a yard sale for three dollars, and it’s been the best investment ever. This display not only looks charming but also reminds us of all the wonderful people in our lives every time we come home!
If you don’t have an old ladder lying around, check thrift stores, garage sales, or even ask older relatives – someone always has one tucked away in a barn or garage! You want one that’s weathered and rustic-looking because imperfections add character. Give it a light sanding if there are any rough spots, but don’t worry about making it perfect – that’s part of its charm! You can paint it white, red, or a festive green, or leave it natural like I did. Lean it securely against your porch wall or railing, making sure it’s stable and won’t tip over in the wind!
Now for the decorating magic! Use small clothespins (you can buy a big pack at the dollar store) to clip Christmas cards to the ladder rungs. I love how this creates a cascading display of holiday greetings that changes and grows throughout December as more cards arrive! Weave some evergreen garland through the rungs, add battery-operated string lights for nighttime glow, and hang a few special ornaments from the sides. You can also tuck in some wrapped packages at the base to complete the look!
This ladder display serves double duty as both decoration and functional organization, which is exactly what busy moms need! My boys love checking the ladder each day to see if new cards have arrived, and they’ve started recognizing family members from the photos. The whole setup takes maybe twenty minutes to arrange, costs practically nothing if you already have the ladder, and it adds such a personal, heartwarming touch to your porch! It’s definitely one of those front porch christmas decor ideas diy cheap that looks way more expensive than it actually is, and visitors always stop to read the cards and admire the creativity!
Your Budget-Friendly Christmas Porch Awaits
There you have it – seven absolutely gorgeous ways to transform your front porch into a Christmas wonderland without emptying your wallet! I hope these front porch christmas decor ideas diy cheap have inspired you to get creative and make this holiday season extra special for your family. The best part about DIY decorating is that you can customize everything to match your personal style, and the memories you create while making these projects with your kids are truly priceless!
Remember, the most beautiful holiday decorations are the ones made with love, not necessarily the most expensive ones from fancy stores! So grab those materials you already have at home, set aside an afternoon while the kids are occupied, and start creating your own magical Christmas entrance. Your neighbors will be asking for your decorating secrets, and you can proudly tell them that it was all done on a budget! Wishing you a wonderful holiday season filled with joy, creativity, and just the right amount of glitter tracked through your house!
This post may contain affiliate links. Read the full disclosure here.