Easy DIY Winter Wonderland Decorations for a Magical Home
I love turning our home into a magical winter wonderland, and the best part is how simple it can be with easy DIY winter wonderland decorations. With three boys running around, I need ideas that are quick, kid-friendly, and still full of charm. This post will share fun, simple projects that bring the magic of winter indoors without any stress or fancy supplies!
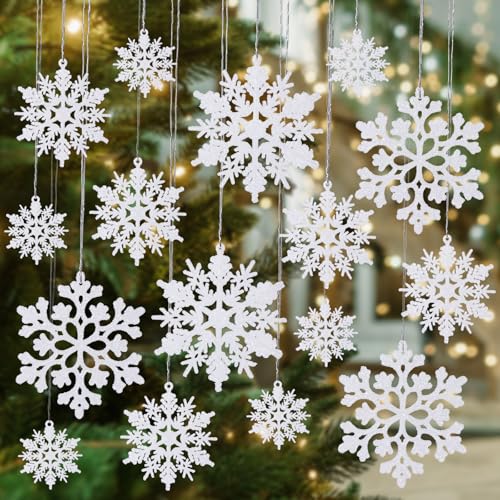
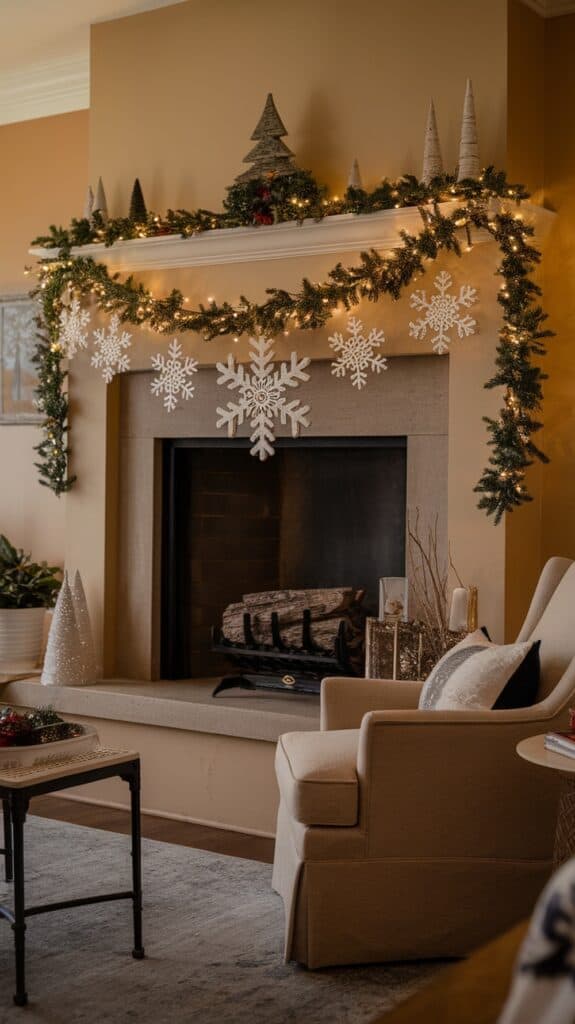
These snowflake hanging decorations make your home look straight out of Frozen.
Creating a festive space doesn’t have to take hours or empty your wallet. Whether you want cozy touches or playful accents, I’ll guide you through ideas perfect for busy moms who want a warm, inviting home filled with seasonal joy. You’ll see how easy and rewarding decorating with your little helpers can be!

Getting Started: Essential Supplies for Easy DIY Winter Wonderland Decorations
Starting your easy DIY winter wonderland decorations can feel overwhelming when you’re not sure what you need. I’ve found that having the right supplies on hand makes the whole process smoother and even fun! It’s like setting the stage before the magic happens. With just a few basic tools and materials, you can create cozy, whimsical touches that bring winter indoors in no time.
Crafting Tools and Materials Every Mom Should Have
If you’re a mom like me, juggling three energetic kids, quick and easy is the name of the game. Here’s a simple list of tools and materials that I keep stocked:
- Hot glue gun and glue sticks – Fast, strong, and kid-friendly (with supervision).
- Scissors – Sharp enough to cut paper, felt, and lightweight wood.
- Twine or clear fishing line – Perfect for hanging decorations without fuss.
- Craft paper and cardstock – White, silver, and pale blue make a beautiful winter palette.
- Cotton balls or batting – For soft snow effects.
- Pipe cleaners – So versatile for snowflakes, garlands, or playful shapes.
- White paint or spray paint – Adds a frosty touch to pinecones and branches.
- Glue dots and double-sided tape – No mess, no drying time.
- Glitter or faux snow powder – Just a little sparkle goes a long way.
Keeping these basics around means you can pull together a project before your youngest even notices. Plus, the tools and materials work across many projects, so nothing goes to waste.
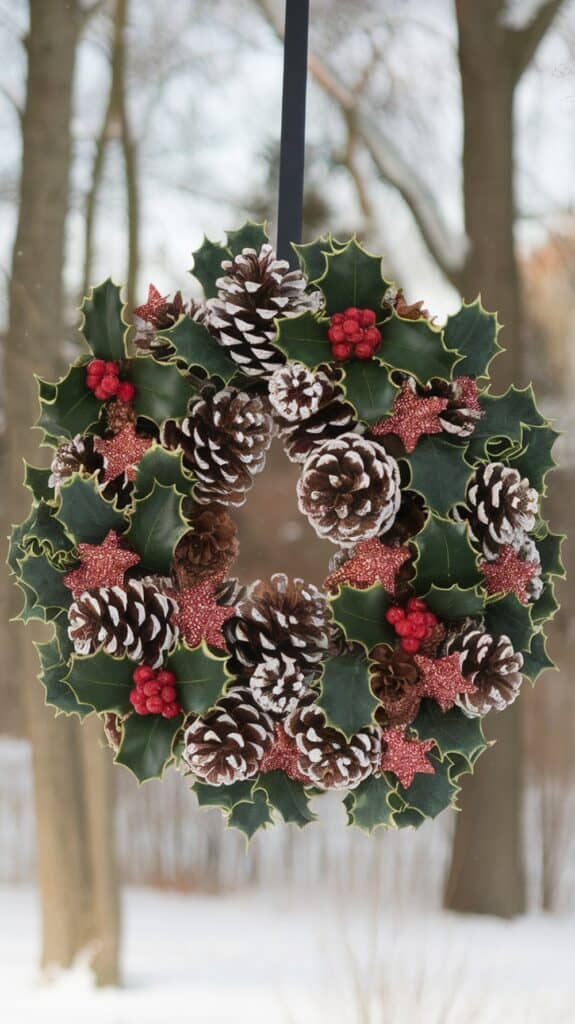
Incorporating Natural Elements for a Cozy, Magical Feel
One of the things I love most about winter decorations is adding natural touches. They make the home feel warm, inviting, and a little magical without much effort. I like to go on a quick neighborhood walk with the boys to gather some treasures. Nature provides so much for free—including some of the best rustic charm!
Try adding some of these natural elements:
- Pinecones (spray painted white or dusted with glitter).
- Evergreen branches or clippings from your Christmas tree.
- Dried orange slices or cinnamon sticks (they smell amazing too).
- Twigs or bare branches (great for hanging paper snowflakes).
- Acorns or chestnuts in a simple bowl.
These simple elements bring texture and warmth that complement the softer whites and silvers perfectly. Plus, they’re super kid-friendly to explore and collect.
Where to Shop Smart for Supplies on a Budget


Decorating doesn’t need to drain your wallet! If you’re like me, finding where to shop smart is half the fun. I’ve learned a few tricks to stretch my budget while still getting quality supplies for easy DIY winter wonderland decorations.
Here are some of my favorite places to check out:
- Dollar stores – Tons of holiday crafting basics and seasonal touches at unbeatable prices.
- Craft store clearance aisles – After the holidays, you can often find great deals on ribbon, ornaments, and lights.
- Online marketplaces – Bulk supplies like glitter, twine, or craft paper often cost less online.
- Thrift shops – Old ornaments, glass jars, and ribbons that can be reimagined beautifully.
- Nature itself – As mentioned, walks outside often provide free pinecones, branches, and other gems.
Planning ahead and buying just a little extra of your most-used materials means you’re ready for last-minute decorating sprees. I also like to keep an eye out for sales and stock up whenever I can. It keeps the magic alive all season without stress or spending a fortune.
Simple Indoor Decorations That Bring Winter Magic to Life
When it comes to easy DIY winter wonderland decorations, nothing beats simple projects that bring the magic of the season right into your home. I love quick indoor crafts that don’t take much time or effort but still make every corner feel cozy and festive. These ideas are perfect for busy moms like me, especially with kids underfoot. They add just the right touch of winter charm without a huge mess or tons of fuss.
Here are a few of my favorite simple indoor decorations that light up the room and capture that snowy wonderland vibe. Grab some basic supplies and let’s bring some winter magic to life!
Fluffy Snowflake Garlands Made from Paper and Cotton
Snowflake garlands are such an easy and charming way to decorate windows, mantels, or doorways. My boys love helping with this one. You only need a bit of white paper and cotton balls to create soft, fluffy snowflakes that look like they’ve just drifted in from a snowstorm.
Here’s how I do it:
- Cut paper into snowflake shapes or let the kids fold and cut their own designs.
- Stretch and pull apart cotton balls to create a fluffy snow texture.
- Glue the cotton onto the paper snowflakes to give them a puffed-up, 3D look.
- String them together on twine or clear thread with simple knots or glue dots.
These garlands add a wintry touch without needing real snow or glitter everywhere. Plus, they’re lightweight and easy to hang just about anywhere in the house. I love how they catch the light and look soft and snowy all day long!
Sparkling Mason Jar Lanterns to Light Up Your Evenings
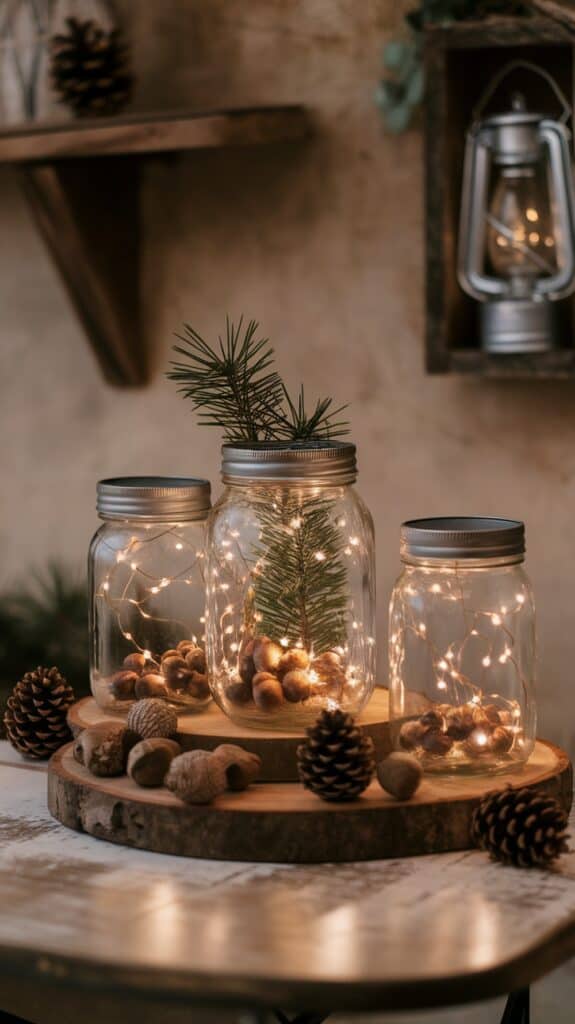
Adding soft light always makes a room feel warmer, especially in the chilly winter months. Mason jars make ideal lanterns for this! They’re cheap, reusable, and the glow from candles or fairy lights inside creates instant magic.
To make sparkling mason jar lanterns, I:
- Fill jars with battery-operated tea lights or string fairy lights inside for safety and ease.
- Decorate the outside with a sprinkle of faux snow, glitter, or frosty paint on the glass.
- Wrap twine or ribbon around the jar’s neck for a cozy touch.
- Place pinecones, small twigs, or sprigs of greenery inside the jar or tied to the outside.
Lining the mantel or windowsill with these lanterns gives everyone that calming glow that feels like a Winter Wonderland’s heart. The boys love switching them on as the sun sets—it’s become a nightly tradition that’s simple and charming.
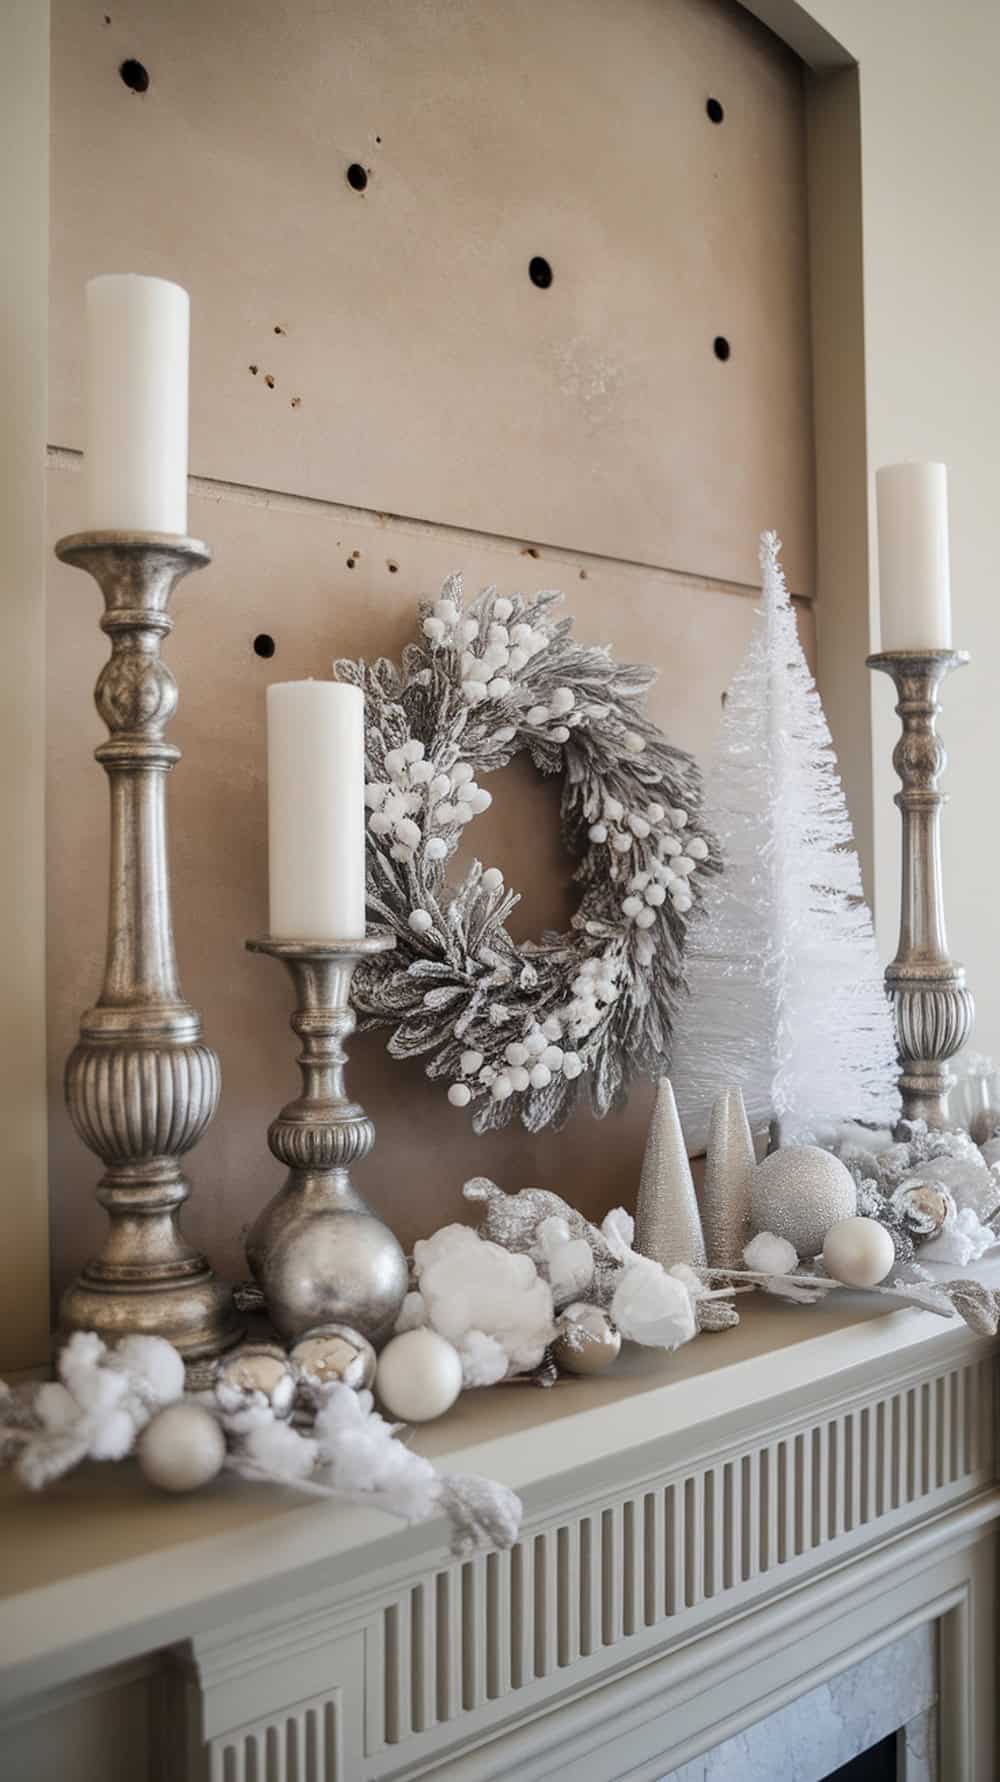
DIY Winter Wonderland Centerpiece for the Dining Table
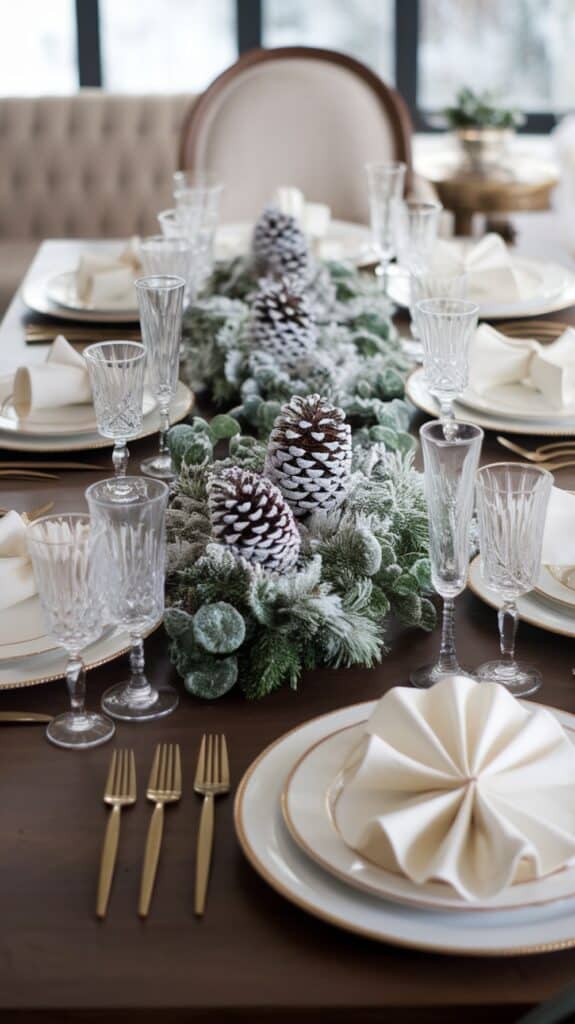
The dining table is the perfect place for a winter centerpiece that impresses without stress. My go-to centerpiece combines natural elements with easy-to-find crafts to create something that feels seasonal and warm at mealtimes.
Here’s what I use:
- A wide wooden tray or rustic plate to hold everything together.
- Pinecones sprayed with a little white paint or glitter for a frosty look.
- Evergreen branches or small clippings from our tree.
- Battery-operated candles for safe, gentle light.
- Little white or silver ornaments scattered throughout.
I arrange everything loosely to keep the look natural but festive. It’s a simple setup that you can tweak every year with whatever you find outside or in your craft stash. Plus, it’s dramatic enough to make dinners feel special but kid-friendly enough to not stress over spills or messes.
This kind of centerpiece brings winter magic right to the table, making every meal feel like part of the season’s story.
These indoor decorations are some of my favorite easy DIY winter wonderland decorations to create with my boys. They are simple, fun, and capture the spirit of winter without needing a lot of time or fancy materials. Plus, they fill our home with cozy, snowy charm that everyone notices!
Enchanting Outdoor Decorations That Welcome Winter Cheer
Bringing winter cheer outside is just as fun as decorating inside, especially with easy DIY winter wonderland decorations that anyone can put together. I love how a little creativity can turn a simple front yard or porch into a cozy greeting for all who pass by. Plus, these outdoor accents add that extra sparkle and warmth to our home’s curb appeal.
The best part? You don’t need fancy supplies or a big budget to make your outdoor space feel festive and inviting during the chilly months. Here are some of my favorite easy projects that look charming and are simple enough to do with kids helping or even while catching a few quiet minutes for myself.
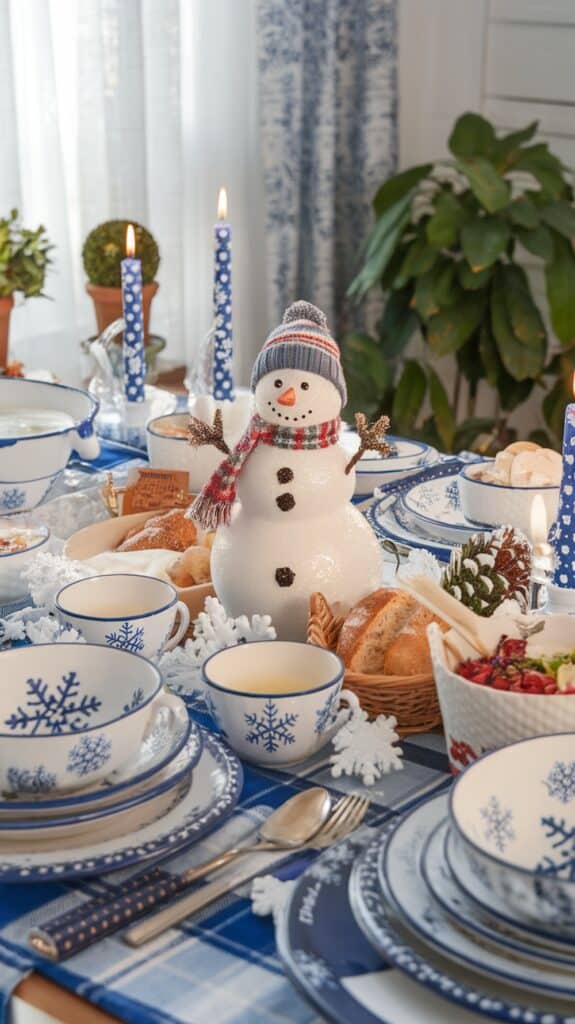
Snowman Planters Using Everyday Flower Pots
Snowmen aren’t just for the yard anymore! I adore making little snowman planters from plain flower pots that you probably already have around the house. They add a playful, whimsical touch right at your doorstep or along the porch railing.
Here’s how I put them together:
- Use two or three flower pots per snowman, stacking the largest on the bottom and the smaller ones on top.
- Paint the pots white or use white spray paint for an even coating.
- Once dry, add details like eyes, a carrot nose, and a mouth with paint or permanent markers.
- Use scraps of fabric, old socks, or ribbon to make scarves and hats.
- Fill the bottom pot with soil and plant evergreen sprigs, winter flowers, or even some pinecones for a natural winter look.
The kids get a kick out of helping decorate their own little snowman friends. Plus, these planters bring cheerful personality to your outside space while staying weather-friendly and reusable.
DIY Wooden Signposts with Winter Quotes and Directions
Nothing welcomes visitors like a charming wooden signpost pointing the way to “Winter Wonderland” or “Snowy Trails.” These signs are surprisingly easy to make and add a storybook feel to your front yard or garden path.
To create your signpost:
- Gather thin wooden boards or pallet scraps and cut them into arrow shapes.
- Paint each board in soft winter colors like icy blue, white, or rustic wood tones.
- Choose some favorite festive phrases or fun directional names (e.g. “Cozy Cabin 1 mile,” “Hot Cocoa This Way,” or “Snowflake Lane”).
- Write your quotes with paint pens or stencils for neat letters.
- Attach the arrows to a sturdy wooden stake or pole using screws or strong glue.
- Stick the signpost firmly into the ground near your walkway or by the porch.
This project is perfect for adding a little personality to your outdoor space while guiding guests with charm. It’s also a fun chance for the whole family to brainstorm silly or sweet phrases that mean something special.
Glowing Pathway Lights with Homemade Lanterns
Creating a warm glow leading up to your home instantly transforms your yard into a welcoming winter scene. I love using homemade lanterns to line our pathway; they are easy, safe, and add that cozy light you want on chilly evenings.
Here’s a simple way to make them:
- Find old glass jars, like empty pasta sauce jars, or small containers you don’t mind repurposing.
- Fill the bottoms with small stones or sand to hold battery-operated tea lights steady.
- Decorate the outside of the jars with frosted glass spray, a dusting of faux snow, or wrap with twine and pine sprigs.
- Add festive ribbon or wire handles so you can hang the lanterns if you want.
- Space the lanterns evenly along your walkway, porch steps, or driveway.
The soft amber glow guides the way and makes your entrance feel extra special. Plus, since you’re using battery lights, you don’t have to worry about open flames or kids’ safety.
All of these easy DIY winter wonderland decorations are budget-friendly and simple enough to tackle on a weekend, even with little helpers around. They create outdoor charm that invites neighbors and family alike to feel the warmth and whimsy of winter right from the moment they arrive!
Involving the Kids: Fun Winter Wonderland Craft Activities
Getting the kids involved in making easy diy winter wonderland decorations is always a highlight for me. It’s not just about making pretty things; it’s about creating memories together while adding personality and charm to our home. Plus, the boys get such a kick out of seeing their handiwork hanging around the house or lighting up a corner with their creativity. These projects are simple enough to fit into a busy day but still leave room for giggles and surprises.
Handprint Snowmen and Winter Animals Crafts
One of my favorite go-to crafts is turning the boys’ handprints into snowmen or winter animals. It’s such a fun way to capture a moment in time—plus the kids love showing off their “snowmen” long after they’ve dried. You only need plain white paper, some paint, markers, and a little imagination. We create handprints with white paint on colored cardstock (blue or gray works well for a winter feel). From there, I help the boys add faces, scarves, or little animal features like ears and noses to turn those prints into cheerful snowy creatures.
This project is great because it lets us get messy, play with textures (sometimes adding glitter or cotton for snow!), and work side-by-side even with my youngest joining in. When the handprints dry, we hang them up on the fridge or string them on a garland for a playful winter display the kids are proud to share with friends and family.
Building a Mini Indoor Winter Village Together
Building a mini indoor winter village is another big hit at our house. It’s a perfect activity to spread across an afternoon or even a weekend. The idea is simple: gather small boxes, cardboard, or even recycled containers to create little houses and shops. Then, we paint and decorate them with fake snow, tiny trees, and other wintery touches. I love that this project lets us be creative on all levels—from designing the village layout to adding the smallest details like windows outlined in silver or snowmen in front yards.
I set up the village on a large tray or shelf so it becomes a cozy winter scene the kids check on every day. It sparks storytelling and all sorts of imaginative play between building sessions. If you don’t want to buy tiny figurines, the boys enjoy making their own characters from paper or clay. It turns a simple decoration into a fun collection of memories.
Using Recycled Materials to Teach Creativity and Sustainability

One thing I’m passionate about is showing the boys how to be creative while respecting the planet. Using recycled materials for our winter decorations is an easy way to do this and always encourages out-of-the-box thinking. Cardboard boxes, egg cartons, scrap fabric, and leftover paper all become part of our crafting stash, waiting to be reborn as festive decorations.
For example, old toilet paper tubes can turn into little snowmen or trees with just a bit of paint and glue. Scraps of fabric make adorable scarves or hats. Even bottle caps and buttons become eyes or decorative accents. I find these projects teach resourcefulness and patience—plus, it’s exciting for the boys to see how everyday “trash” becomes treasure. Using recycled materials reduces waste and fits perfectly with the kind of easy diy winter wonderland decorations that don’t cost a fortune or rely on store-bought supplies.
Getting the kids involved with these hands-on, joyful activities makes decorating feel like a family event every time. They take pride in their creations, and I love seeing their excitement grow with each new project. Plus, these crafts remind me that the best decorations are the ones made together.
Tips and Tricks for a Stress-Free, Magical Holiday Decorating Experience
When it comes to easy DIY winter wonderland decorations, the holiday season should feel joyful, not overwhelming. I’ve learned that a little planning goes a long way in keeping the whole decorating process smooth, especially with three boys buzzing around my feet. Creating a magical vibe doesn’t mean chaos or stress; it’s about setting up your space, managing the mess, and thinking ahead to make your efforts last year after year. Here’s how I keep holiday decorating fun, organized, and totally manageable for the whole family!
Setting Up Crafting Stations That Work for Multiple Kids
Having a spot where the kids can spread out their projects and feel part of the holiday fun is a total game changer. I like to create dedicated crafting stations that are practical for multiple kids working at once.
Here’s what works for me:
- Use a large table or spread a plastic tablecloth on the floor so everyone has a clear space with room to create.
- Provide each child with a small tray or muffin tin to hold their supplies. It keeps things from getting mixed up and makes cleanup easier.
- Stock the station with kid-friendly tools like safety scissors, glue sticks, and pre-cut shapes to avoid frustration.
- Include a container for scrap paper and an “overflow” bin for extra materials, so you don’t have to stop every five minutes to find what’s missing.
- Keep wipes and paper towels handy to tackle sticky fingers fast.
This setup turns crafting time into a mini holiday workshop that feels organized and fun. Plus, it lets me supervise from a comfy spot while they stay busy and focused. It’s like giving them their own little creative corner where magic happens without constant interruptions.
Managing Time and Mess During DIY Decorating Projects
Let’s face it, with kids, crafting can turn messy pretty fast. I’ve learned some tricks to keep the decorating projects flowing without losing my mind or feeling like the mess owns the day.
Here’s my go-to approach:
- Set a clear time limit for projects. I like to say, “We’ll craft for 30 minutes,” so everyone knows what to expect and energy stays high.
- Prepare the space with newspaper or a washable mat to catch spills and keep surfaces protected.
- Limit the number of craft supplies out at once; too many choices can lead to clutter and distractions.
- Clean as you go by turning it into part of the fun—sing a clean-up song or make it a quick game.
- Use materials that are easy to clean up, like glue sticks instead of liquid glue or paper-based decorations over paint-heavy crafts.
- Give kids aprons or old shirts to shield clothes and reduce laundry piles.
By managing time and mess this way, I keep decorating a fun memory, not a chore. It helps the boys stay engaged and keeps me from feeling overwhelmed. Trust me, a little structure with a lot of patience makes all the difference!
How to Preserve and Reuse Your DIY Decorations Year After Year
After all the time and love poured into your easy DIY winter wonderland decorations, it’s a shame to toss them out after one season. I really believe in preserving these homemade treasures so they come back every year to add that personal touch to our home once again.
Here’s what I do to keep them looking fresh:
- Store decorations in labeled, durable containers—plastic bins with lids are best to protect against dust and pests.
- Make sure all decorations are completely dry before packing them away to avoid mold or mildew.
- Use acid-free tissue paper or bubble wrap between fragile pieces to keep them safe.
- Hang delicate paper or snowflake garlands on a clothes hanger so they don’t get crumpled.
- For bulky or oddly shaped items, wrap them carefully in soft fabric or lightweight blankets.
- Set aside a “repair kit” with extra glue, scissors, and tape ready for quick touch-ups before unpacking next year.
- Keep a photo album or folder of your creations to spark ideas and remember what worked well.
By taking these simple steps, your DIY decorations will keep their charm and last for many winters to come. It feels great to pull out those homemade snowflakes or glowing lanterns year after year and know the magic you created is still brightening your home.
Keeping these tips in mind makes holiday decorating with the kids stress-free and truly special. Setting up a good space, managing the mess, and caring for your decorations means you get to enjoy the season instead of rushing through it. Now, let’s bring that winter wonderland spirit alive with creativity and calm!
Conclusion
Easy DIY winter wonderland decorations are more than just pretty accents; they create moments of joy that stick with your family. When I decorate with my boys, the fun, laughter, and shared creativity fill our home with warmth even on the coldest days. These simple projects don’t demand a lot of time or fancy materials, but they bring a special kind of magic that store-bought decorations can’t match.
I hope you feel inspired to make some of these ideas your own and enjoy the little victories along the way. Grab your supplies, get the kids involved, and watch your home transform into a cozy winter retreat filled with memories. Happy decorating!
This post may contain affiliate links. Read the full disclosure here.