How To Build Ideas for Christmas Village Display That Tells a Story
Every December, our kitchen table turns into a mess of tiny houses, twinkling lights, and little deer as my three boys and I pull out all our favorite pieces. Finding fresh ideas for Christmas village display keeps us excited, and I love watching the boys add their own spin each year. The best part is that we get to build something together and make memories that stick!
This Christmas village starter set is the cutest way to start a new family tradition.
It’s about more than just arranging buildings and trees. When we tell a story with our village, even the oldest and most dented pieces feel new and important. There’s a certain magic when everyone gets involved, and those small details and shared laughs transform simple scenes into something truly special.

How to Pick a Theme for Your Christmas Village That Tells a Story

Every year, when we start pulling out little boxes and tinsel, my first step is picking a theme. The theme shapes everything. It turns a growing pile of snow, houses, and silly figurines into a story the whole table understands. In my family, ideas for Christmas village display usually start with a messy brainstorm, and that’s where the real fun begins! If you want a village that draws everyone in, keeps little ones guessing, and makes visitors smile, picking the right story is the secret ingredient.
Start With What Sparks Joy (And Smiles)
For me, the magic really happens when my boys get excited. So I like to think about what our family loves most during the holidays:
- Do we go sledding every winter?
- Do we love baking cookies together?
- Are we obsessed with Christmas movies?
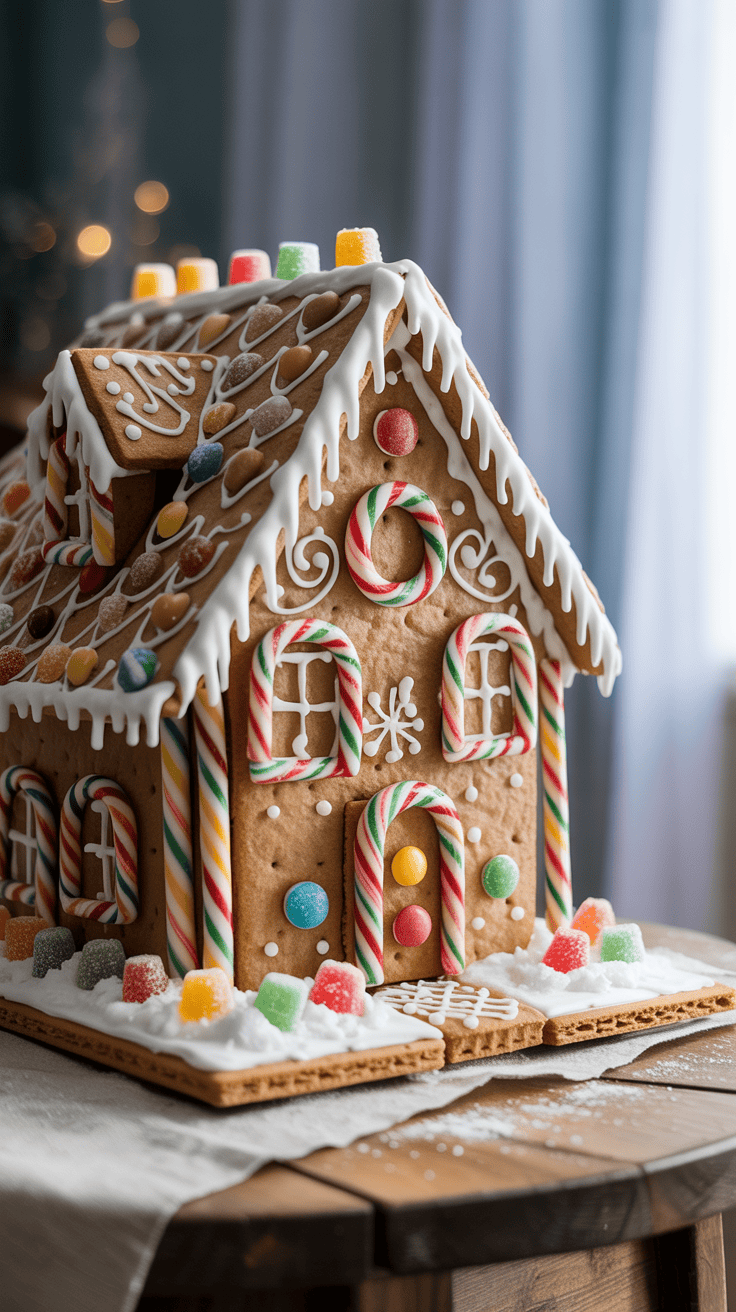
The best themes always come from what makes us happy. When the kids see their favorite activities or scenes, they feel included and proud. If your bunch loves snowball fights, let your village burst with tiny snowballs! If the kitchen is your happy place, give your village little bakers and gingerbread houses.
Gather Inspiration (Without Overwhelm)
Theme ideas don’t need to be complicated. Sometimes, a single memory is enough. Here’s how I keep everything simple and stress-free:
- Family Traditions: Think of activities you all enjoy year after year.
- Memorable Moments: Did something special happen last Christmas? A surprise snowstorm, a funny pet moment, or the first big sled ride?
- Favorite Stories or Movies: It can be a classic like A Christmas Carol, or even your own tall tales.
Keep a short list. Ask everyone to share their favorite part of the holidays, then vote as a group. This lets the whole family get invested right from the start.
Choose a Setting That Feels Personal
Every good story needs a setting. Picking a village backdrop that feels close to your heart makes the whole display feel warmer and more meaningful:
- Small Town Magic: Think cozy town square, snowy schoolhouse, or a main street decorated with tiny twinkle lights.
- Countryside Winter: Cottages, sleds, and apple carts nestled among snowy evergreens.
- Fantasy Worlds: If you dream about elves or candy mountains, sprinkle some whimsy over your village!
If your family takes an annual trip or has a favorite place, use that as your setting. For my boys, recreating places we’ve visited together always brings on the happiest stories (and the proudest little storytellers).
Layer In Details That Tell the Story
With the theme and setting picked out, it’s time to bring every scene to life:
- Start Big, Then Go Small: Place larger pieces first (like the main house or town center). Add details that support your story: snowmen, sleds, tiny pets, or mugs of cocoa.
- Think About Action: What are the villagers doing? Are they building a snow fort, stringing lights, or trying to rescue a wobbly penguin from an icy pond?
- Sprinkle in Surprises: Hide a few silly figurines or unexpected scenes to keep kids coming back for second looks.
I always love watching my boys spot something new, even after the fourth or fifth time walking by the table!
Let the Kids (and Grown-Ups) Help Shape the Theme
Group brainstorming isn’t just fun, it teaches everyone to work together. I ask each kid to draw or describe their dream scene. Even if the end result is a little “inside joke,” those personal touches always feel special.
- Encourage wild ideas. Sometimes the best themes start as total silliness.
- Remind kids every story is worth including, even if it’s just a penguin with a candy cane.
Families grow and change. One year, our display was all about the North Pole, because my youngest declared he wanted igloos and polar bears. Last Christmas, everything was centered around baking day, since everyone was obsessed with gingerbread. The most memorable displays are the ones that capture how your family feels this year—not what you think your village should be.
Simple Table: Popular Christmas Village Themes
Here’s a quick peek at some favorite themes to spark ideas:
| Theme | Setting Example | Fun Story Details |
|---|---|---|
| Town Square | Main street, old-fashioned | Carolers, hot cocoa stand, train depot |
| Winter Wonderland | Snowy forest | Forest animals, sledding, skating pond |
| Santa’s Village | North Pole | Elves, reindeer, toy workshop |
| Holiday At Home | Cozy cottage | Kids baking, family tree, pets in hats |
| Christmas Market | Vendor stalls, plaza | Christmas cookies, shoppers, lanterns |
No theme is too simple or too silly. The best ideas for Christmas village display are personal, a little playful, and packed with heart.
When you let your family’s story spill right across the snow, you’ll build something no store could ever sell—and that’s what makes every year a memory!
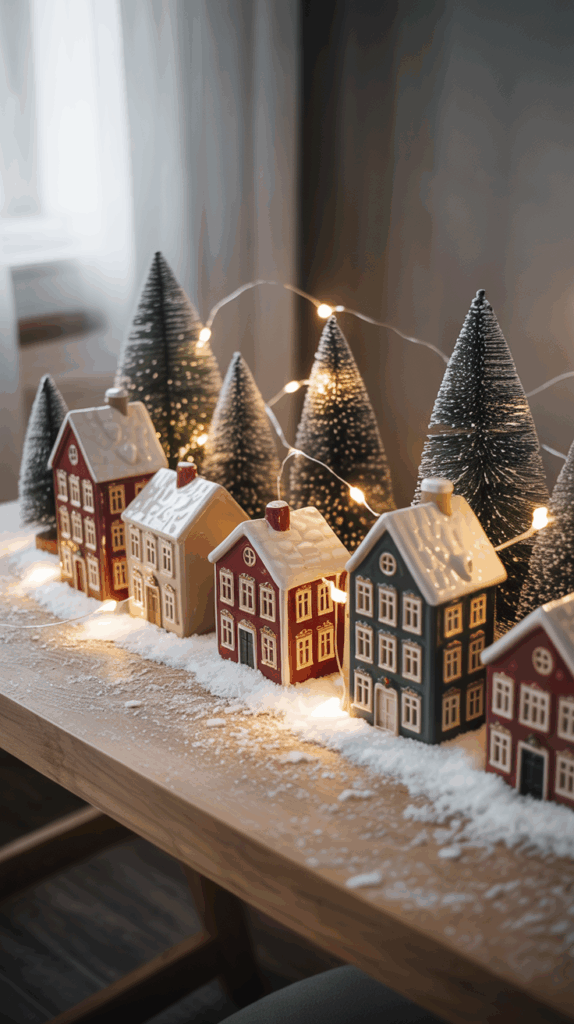
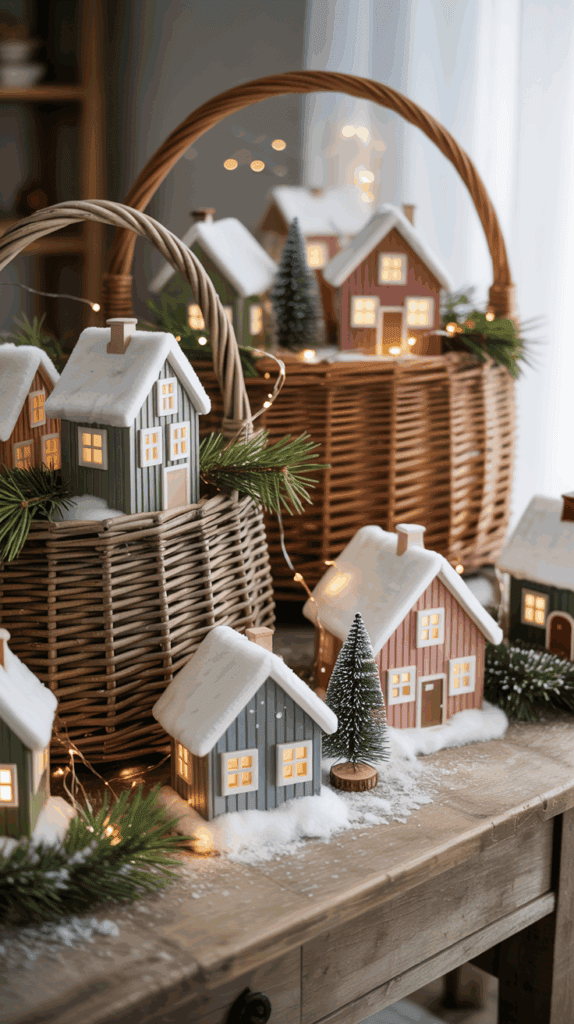
Gathering and Arranging Pieces: Bringing Your Village Story to Life
Once I’ve picked my theme, the real magic starts: pulling out all those boxes and baskets of village pieces and figuring out what goes where! The fun is in mixing and matching old favorites with a few new surprises. If you’re like me, the best ideas for Christmas village display pop up after you lay everything out and let your imagination run wild. I love that moment when even my youngest points at a tiny snowman and says, “He belongs right by the bakery!” It makes my heart so full.
Sorting Through Memories and Treasures
Before anything finds a spot in our display, we always do a quick “treasure hunt” through every piece. We start by emptying all the bins, laying out houses, trees, animals, and those odd bits we forgot we even had. My boys love lining things up side by side on the living room floor while I tell little stories about where each one came from.
I sort items into groups:
- Buildings: Houses, shops, schools, and the ever-important town bakery!
- People: Skaters, carolers, silly children, or even Santa.
- Vehicles and Extras: Cars, sleds, old trains, lamp posts, and signs.
- Animals and Nature: Everything from fluffy sheep and reindeer to a single lost penguin (true story).
Taking a few minutes to remember who or what is in each pile helps spark small stories. We always find a piece or two that need a bit of glue or a quick paint touch-up. I let the kids tackle these simple fixes with non-toxic glue or a dab of paint—it’s a good lesson in caring for our things.
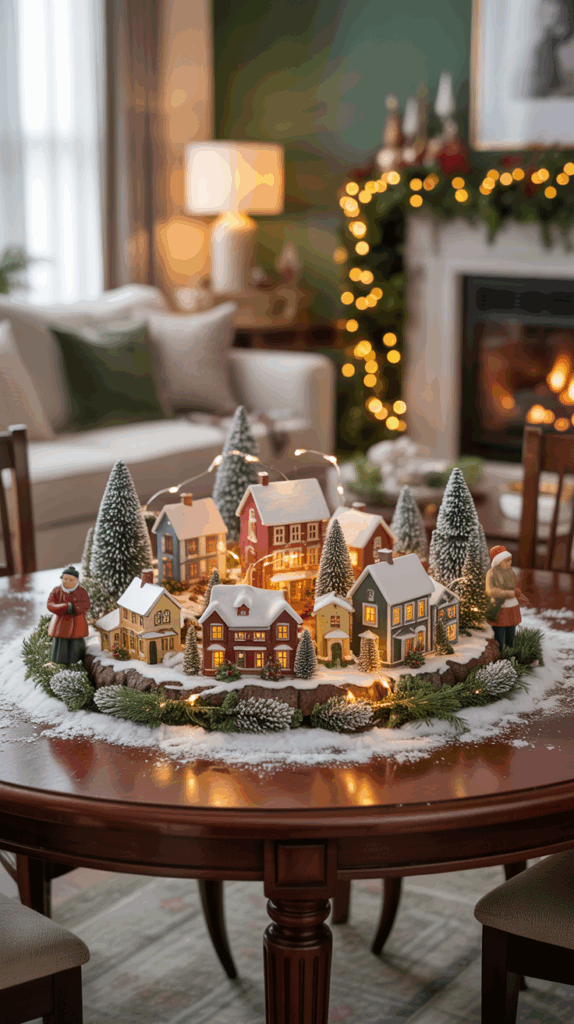
Picking a “Center Stage” for Your Story
Every story needs a stage, and our village is no different. I like to start by picking a “main event” for the year—maybe the old church all lit up, or a bustling skating pond in the center. This one spot becomes the heart of our story, and everything else circles around it.
Here’s how I decide what goes center stage:
- Which piece fits the theme the best?
- Is there a new item the kids are excited about?
- Where will the lights and cords reach? (A mom trick: Plan cords before snow or houses go down.)
Tip: If you’re not sure, let each child “vote” for their favorite. Sometimes the answer is as simple as “the candy shop looks happiest right in the middle!”
Laying Out Pathways and Scenes

Now comes my favorite part—laying out paths, little roads, and town “blocks.” Think of it like drawing the map of your story. Do you want a winding main street or a cozy set of houses around the village green? I like to use fake snow, white felt, or even soft cotton batting. The boys help me create “roads” with a swipe of glitter or a line of tiny stones.
To make everything feel alive:
- Place bigger buildings in the back and smaller pieces up front.
- “Tuck” in animal figurines by bushes or by the pond.
- Set up action: arrange figures in mid-snowball fight, or with sleds zipping downhill.
Every family does this differently, but in our house, I let the kids make the first drafts. They laugh, move pieces, and tell wild stories as they go. It’s messy at first, but always magical.
Giving Each Piece a Little Story
As we arrange, I encourage everyone to give each piece or figure a bit of a backstory. My oldest decides the ice skater is chasing her mischievous dog. My middle son wants two kids fighting over the last gingerbread cookie outside the bakery. Even if these aren’t “official” village pieces, we use our imagination and add little details—sometimes marking footprints in the “snow” with a pencil eraser or giving snowmen tiny hats.
A few favorite add-ons:
- Cut-out holiday cards for extra sparkle as backdrop scenes.
- Scrapbook paper for “ice” skating ponds.
- Old jewelry or buttons as pond stones or tree decorations.
Building Depth with Height and Layers
Villages look best with levels! I create height by slipping empty boxes, books, or sturdy containers underneath our base (then covering it all with felt or batting). Taller buildings go up high, while winding ramps or little stairways connect everything together. This makes the scene pop and feels more like a real town.
If you need a quick visual, here’s a simple table of what I use to build layers:
| Layer Help | Items to Use | Placement Idea |
|---|---|---|
| Height & hills | Sturdy boxes, books | Under the felt for “hills” |
| Ice & water | Mirror tile, blue plastic | Pond or river in center |
| Roads & tracks | Cardboard, ribbon, gravel | Winding through the village |
| Hidden “gems” | Old jewelry, marbles | Near houses, in ponds, by trees |
Remember: Nothing has to be fancy! Kids love “secret” spots, even if they’re just a shiny marble tucked behind the bakery.
Staging the Scene: Lights, Snow, and Finishing Touches
Bringing your story to life means lighting up your world. We wrap clear Christmas lights under and around the houses, being careful not to burn little fingers (always check for cool bulbs!). Cotton batting gets fluffed into soft snowbanks. The boys like adding “fresh” snow with flour, coconut, or that old-fashioned glitter that never seems to leave our house.
We finish up with fun extras:
- Cut ribbon for “scarves” on snowmen.
- Make tiny presents from wrapped gum or mini boxes.
- Jazz up plain bottlebrush trees with beads or cake sprinkles as “ornaments.”
Every detail adds another line to your village’s story. When the lights go on, everything glows, and you can almost hear the carolers sing.
Here’s what I remind my family: Your village is never really finished. We add, swap, or move things around all month long! The best ideas for Christmas village display often happen while you’re just living with it day after day. So let the kids (and grown-ups) rearrange however the mood strikes.
Building our village isn’t just about decorations—it’s a way to play, remember, and dream together as a family. Every little piece, from grand mansions to a lost mitten in the snow, tells a part of our story. And that’s why our Christmas village is always the coziest spot in our house!
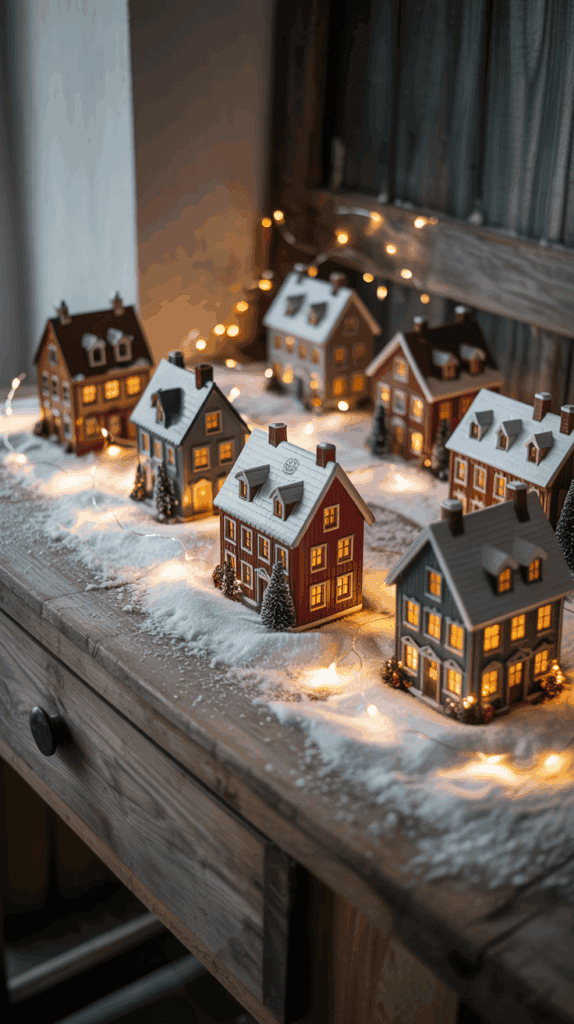
Adding Detail: Scenery, Backdrops, and Lighting That Set the Mood
When it comes to ideas for Christmas village display, scenery and lighting are how I sprinkle real magic onto our table. These details turn little houses and people into moments you can actually feel. The right backdrop makes a snowy street look like it came from a storybook, and a bit of careful lighting makes everything soft and inviting. I’ve learned that you don’t need to spend much—just a little extra thought can turn a simple village into a place everyone wants to explore again and again!
Setting the Scene with Scenery and Backdrops
Building the perfect backdrop for your Christmas village doesn’t require fancy skills. I like to keep it simple, but also playful. The trick is to pick scenery that helps tell your story and brings those little eyes to life with excitement.
Some of my favorite backdrop ideas to use:
- Poster board painted blue or snowy white for a classic winter sky. My kids love adding painted stars, snowflakes, or even a moon!
- Wrapping paper or leftover scrapbook paper tacked to the back wall of the table. Try patterns with trees, falling snow, or soft sparkle. It’s such an easy way to add texture and color.
- Folded fabric or felt in deep blues for night or light blue for a daytime scene. A simple drape of material changes the mood right away.
- DIY cut-out silhouettes: Let your kids help you cut out tree lines, mountains, or city skylines from black or dark green construction paper and stick along the edge for a 3D look.
We always have fun adding extra touches, like dangling cotton balls on string for big, fluffy snow clouds or cutting out tiny gold stars from foil. My three boys sometimes fight about who gets to glue what, but the wobbly lines and imperfect shapes make our backdrop feel warm and real.
Lighting That Feels Like Magic
When I add lighting to our Christmas village, everything comes to life. Even the simplest arrangement can glow like something out of a movie. I always say lighting does half the storytelling work for me!
Here are ways I use lighting to set the perfect mood:
- String lights weaved under “snow” or behind houses: I tuck small, battery-powered fairy lights right into the cotton or batting. The light peeks out and looks just like tiny windows flickering on a cold night.
- Individual tea lights or LED candles placed inside or behind buildings: A soft, warm light feels cozy and safe. (Always use battery candles with little ones running wild nearby!)
- Spotlighting: If there’s a special centerpiece, like our town skating pond or a gingerbread bakery, I use one stronger white or yellow LED pointed right at it for extra drama.
- Colored lights: Sometimes I let the boys choose colored bulbs. Blue makes everything look colder and more magical, while gold adds that toasty, holiday feel.
If you use regular plug-in lights, remember to plan cord placement early. I learned this the hard way—nothing spoils the mood like trying to fix a cord under a snowbank after you’re “done.” Our family likes to turn off the overhead lights and just enjoy the soft village glow on dark December nights. It feels peaceful and special every single time.
Adding Depth with Snow, Hills, and Layers
Flat villages look cute, but when you add hills and snow, everything looks real. It’s like giving your village a real landscape of its own. I’ve learned a few simple tricks:
- Layering with boxes, books, or old food containers: Stack these underneath your fabric or cotton to create rolling hills or dramatic drops. Cover everything up so it just looks snowy and soft.
- Cotton batting or quilt batting: This is hands-down my best tool for instant snow. Tear it into fluff for snowbanks, tuck it around trees, or ball it up for little drifts.
- Fake snow sprinkles: The kids love dusting everything in “fresh snow.” We use old-fashioned glitter (I know, messy but magical), flour, or shredded coconut for safe and edible sparkle around the bakery.
- Mirror tiles or silver paper: Nothing beats a shiny mirror for an ice rink or frozen pond. My boys always turn a little mirror into a mini hockey game scene.
Each level adds a new corner to discover. When cousins or friends come by, they always spot a detail they missed before. The extra effort never goes unnoticed.
Scenery and Lighting Ideas at a Glance

Here’s a handy table I keep in my planning folder for quick reference:
| Element | Easy Supplies | Quick How-to Idea |
|---|---|---|
| Winter sky backdrop | Poster board, fabric | Paint, drape, or pin up for color pop |
| Snowy landscape | Cotton batting, felt | Pull, fluff, and drape over base |
| Hills and height | Boxes, books | Hide under snow for rolling look |
| Sparkle & snow | Glitter, coconut, flour | Dust on houses, paths, pond edges |
| Skating pond | Mirror tile, foil | Place flat and frost edges with snow |
| Magical lighting | Fairy lights, tea lights | Weave under snow or pop in windows |
| Backdrop silhouette | Construction paper | Cut trees, mountains, skyline shapes |
If you want to get fancy, add tiny wreaths to lamp posts, or hang a string of mini lights along the town square. My boys always want to make something blink or spin!
How Scenery and Lighting Shape the Story
The mood you set with scenery and lighting does more than just look pretty. It gently guides the story your village tells. A soft blue sky with sparkly snow and gentle light feels peaceful and dreamy. Bold, gold lighting and busy markets feel active and full of joy. Sometimes, just switching off the kitchen lights and letting the village glow brings quiet time before bed—like story hour without a book!
With a little effort and some family teamwork, these details can make the entire world of your Christmas village pull you in. No piece is too small or scene too silly when the whole table shines and feels alive.
Making Memories: Involving the Whole Family in Your Village Story
Getting the whole family involved is what turns simple ideas for Christmas village display into lasting memories. Setting up our village is not just about pretty scenes or perfect arrangements. It’s about giggles, sticky fingers, and proud little faces hovering over a scene they helped imagine. Whenever we build our Christmas village together, it feels like we’re making a new holiday tradition, one memory at a time!
Sharing the Story-Building with Every Family Member
The magic truly happens when everyone plays a part. I do my best to invite each of my boys to take ownership, from the littlest one lining up snowmen to my oldest who prefers planning town layouts. Letting everyone’s ideas in makes our village a patchwork of personalities.
If you want to make this an experience from start to finish, try these easy ways to share the fun:
- Host a village “kickoff night.” Build excitement! We open cocoa, turn on the Christmas tunes, and dump all the houses and figures on the table. Each kid picks a favorite piece and claims a “storyline.”
- Ask everyone to decorate or arrange one area. Even if it’s just a single house or a pathway, giving each person a special spot helps them feel seen and proud.
- Let the youngest help with tasks that can’t “go wrong.” Little hands love spreading snow, sprinkling glitter, or arranging animals. I call these the “magic jobs.”
- Hand older kids small tasks with purpose. Whether it’s helping with lights, placing centerpieces, or drawing a backdrop, giving older kids responsibility keeps them engaged (and a little less wild).
- Don’t forget grown-ups! Dads, grandparents, or even the babysitter can pick a piece or tell a silly story about their part of town.
I love how our village ends up full of inside jokes. (“Look, Dad’s bakery sells dinosaur cookies again!”) The kids talk about these stories all season.
Turning Village Time Into Family Game Time
Turning the whole activity into a special event keeps it from feeling like a chore. Some of our happiest holiday memories come from turning setup into a playful competition or silly group project.
Here are games and prompts we’ve used in past years:
- Scavenger Hunt: Make a list of things to “hide” in the village (like a red sled, a reindeer hiding behind a bush, or a snowman with a hat). Each person hides and then hunts for surprises.
- Story Starter Dice: Roll dice to pick random actions, characters, or weather. Build a story together about what happens in the village that year!
- Theme Voting Jar: Write favorite village themes or story ideas on scraps of paper. Everyone votes and the winner shapes the story for this year.
- Guess the Scene: Let each person set up a small “scene” and others guess what’s happening there.
Including games gives everyone a role and keeps even the youngest from wandering off. Plus, these games turn into family traditions almost on their own!
Making Keepsakes Together: Personalized Village Pieces
There’s something special about adding homemade touches. We always find a way to sneak in a little family craft time. When the boys help make something, they talk about it forever.
Easy ideas that work for all ages:
- Make mini “family” snowmen using modeling clay or air-dry clay. Each kid adds their own face, hat, or scarf!
- Paint tiny wood signs or mailboxes with your family’s last name.
- Let kids make paper or felt pets that look just like your own.
- Personalize a village house with paint, scrap paper, or stickers.
The real joy is not in perfect results, but in the messy, lopsided details that only your own kids could create. I save a piece or two each year, even as the boys outgrow the “googly eyes on everything” phase.
Capturing the Stories with Photos and Videos
If there’s one thing I wish I’d started sooner, it’s taking more photos (and even little videos) of our village moments. These tiny scenes disappear after the holidays, but the memories last if you snap a few special shots.
Try these simple ways to keep the story alive:
- Take a photo of your family with the finished village each year. I tape ours into a scrapbook—one page for every Christmas.
- Let kids pose their favorite figurines in silly situations and take a quick pic with your phone.
- Film a “village tour.” Let your child be the tour guide, walking the camera past each scene and telling the story.
- Print one or two photos and slip them into your holiday card or keep them for a memory box.
It’s wild how fast these moments fly. I look back and see chubby hands working on last year’s village, or hear my youngest’s proud voice explaining how the elves “got stuck in the tree.” These are the memories that matter most come January.
Creating a Family Tradition Everyone Looks Forward To
When we make the village a whole-family tradition, it becomes bigger than just another holiday craft. The kids talk about it in July! I set a date on the calendar for “Village Night” and keep it special, just like movie nights or baking days.
In our house, the best tradition is not the perfect village or the fanciest figurines—it’s the giggles, teamwork, and mess we share as a family. If you find yourself looking for fresh ideas for Christmas village display, invite everyone in and see what you come up with together. These are the stories your kids will pass on one day, too.

Conclusion
Building a Christmas village that tells a story doesn’t have to be fancy or expensive. What matters most is gathering your family around the table, swapping ideas for Christmas village display, and letting your imagination shape every corner. Those little stories, silly surprises, and wonky, handmade details are what make the whole thing shine.
I’ve found the real joy comes from sharing the mess, the laughter, and even the little arguments over who gets to place the skating pond! If you’re a mom with wild kids, a tight budget, or zero time for perfection, trust me—you can still create magic and memories to last for years.
Try something new this year, or stick with a tradition your kids love. Take photos, swap stories, and share your village creations with friends or in your favorite mom group for extra holiday cheer! Your family’s ideas for Christmas village display will become a tradition everyone looks forward to, and those memories are the true gift of the season. Thank you for reading and sharing this part of your holidays with me!
This post may contain affiliate links. Read the full disclosure here.