Tiered Deck With Fire Pit Designs That Add Dimension and Drama
I never imagined a tiered deck with fire pit could completely transform not just our backyard, but how we actually use it as a family.
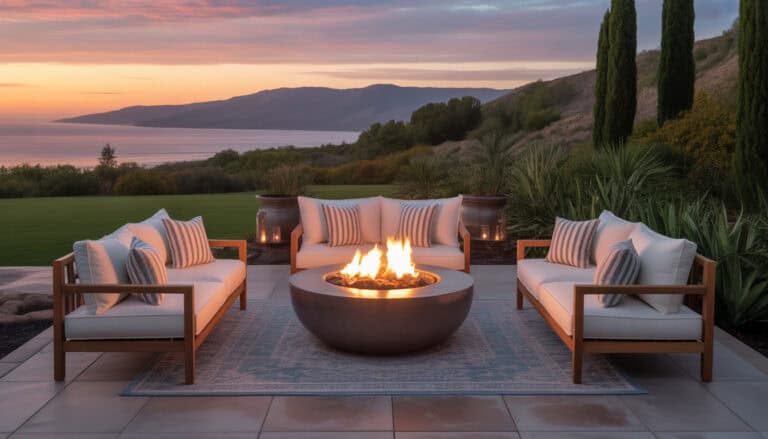
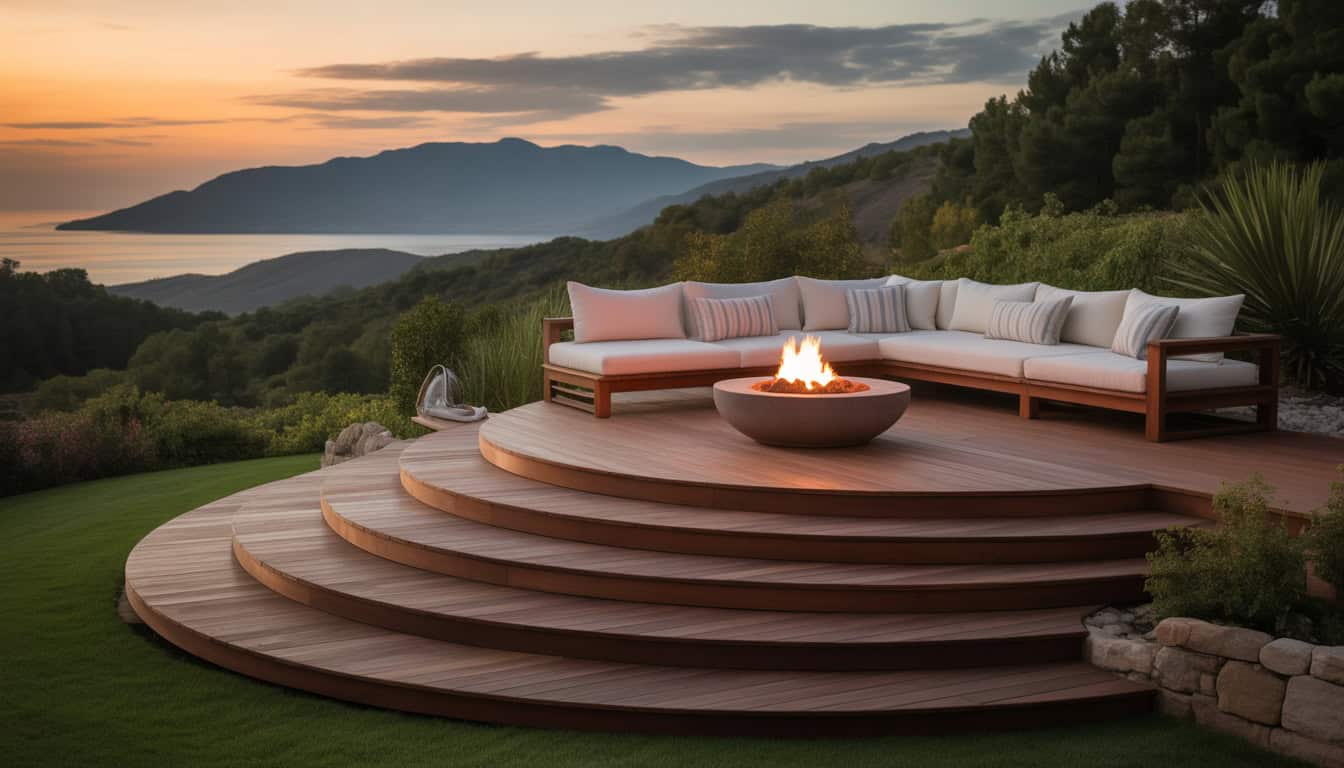
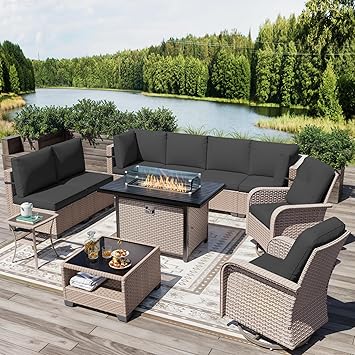
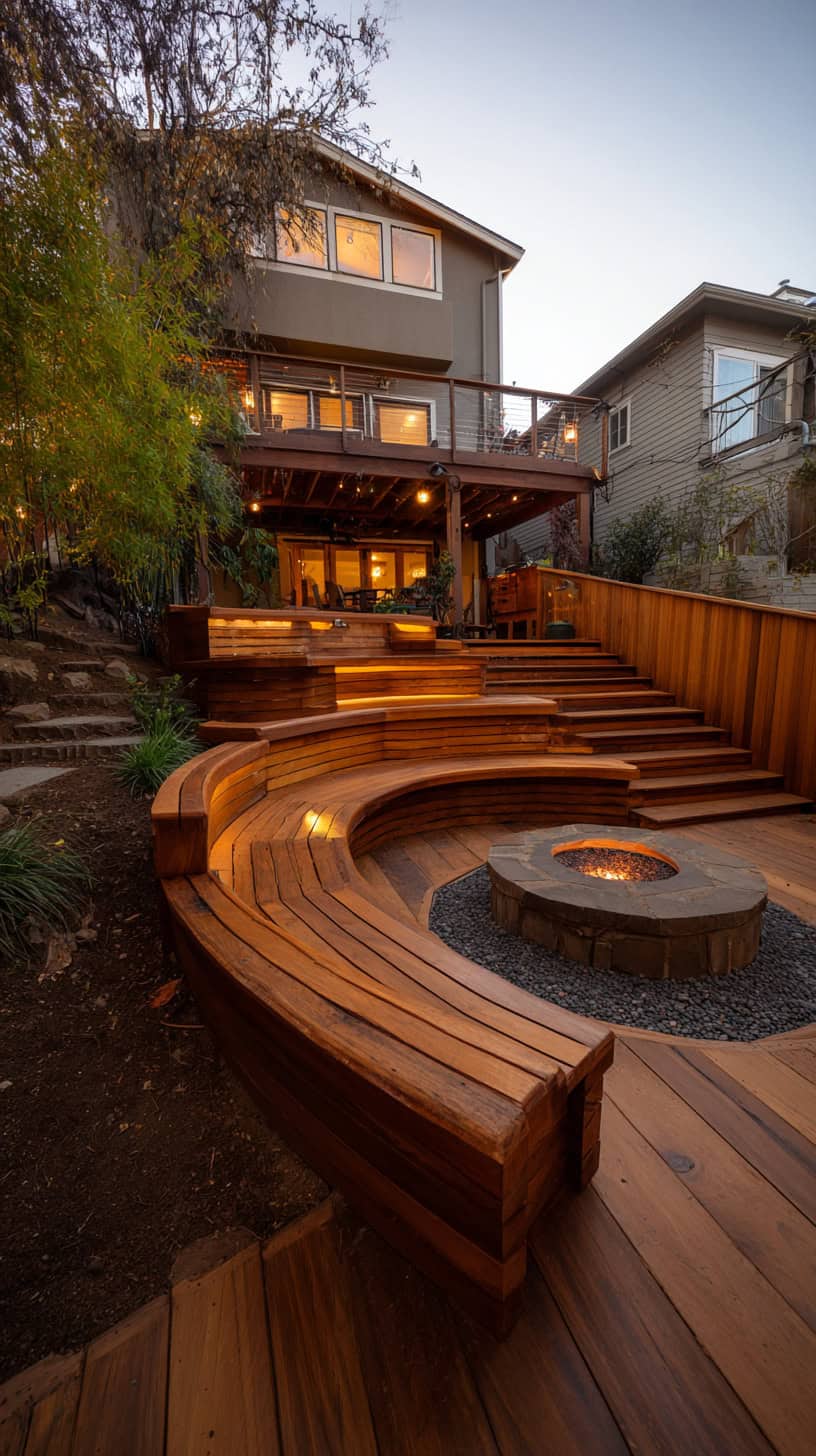
I love designing layered outdoor spaces with depth and flow, and I always place a sunken stone fire pit kit at the center to create a natural gathering point that connects each deck level beautifully.
The moment we added levels and flickering flames, our outdoor space went from flat and forgettable to absolutely magical. Trust me, once you see what different elevations can do for your yard, you’ll never look at platform decks the same way again.
Why a Tiered Deck with Fire Pit Changed Our Family Evenings
Our old deck was just one big rectangle. Functional, sure, but boring. We’d sit out there and everything felt cramped, even though we had plenty of square footage. The kids would run around with nowhere specific to go, and honestly, we spent more time inside than we should have.
Adding a tiered design changed everything. Suddenly we had zones. The upper level became our dining space with the grill, the middle tier turned into a cozy conversation area, and the lower level, closest to the yard, became home to our fire pit sitting area. Each level has its own purpose, its own feel.
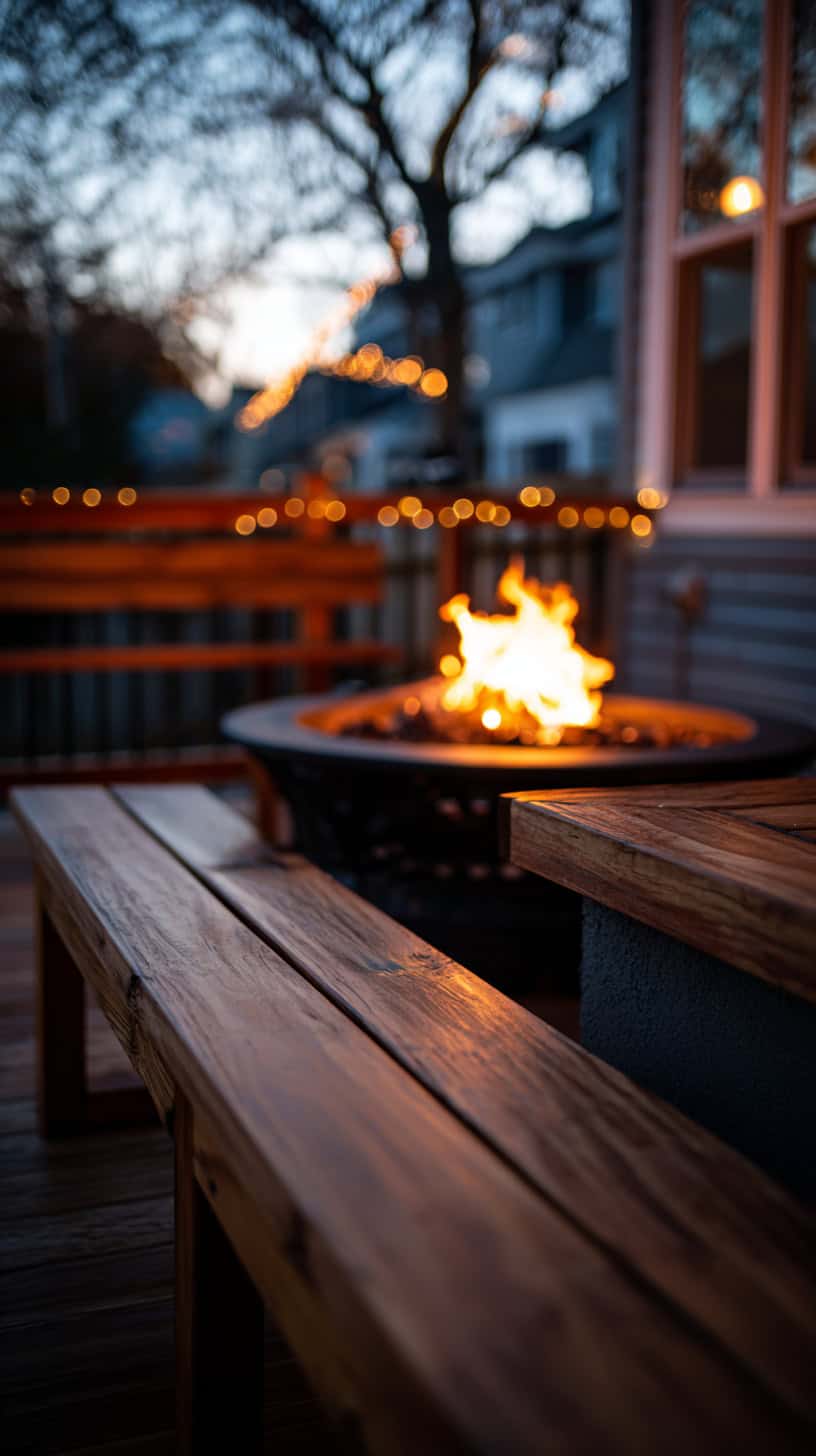
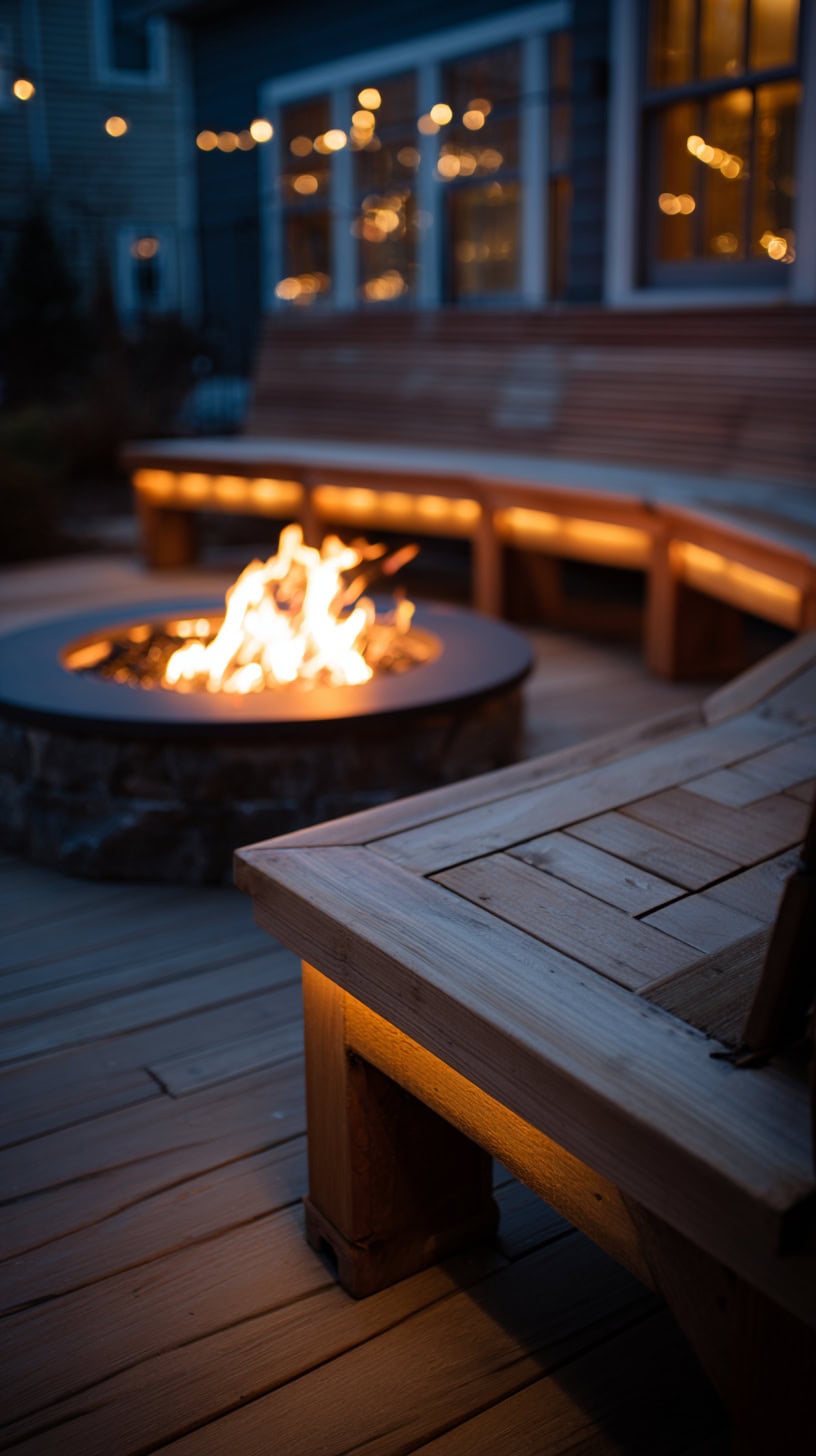
The fire pit was the real game-changer though. We positioned it on the lowest tier, surrounded by built-in bench seating. Now our evenings look completely different. The kids roast marshmallows while my husband and I actually get to sit and talk. We use this space April through October, sometimes even into November if we bundle up.
What I love most is how the different levels create natural gathering spots. People instinctively spread out instead of clustering in one area. During family barbecues, some folks hang by the grill on the top deck, others sit around the fire pit below, and everyone feels like they have their own comfortable space.
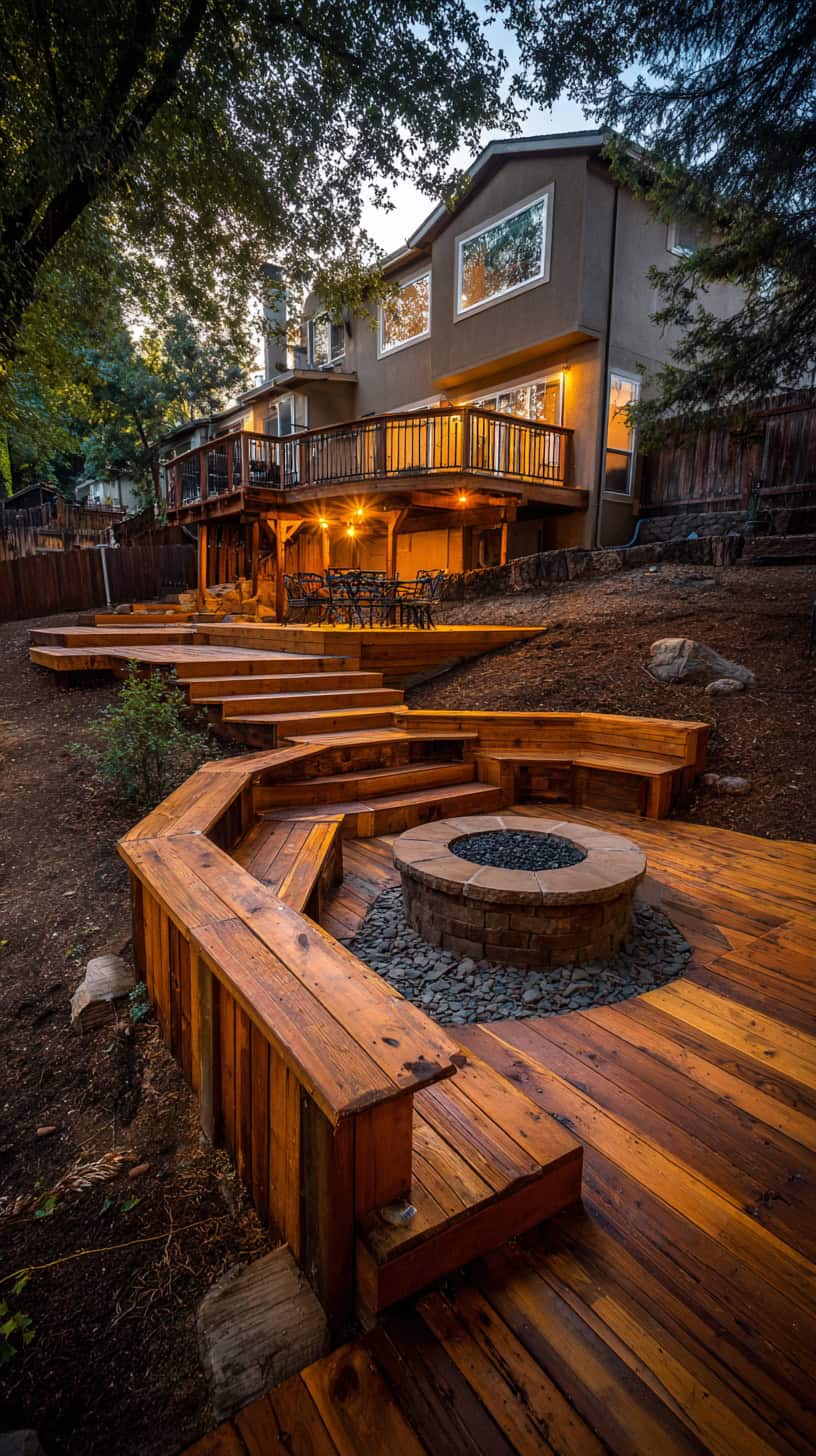
The elevation changes also solved our sloped yard problem. Instead of fighting the natural grade, we worked with it. The tiered backyard design made what was once an awkward slope into an architectural feature we actually show off to neighbors.
Top Two Tier Deck Ideas Trending Right Now
After researching endlessly and talking to our contractor, I discovered some fantastic two tier deck ideas that work for almost any yard size or budget. The key is choosing a design that matches how you actually live.
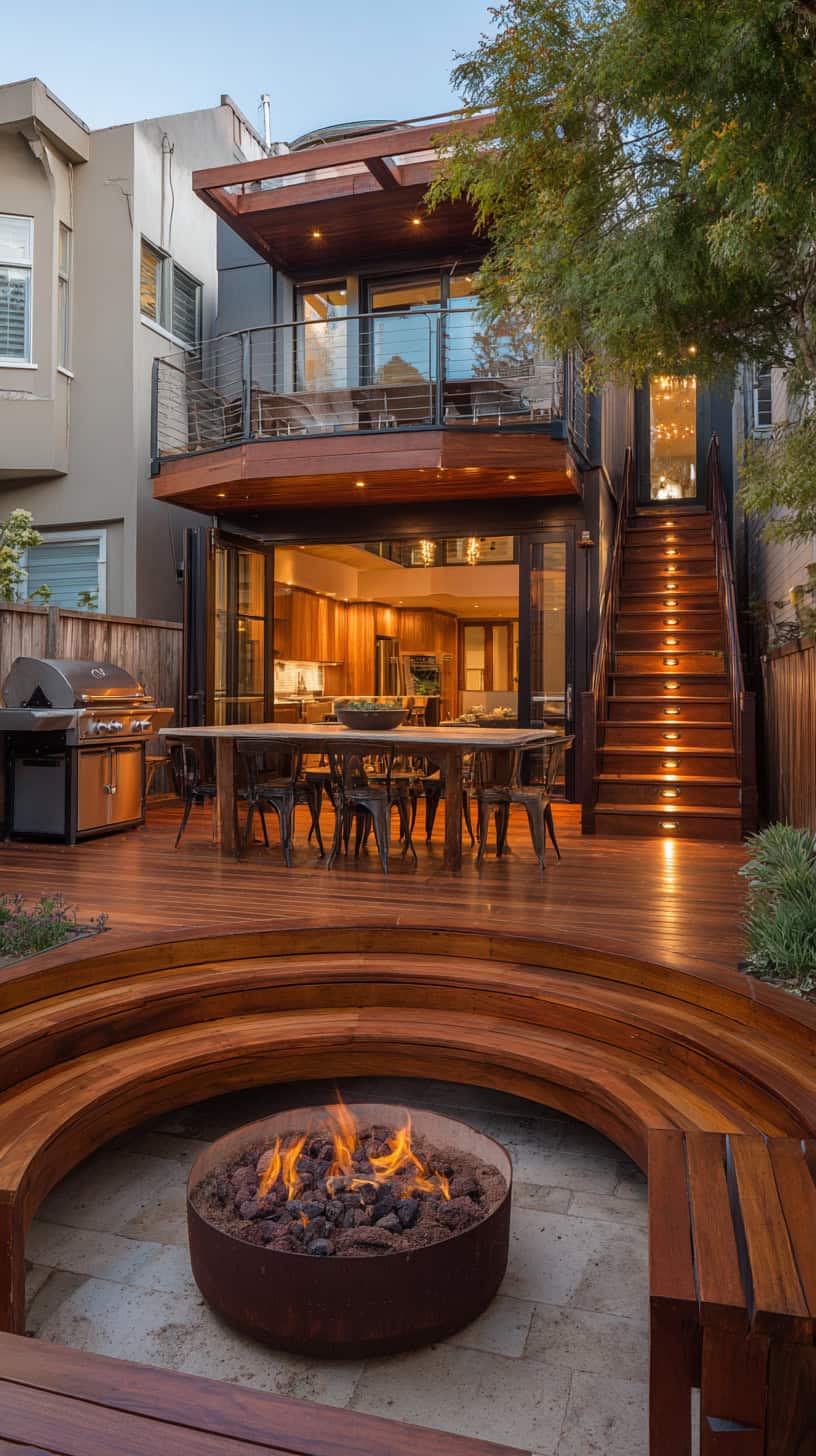
The classic approach puts your main entertaining area on the upper tier, directly off the house. This level typically includes your outdoor grill area, dining table, and maybe some lounge chairs. The lower tier, accessed by wide steps, becomes your fire pit zone. This setup works beautifully because cooking smells and smoke from grilling stay separated from your cozy fire pit sitting area.
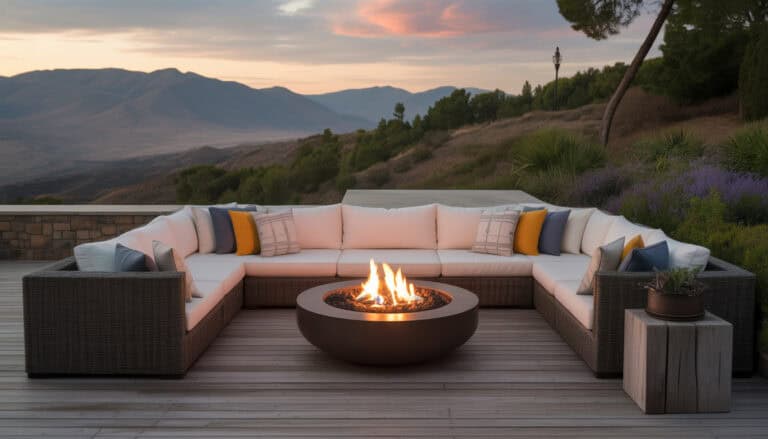
Another trending design flips this concept. The upper deck stays small and intimate, perfect for morning coffee or quiet reading. The lower, larger tier becomes your party central with the fire pit as the star attraction. We have neighbors who did this, and their lower deck is huge, easily fitting twelve people around their sunken fire pit ideas setup.
Corner designs are having a moment too. Instead of stacking tiers front to back, these plans wrap around the house corner, with each level turning at a right angle. One tier might run along the back of the house while the other extends along the side. The fire pit usually goes at the junction point where both levels meet, creating a natural focal point visible from multiple angles.
For smaller yards, stepped tiers work wonders. Rather than dramatic level changes, you create just two or three steps down between sections. This gives you the visual interest and defined zones without eating up too much yard space. The gentle elevation change is also safer for little ones and easier for older family members to navigate.
L-shaped configurations combine the best of several approaches. The main deck extends from the house, then one section drops down and turns perpendicular. This creates a protected corner that’s perfect for a fire pit, naturally sheltered from wind by the upper deck level.
Backyard Fire Pit on Sloped Yard: Making It Work for Us
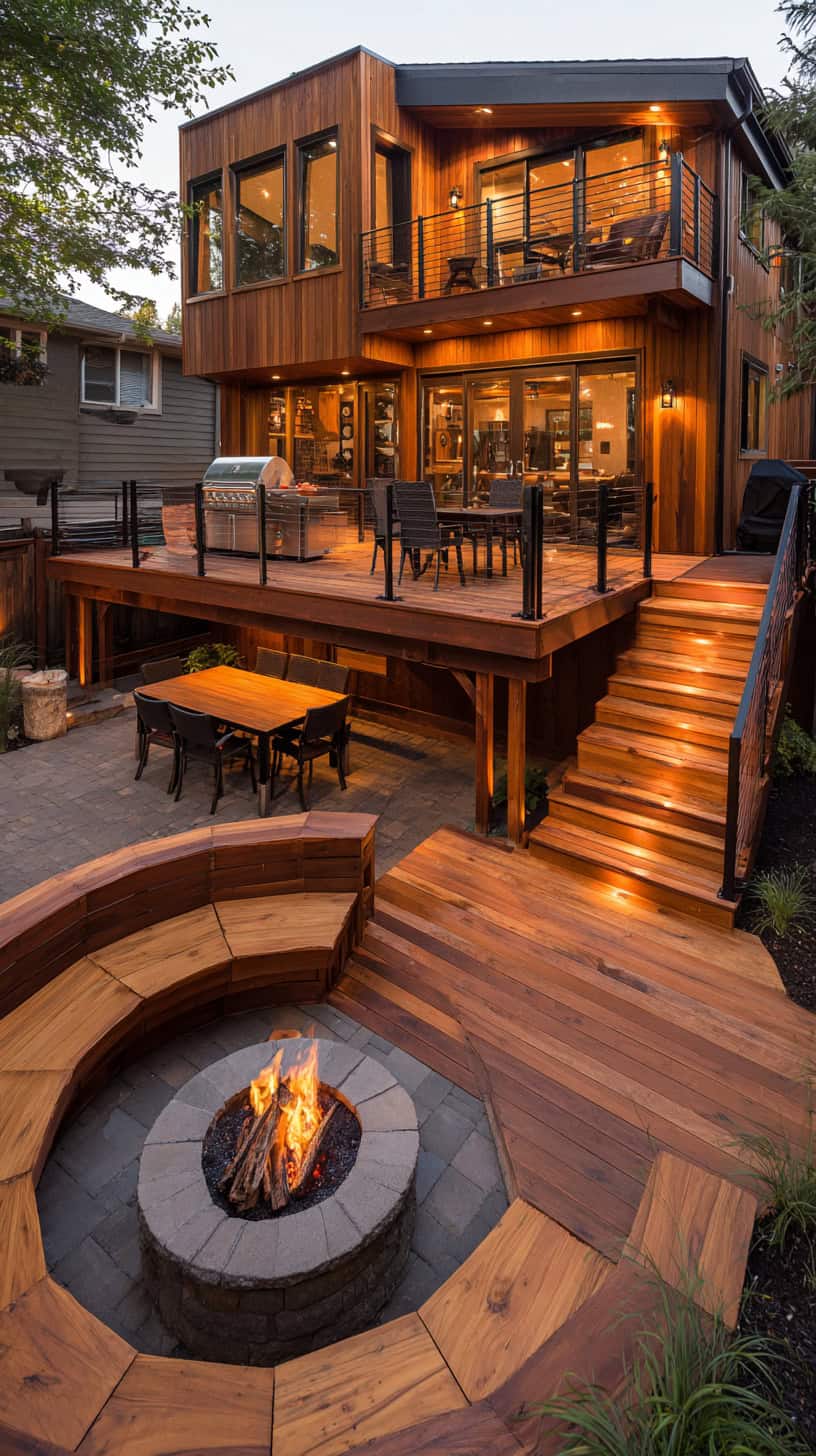
Our yard slopes pretty significantly from the house down toward the back fence. For years, we saw this as a problem. Turns out, it was actually a blessing for creating an amazing backyard fire pit on sloped yard design.
The slope meant we could build tiered levels that felt natural, not forced. Each tier stepped down following the land’s contour. Our contractor explained that working with the existing grade actually saved us money on excavation and materials. Instead of hauling in massive amounts of fill dirt to level everything, we built decks at different heights that matched the slope.
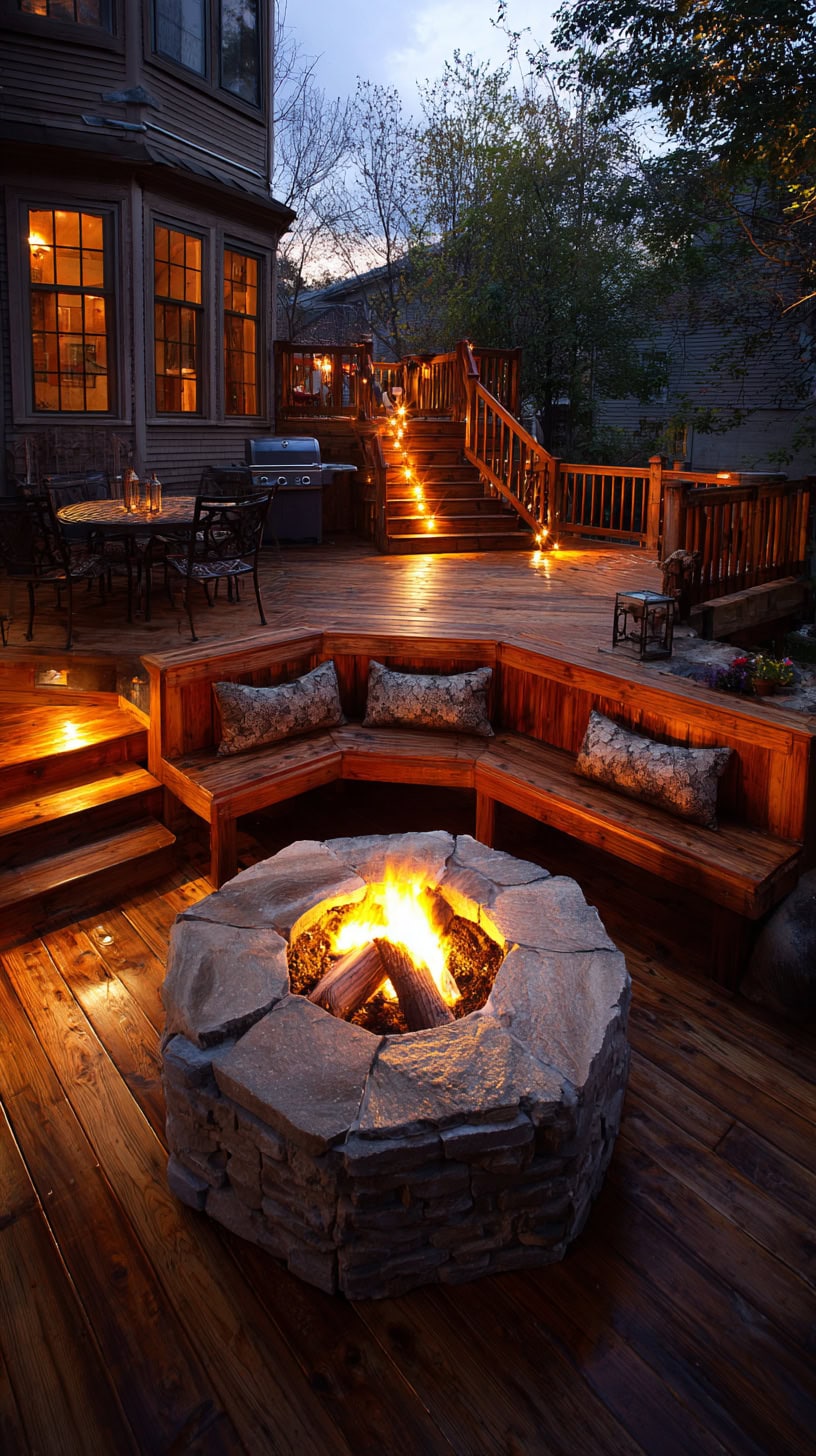
We placed the fire pit on the lowest level, furthest from the house. This positioning is brilliant for several reasons. First, smoke naturally rises and drifts away from the house and upper deck areas. Second, when you’re sitting around the fire looking up, you see the beautifully lit upper decks and the house beyond. It creates this layered, dramatic view that feels almost resort-like.
The other smart move was building retaining walls between levels. These walls do double duty, holding back earth while also creating raised planter beds. We filled them with ornamental grasses and trailing flowers. During fire pit evenings, we string lights along these walls, and the whole setup glows.
Drainage was crucial. Sloped yards mean water runs downhill, obviously. Our builder installed proper drainage under and around each deck level, with gravel beds beneath the fire pit area. We’ve had major rainstorms, and everything drains perfectly. No puddles, no erosion, no problems.
The steps between levels became an opportunity for creativity too. We made them extra wide, turning them into casual seating during parties. Kids sit on the steps with their s’mores, using the different levels like stadium seating around the fire.
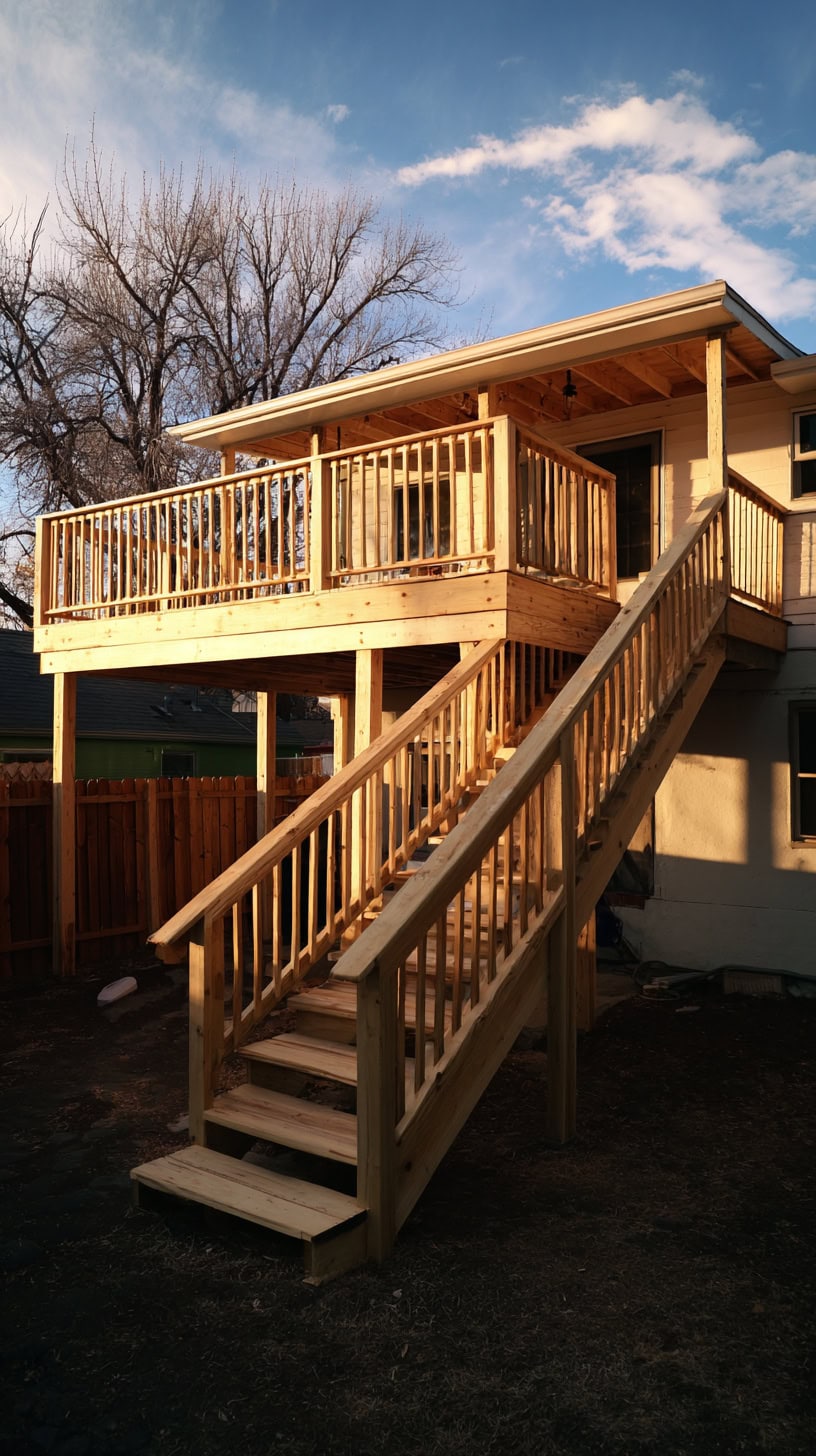
Elevated Deck Designs with Built-In Firepits Backyard Ideas
When we started planning, I fell in love with elevated deck designs that incorporate the fire pit right into the deck structure itself. These firepits backyard ideas take more planning but deliver incredible results.
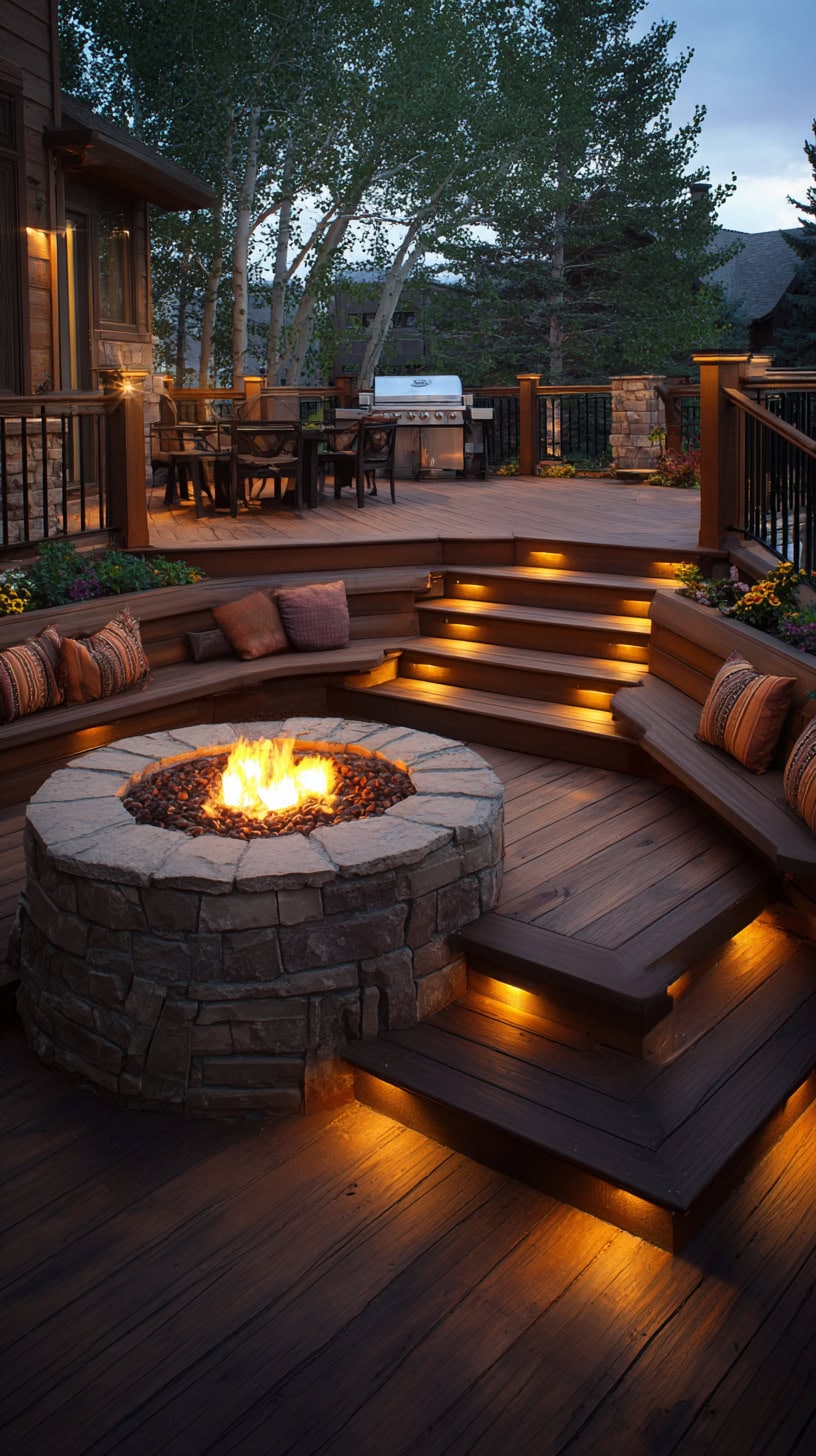
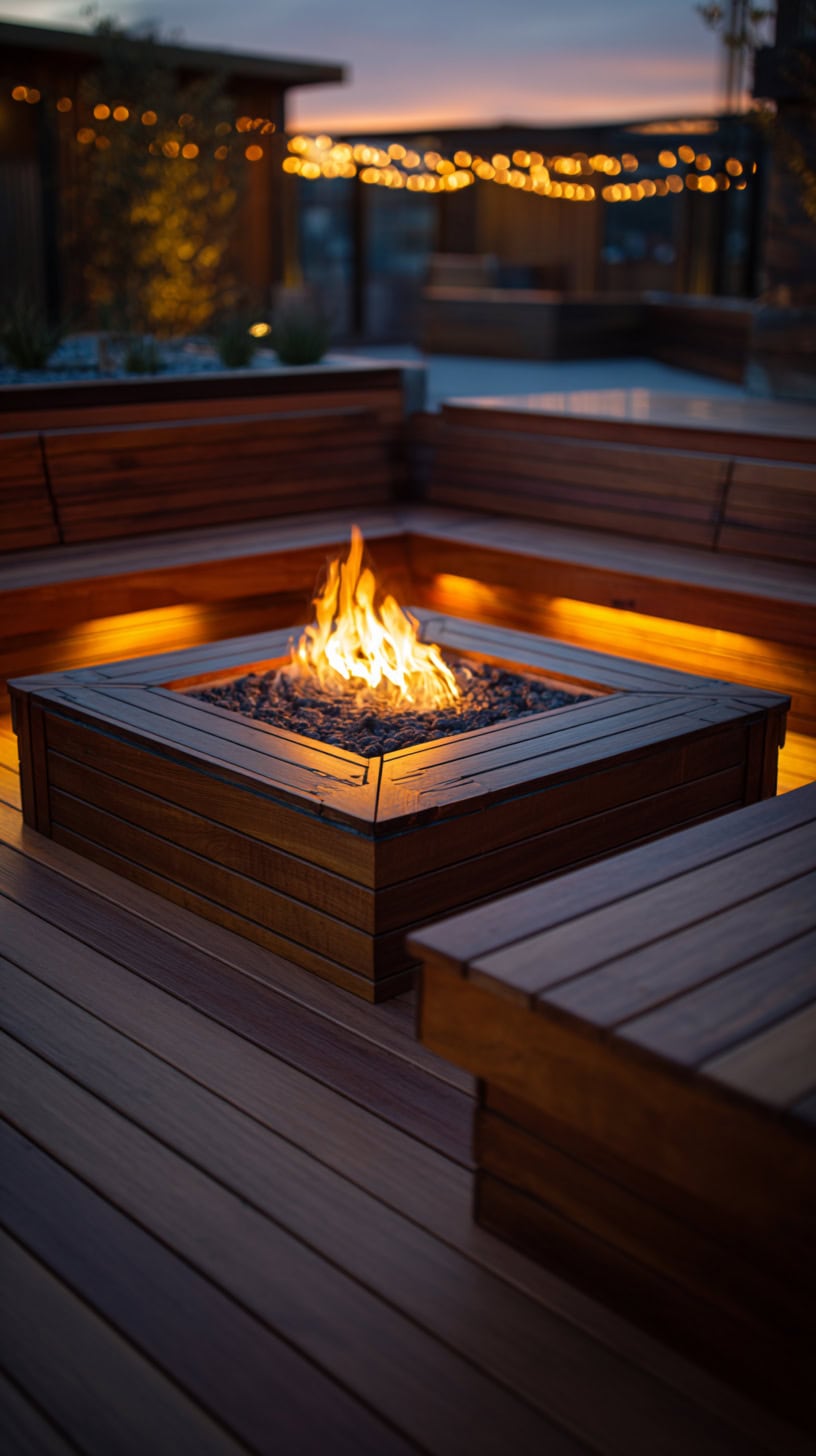
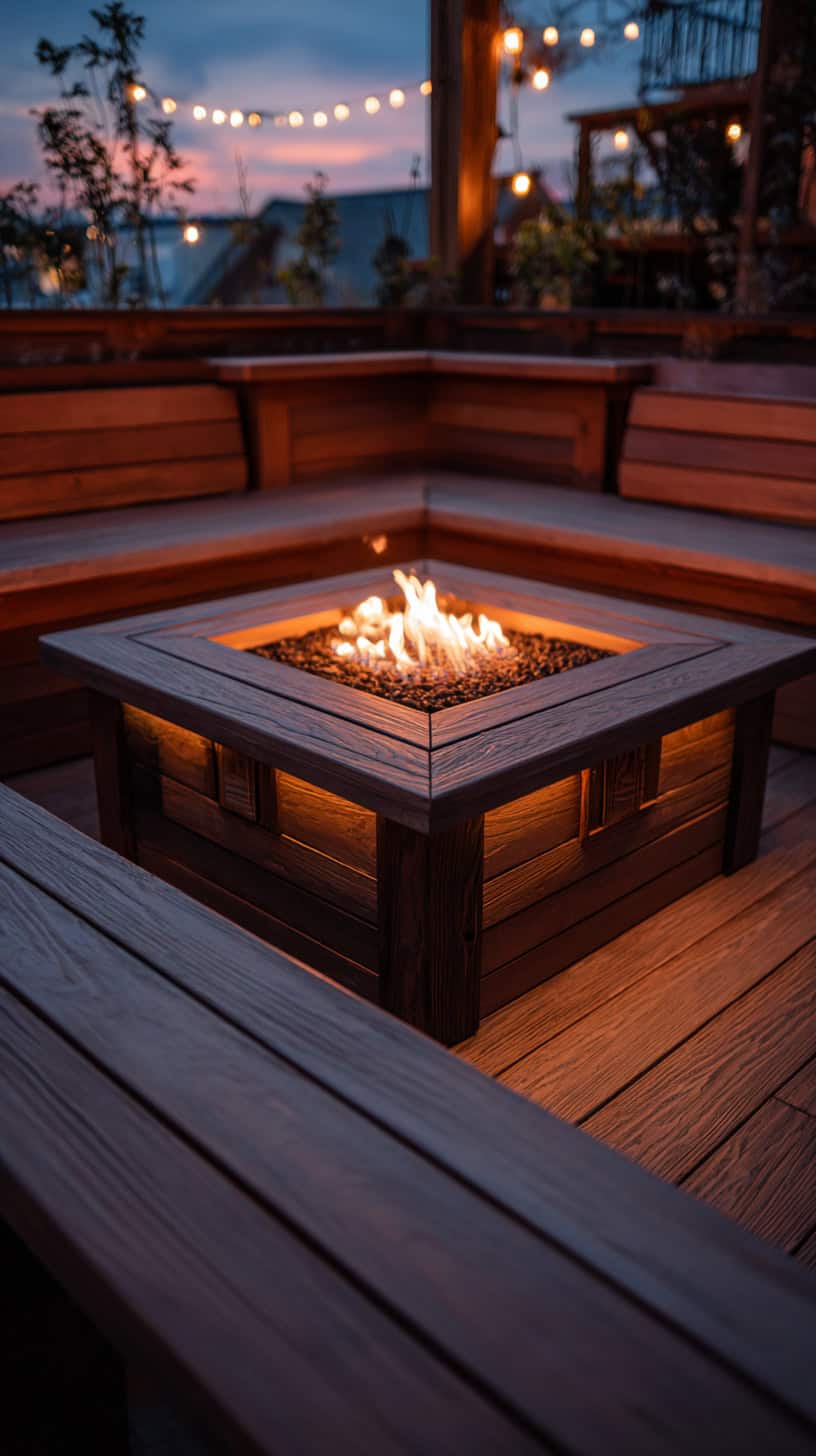
Built-in fire pits come in two main styles. The first sits flush with the deck surface, like a fire pit table. The second type, which we chose, is a raised fire pit with built-in seating surrounding it. The seating boxes are actually part of the deck framing, with storage underneath for firewood, cushions, and outdoor blankets.
Our fire pit sits in a recessed circle on the lower deck tier. The decking boards radiate outward from the fire pit like sun rays. This pattern isn’t just pretty; it actually helps define the fire zone visually. Everyone instinctively knows where the seating area begins.
The bench seating we built around the pit is about eighteen inches tall, perfect height for adults and kids. We used composite decking material for the bench tops because it doesn’t get as hot as wood in direct sun, and it requires zero maintenance. The backrest portion angles slightly for comfort.
For safety, we installed a spark screen and chose a propane fire pit rather than wood-burning. With little ones around, this felt like the smarter choice. The flames are controllable, there’s no floating embers, and cleanup is nonexistent. Plus, we can use it during burn bans when wood fires aren’t allowed.
The elevated position of our deck, even at the lowest tier, provides excellent ventilation for the fire pit. Air flows underneath the deck structure, and the open sides mean smoke disperses quickly. We’ve never had that smoky, eyes-watering experience that sometimes happens with ground-level fire pits in enclosed spaces.
Lighting around the built-in fire pit area deserves mention. We installed low-voltage LED strips under the bench seating edges. They cast a soft glow downward, illuminating the deck surface without creating glare. Combined with the firelight, the whole area feels warm and inviting without being too bright.
Outdoor Grill Area Magic on a Tiered Backyard
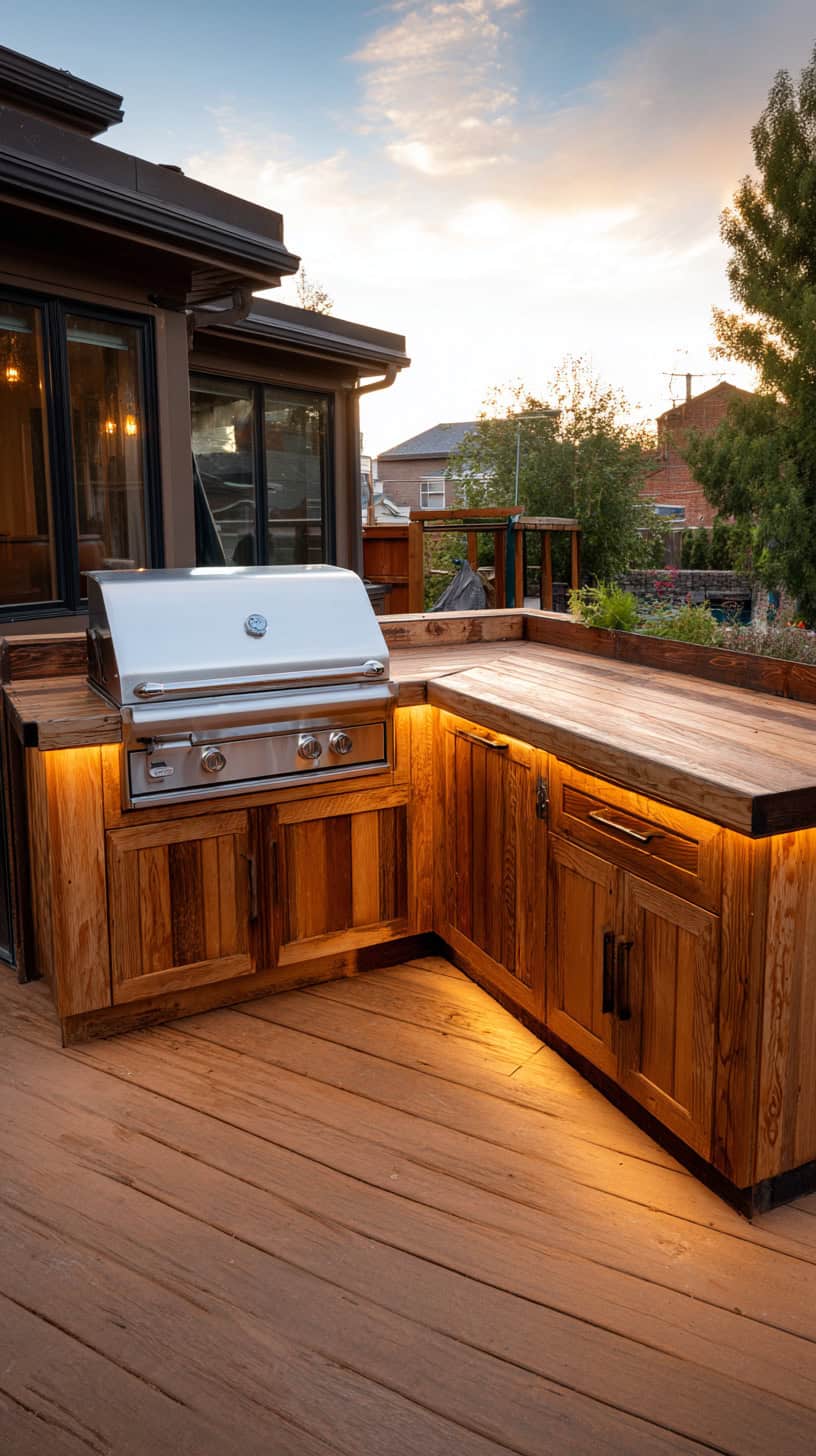
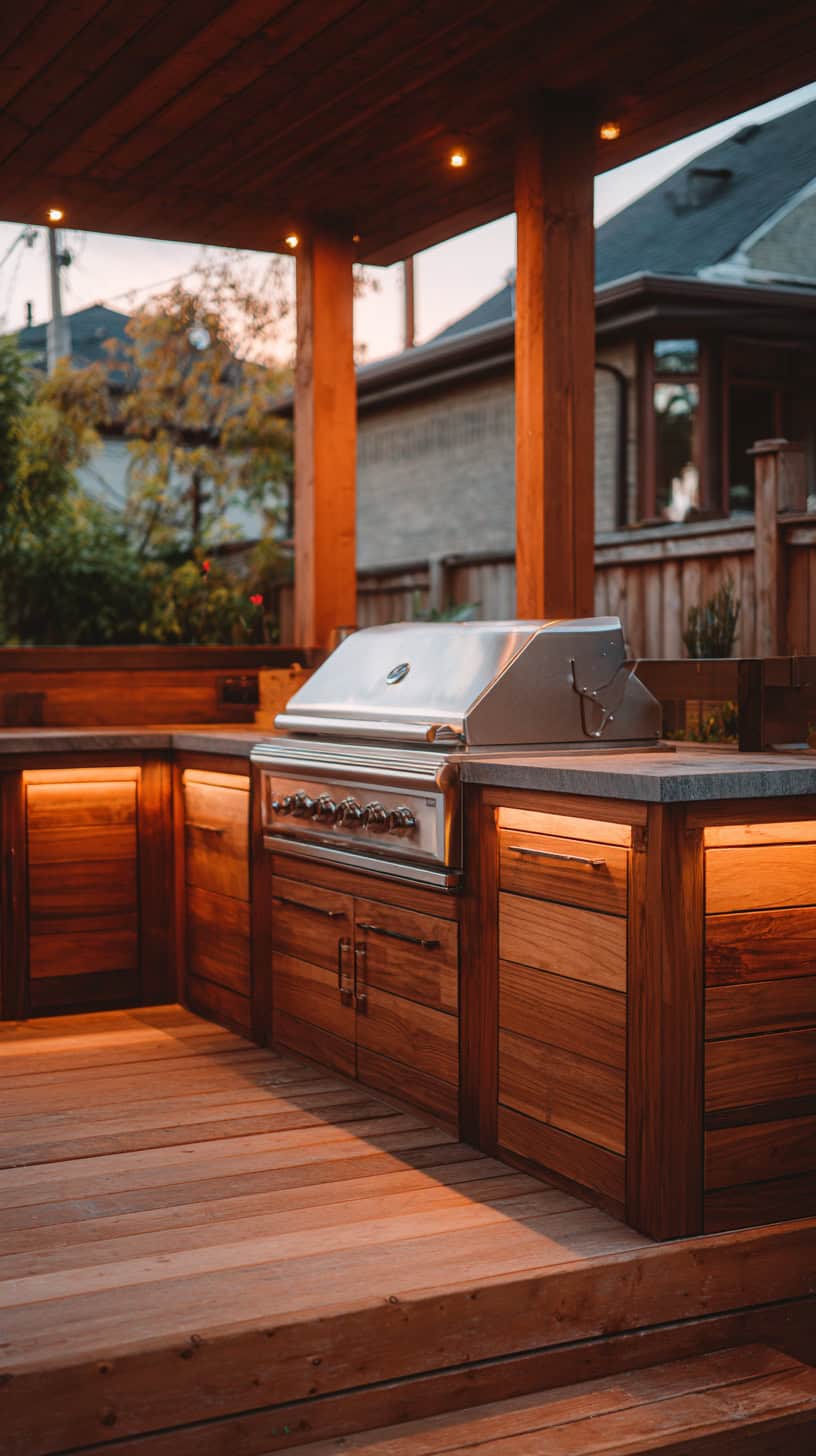
The outdoor grill area on our top tier might be my favorite part of the whole tiered backyard design. Having the cooking zone elevated and separate from the fire pit area solved so many problems I didn’t even know we had.
We created an L-shaped counter along one side of the upper deck. The grill sits in the middle with prep space on both sides. Underneath, we built cabinets for propane tanks, grilling tools, and supplies. Having everything at arm’s reach while cooking is absolutely game-changing.
The elevation matters more than you’d think. When I’m grilling on the upper tier, I can see the whole backyard. I watch the kids playing below, keep an eye on guests around the fire pit, and still tend to burgers without running up and down stairs constantly. It’s like having a control tower for the whole outdoor entertaining space.
We added a small sink to the grill area, connected to an outdoor water line. This simple addition means I can wash vegetables, rinse utensils, and clean up without going inside. During big cookouts, this alone saves probably twenty trips through the house.
The tiered design also keeps cooking smells and heat where they belong. Grilling generates serious heat, especially in summer. With the grill on the upper tier and seating areas below, guests stay comfortable while I cook. The breeze carries smoke up and away rather than into people’s faces.
Storage in the grill area made our deck so much more functional. We have a dedicated cabinet for charcoal and wood chips, another for sauces and seasonings, and a third for serving platters and utensils. Everything stays organized and protected from weather. No more running to the garage mid-cookout because I forgot the tongs.
We also installed a small refrigerator in one of the lower cabinets. It’s not huge, but it holds drinks, condiments, and meat waiting to be grilled. This keeps foot traffic out of the kitchen and makes entertaining feel effortless. Guests grab their own drinks, I stay focused on cooking, and everything flows smoothly.
Safety First for Fire Pit Sitting Areas with Little Ones
With three kids under ten, safety wasn’t optional when designing our fire pit sitting area. We made deliberate choices to keep everyone safe while still maintaining the cozy, inviting atmosphere we wanted.
The built-in bench seating around our fire pit sits about four feet back from the fire itself. This distance prevents accidental contact with flames while still providing plenty of warmth. The benches also create a physical barrier; kids can’t easily run directly toward the fire because the seating is in the way.
We chose a propane fire pit with an automatic shut-off feature. If it tips or the flame goes out unexpectedly, gas flow stops immediately. The control knob is recessed and requires an adult’s strength to turn. Our six-year-old has tried; she can’t budge it. Perfect.
The fire pit itself sits in a steel ring surrounded by non-combustible stone. Even if someone knocked over a drink or dropped something, there’s no risk of deck boards catching fire. We also keep a fire extinguisher mounted in a weatherproof cabinet right on the lower deck. Everyone knows where it is.
Railings were another key safety feature. The upper deck has standard railings around all open edges. For the stairs between levels, we installed railings on both sides rather than just one. Little hands need those railings, and having them on both sides means kids can hold on whether they’re going up or down.
Lighting plays a huge safety role too. We have motion-sensor lights on all three deck levels. They’re subtle during the day but automatically brighten pathways and stairs after dark. Nobody trips going to refill a drink or heading inside for bathroom breaks.
The deck boards themselves are slip-resistant composite material. They don’t get slippery when wet like traditional wood can. We’ve had pool parties followed by evening fires, and even with wet feet, nobody’s slipped. This material also doesn’t splinter, which is wonderful for barefoot kids running around.
We established clear fire pit rules from day one. Kids must be seated before the fire gets lit. No running near the fire area. Nothing gets thrown into the fire without adult permission and supervision. Marshmallow roasting requires adult help for kids under eight. These rules are non-negotiable, and honestly, the kids follow them well because they love fire pit time so much.
Budget-Friendly Tiered Deck with Fire Pit Inspiration
Here’s the truth: our dream design exceeded our initial budget. But we found creative ways to get the tiered deck with fire pit we wanted without completely breaking the bank. These budget-friendly approaches might help you too.
We built in phases. Year one was the basic two-tier deck structure with simple railings and stairs. We used pressure-treated lumber instead of composite for the framing and many deck boards. The structure was solid and functional, but definitely basic. Year two, we added the built-in seating and fire pit. Year three brought the outdoor grill area upgrades. Spreading costs over three years made the whole project manageable.
Doing some work ourselves saved thousands. We’re not contractors, but we handled all the staining, painted the railings, built the planter boxes, and installed all the lighting. YouTube tutorials were our best friend. What professionals quoted at four thousand dollars, we did ourselves for about six hundred in materials.
The fire pit itself didn’t need to be expensive. We skipped the custom-built gas fire pit initially quoted at three thousand dollars. Instead, we bought a quality propane fire pit table for five hundred dollars and built the seating around it. Honestly, it looks built-in, functions perfectly, and saved us serious money.
Platform decks are naturally more budget-friendly than elaborate elevated structures because they require less complex foundation work. Our upper tier is only about eighteen inches off the ground. The middle tier sits at grade level. The lower tier is actually slightly recessed. This simple approach needed fewer posts, less concrete, and reduced labor hours.
We shopped sales relentlessly. When a local home improvement store had their annual deck sale, we bought all our decking boards at thirty percent off. We purchased our grill during a Memorial Day sale, saving two hundred dollars. The fire pit came from an end-of-season clearance. Patience pays off.
Composite decking costs more upfront but saves money long-term. We used it only for high-traffic areas and visible surfaces. The structural framing and areas hidden by benches or planters are pressure-treated lumber. This hybrid approach gave us the low-maintenance benefits where they matter most while keeping material costs reasonable.
Simplifying the design saved money without sacrificing function. We chose straight stairs instead of curved. Our deck levels are simple rectangles rather than complex shapes with lots of angles. Each angle and curve adds cutting time and material waste. Simple geometry is your friend when budgeting.
The built-in seating around our fire pit replaced the need for outdoor furniture. If we’d bought quality weatherproof seating for eight to ten people, we’d have spent fifteen hundred dollars easily. Building the benches into the deck cost about four hundred in materials. Plus, built-ins never need storing for winter and can’t blow away during storms.
We skipped some trendy extras that looked amazing but weren’t essential. Under-stair lighting? Beautiful but not necessary. Fancy metal railings? Gorgeous but pricey. Outdoor sound system built into the deck? Seriously cool but absolutely a luxury. We focused on the core elements that make the space functional and beautiful, knowing we can always upgrade later.
The biggest money-saver was thoughtful planning. We worked with our contractor to design everything upfront, even the phases we’d build later. This meant the initial structure included proper support for future additions. We didn’t have to redo or reinforce anything when adding the grill area; it was designed to handle that weight from the start. Careful planning prevents expensive do-overs.
Local materials made a difference too. We sourced stone for the fire pit surround from a nearby quarry instead of ordering specialty pavers. The stone looks amazing, suits our regional aesthetic, and cost about half what designer pavers would have. Shopping local often uncovers hidden gems at better prices.
Looking back, our tiered deck with fire pit cost roughly sixty percent of what the initial all-at-once, bells-and-whistles quote was. We achieved the same functionality and honestly, I think our phased approach resulted in better decisions. We lived with each phase before adding the next, so we really understood what we needed and what we could skip.
The investment, even spread over time, gave us something priceless: outdoor living space our family actually uses. We spend entire evenings outside now. The kids play safely, we entertain regularly, and our house feels twice as large because the deck functions like additional rooms. Every dollar spent has paid off in family memories and daily enjoyment.
If you’re dreaming of platform decks with different levels and a cozy fire feature, don’t let budget fears stop you. Start with the basics, build what you can afford, and improve over time. The bones of a good tiered design can be simple and affordable. The magic comes from thoughtful layout and how you use the space, not from expensive materials or complex construction. Your family will love it just as much as ours loves our imperfect, gradually built, absolutely wonderful outdoor retreat.
This post may contain affiliate links. Read the full disclosure here.