Winter Wonderland Tablescape for a Magical Dinner Party
Boots thumped, snow scattered, and my three boys barreled inside, cheeks pink and grins wide. While they peeled off layers, I flipped our dining room into a winter wonderland tablescape that still welcomes spills, crumbs, and giggles. Think twinkle lights, frosty whites, and cozy textures, all simple enough to set in minutes.
If you want pretty and practical, you’re in the right place. I’ll share a kid friendly plan with smart budget ideas, easy layering tips, and a stress free checklist you can follow. It works for Christmas, New Year’s Eve, or any snowy dinner party, which makes planning so much easier.
I keep it real, so nothing here feels fussy or fragile. You’ll see what to buy, what to borrow, and what to skip, plus a few mom-tested tricks that hold up to busy hands. Ready to make magic at your table, without the stress?

Pick a Calm Color Palette and Theme that Glitter in Winter Light

Color is the quickest way to set a peaceful mood. I like palettes that feel snowy, soft, and a little sparkly, so the whole room shines without shouting. When I build a winter wonderland tablescape, I stick to a tight mix. Three tones, lots of texture, and a little shine. It looks pulled together in minutes, which is always my goal with three boys underfoot!
Easy Color Combos that Always Look Snowy and Chic
A calm table comes from a short color list. I keep it to three shades, then repeat them in linens, plates, and accents. Fewer than four colors keeps the eye relaxed, which makes everything feel magical and quiet, even with excited kiddos at the table.
Here are my favorite palettes with pairings that never fail:
| Palette | Sample Pairings | Candle Colors | Greenery Choices |
|---|---|---|---|
| White, silver, and clear glass | White plates, silver flatware, clear chargers, crystal or acrylic goblets | White pillars or silver taper pairs | Eucalyptus, frosted cedar, or white-tipped pine |
| Soft blue, navy accents, and chrome | Pale blue runner, navy napkins, chrome napkin rings, clear plates with silver rim | Ice blue votives or navy tapers | Blue-berried juniper, seeded eucalyptus |
| Cream, blush, and champagne gold | Cream tablecloth, blush napkins, champagne gold chargers, milk glass bud vases | Blush votives or cream pillars | Dusty miller, soft pine, bleached ruscus |
Why it works:
- Simple repetition: Three shades echo across the table, so the look feels unified.
- Instant harmony: Neutrals or near-neutrals calm busy patterns in the room.
- Glow factor: Metallic or glass accents bounce light, which adds sparkle without clutter.
Quick examples I use at home:
- White, silver, clear: Layer a white cloth, add a silver runner, and drop clear glass ornaments into a bowl.
- Blue and chrome: Tie navy ribbon around napkins, then add a chrome salt and pepper set.
- Cream and blush: Mix cream dishes with blush napkin bows and champagne gold flatware.
Candle and greenery tips:
- Match the lightest color in your palette for pillars, then add one accent taper if you want a little drama.
- Pick greenery that supports your tones. Juniper for blue, eucalyptus for silver, dusty miller for cream and blush. Keep it soft and feathery, not bulky.
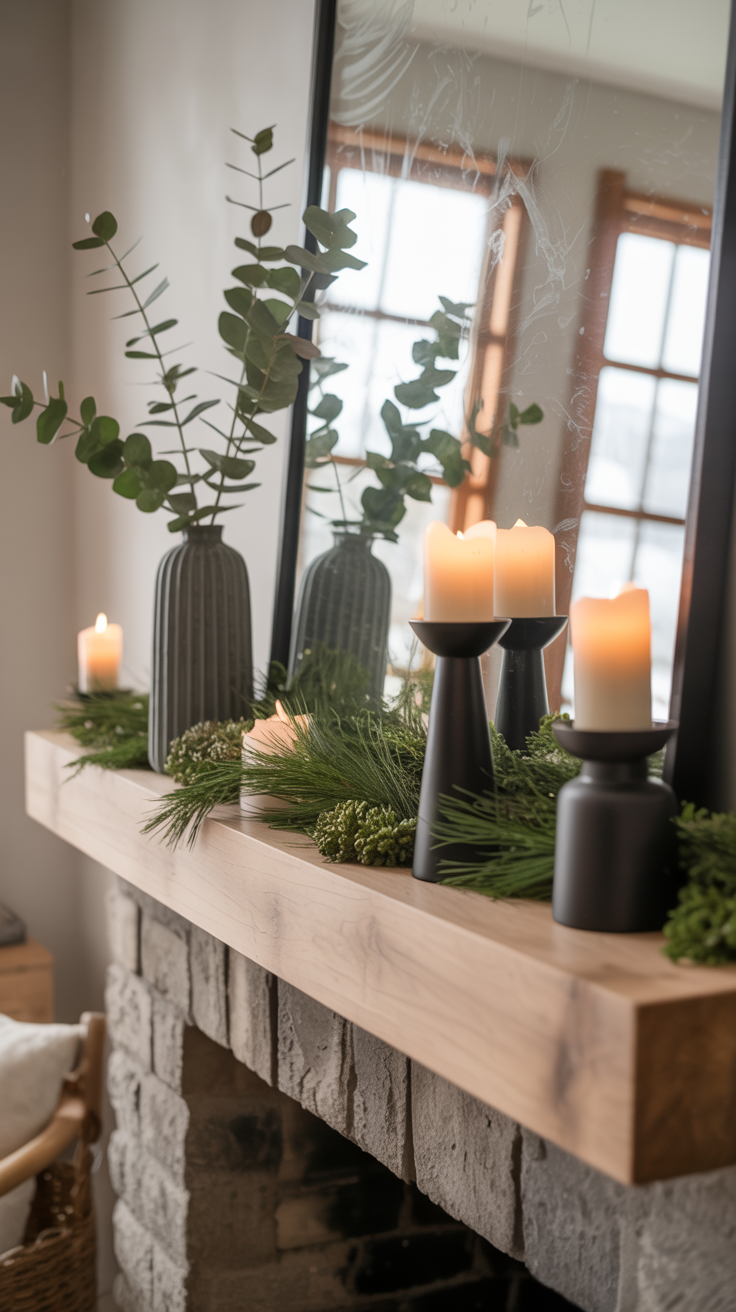
Texture Mix 101: Cozy Meets Sparkle
I balance textures the same way I balance color. One plush layer, one smooth layer, one reflective layer, and one natural touch. It feels cozy and bright at the same time, which is the sweet spot for winter.
- Plush layer: Faux fur runner, fleece runner, or a chunky knit placemat. I use low-pile faux fur so it does not shed. Fleece is my kid-friendly hero because it wipes clean.
- Smooth layer: Satin napkins or a velvet ribbon tied around flatware. Satin slides under plates without catching crumbs. Velvet ribbon adds warmth with zero mess.
- Reflective layer: Mirror tiles under the centerpiece, mercury glass votives, or clear acrylic risers. Acrylic is light and shatter-resistant, which helps when little hands help set the table.
- Natural element: Evergreen sprigs, pinecones, or a slim birch slice under a bowl. I bake pinecones at 200°F for 20 minutes to dry them, then spray with clear sealant to stop flaking.
Kid-friendly, non-shedding notes:
- Choose tight weave knits and low-pile faux fur. Skip loose mohair and loose glitter.
- Go for mercury glass style votives made of plastic or acrylic. They still glow, they do not break.
- Buy pre-sealed greenery or mist with hair spray to cut needle drop for the night.
- Keep mirror tiles under placemats, not hanging over the edge. Little elbows stay safe.
Simple setup I love:
- Lay a fleece runner down the center.
- Add a narrow mirror strip. Stop it short of little hands.
- Place satin napkins on plates, then tie a velvet ribbon.
- Tuck cedar sprigs at each place. Add one pinecone beside the glass.
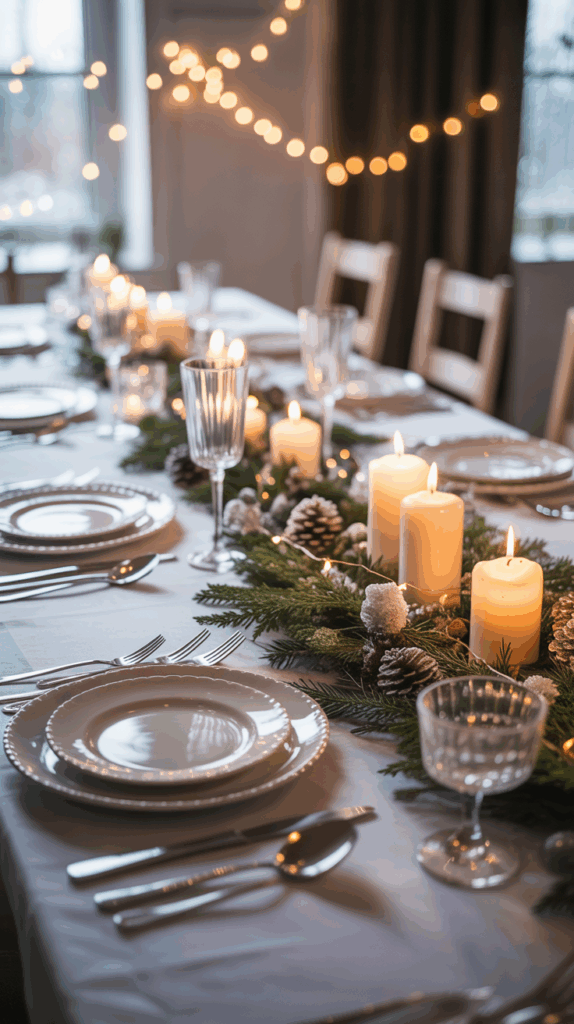
Set the Mood with Layered Lighting

Winter light is soft and low. I build three layers so the table glows, faces look warm, and nothing feels harsh. It is pretty, and it helps kids stay calm at the table, which is a gift on busy nights.
- Layer 1: Fairy lights in the centerpiece
Tuck warm white string lights into greenery, a bowl of ornaments, or a clear vase. Hide the battery pack behind a charger plate or under a napkin fold. Use a timer setting if your strand has one. I like a six-hour timer for a dinner window. - Layer 2: Candles in hurricanes
Use glass hurricanes or tall cylinders so flames sit inside a shield. Space candles at least 2 inches apart. Keep any flame 12 inches from greenery, napkins, and ribbon. Trim wicks to 1/4 inch before lighting to reduce smoke and flicker. - Layer 3: Room glow with soft lamps or battery tea lights
Turn off overheads and click on two table lamps or place battery tea lights on shelves. Bounce a lamp off a wall for a gentle wash. Battery tea lights are great for kids. No heat, still cozy.
Flame-free options that still look magical:
- LED tapers with real wax shells and a gentle flicker.
- Remote votives so you control brightness and timers from your chair.
- Micro fairy lights in clear bottles or jars for tiny stars on the table.
Safety and timing cheat sheet:
- Keep cords off walkways, and tape loose bits under the table.
- Hurricanes should be taller than the flame by at least 2 inches.
- Micro fairy lights on coin batteries usually last 24 to 36 hours. Plenty for a party and next-day leftovers.
- AA battery string lights often run 50 to 80 hours.
- Battery tea lights run 48 to 100 hours. I set them the day before to test, then click them off until guests arrive.
Quick placement that works every time:
- A single string of lights woven through the centerpiece.
- Two medium hurricanes down the center, not blocking faces.
- Four to six battery tea lights around the room to soften edges.
The best part, it all packs up fast. I pop lights into a zip bag, tie ribbons onto napkins for next time, and store greenery in a flat bin. Clean, calm, sparkly, and ready for the next snow day dinner!
Layer the Base: Linens, Runners, and Sparkly Details that Do the Heavy Lifting

Before I set out plates or pour cocoa, I build a strong base. It keeps the table cozy, hides crumbs, and makes cleanup fast, which I love with three boys at home. This is where the magic of a winter wonderland tablescape starts, and it is easier than it looks!
Pick the Right Tablecloth and Runner

A good tablecloth sets the mood, then a runner adds texture and focus. I start with white or cream for a calm snowy base, then layer a tactile runner that feels wintry.
Here is a quick size guide I use at home. Measure your table, then pick your drop. Casual drops feel easy and family friendly. Longer drops feel formal and dramatic.
| Table Size | Casual Drop 6–8 in | Formal Drop 8–12 in | Recommended Cloth Size |
|---|---|---|---|
| 60 in round | 72–76 in round | 84–96 in round | 70, 84, or 90 in round |
| 72 in round | 84–88 in round | 96–108 in round | 90, 102, or 108 in round |
| 30 x 60 in rectangle | 42–46 x 72–76 in | 54–60 x 84–92 in | 60 x 84 or 60 x 102 rectangle |
| 36 x 72 in rectangle | 48–52 x 84–88 in | 60–66 x 96–104 in | 60 x 102 or 60 x 120 rectangle |
| 40 x 84 in rectangle | 52–56 x 96–100 in | 64–70 x 108–116 in | 60 x 120 or 60 x 144 rectangle |
Simple rules I follow:
- Everyday dinner: 6 to 8 inch drop so little feet do not yank it.
- Holiday photos: 8 to 12 inch drop for that long, lush look.
- Wrinkle hack: Toss the cloth in the dryer with a damp towel for 10 minutes.
For winter, I like a runner with texture. Think faux fur, chunky knit, velvet, fleece, or a woven tweed. It adds warmth without visual noise.
Budget-friendly tricks I use all the time:
- Two narrow runners: Overlap them down the center for a wide, plush look.
- Folded throw blanket: A soft throw, folded lengthwise, makes the coziest runner.
- Fabric by the yard: Buy 2 yards of fleece, trim the edges, and you are done.
Nice detail ideas:
- A thin satin ribbon along the runner edges for shine.
- A silver or pale blue ribbon under the runner to peek out like snow.
Shine with Chargers and Placemats

Chargers are the frame for each place setting. They add shine and keep hot plates from scuffing your cloth. They also give kids a clear spot for dishes, which helps with snack creep.
Material picks that fit winter vibes:
- Silver or chrome: Clean, bright, and reflective under candlelight.
- Clear acrylic: Light, durable, and often dishwasher safe on the top rack.
- Wood slices: Rustic snow cabin feel, sealed ones wipe clean easily.
What I check before buying:
- Stack height: Charger plus dinner plate should not tower. I aim for under 1.5 inches total, so glasses do not feel crowded.
- Dishwasher notes: Acrylic is sometimes top-rack safe. Many metallic chargers are wipe-only. Wood slices should be hand wiped.
Mix and match tip for odd place counts:
- Use one style at the heads of the table, then alternate two styles along the sides. Example, silver at the ends, acrylic and wood alternating down the edges. It looks intentional and solves the missing piece problem.
Placemats still play a role if chargers feel tight:
- Oval or slim rectangle mats fit better on narrow tables.
- Wipeable vinyl or faux leather mats are a sanity saver with kids.
- Layer a thin placemat under a clear charger for color without bulk.
Smart setup I love:
- Place chargers to mark each seat.
- Add plates and napkins, then check elbow room.
- Slide chargers a finger-width from the table edge for a tidy line.
Add Gentle Sparkle with Small Accents

A little shimmer goes a long way. I keep sparkle low and clustered so the table shines without feeling busy.
Pretty accents that never feel fussy:
- Mirror coasters under glasses or mini vases. They bounce light and make tapers glow.
- Glass votive clusters in groups of three. Two short, one medium, spaced a hand-width apart.
- Crystal or acrylic ornaments tucked near the centerpiece or on napkin rings.
- Snowflake confetti, just a sprinkle near place cards or the runner edge.
Less is more:
- Aim for one reflective accent at each place, or three clusters along the center. Too many small pieces will read as clutter.
Cleanup and crumb control, mom style:
- Place confetti and tiny beads on top of mirror coasters. Lift the coaster, dump into a bowl, then wipe. Done in seconds.
- Use a handheld vacuum on low over the tablecloth before lifting plates. It grabs crumbs and glitter so nothing hits the floor.
- Line the table under the runner with a strip of parchment. When you clean up, lift the runner, fold the parchment with crumbs inside, and toss.
Quick sparkle recipe I use often:
- Mirror coaster under each water glass.
- Three votives by the centerpiece, slightly staggered.
- One crystal ornament tied to a napkin ribbon at each seat.
Keep the shine gentle, the textures cozy, and the base sturdy. The rest of your table will fall into place, and clean up will be fast, which makes everyone happy!
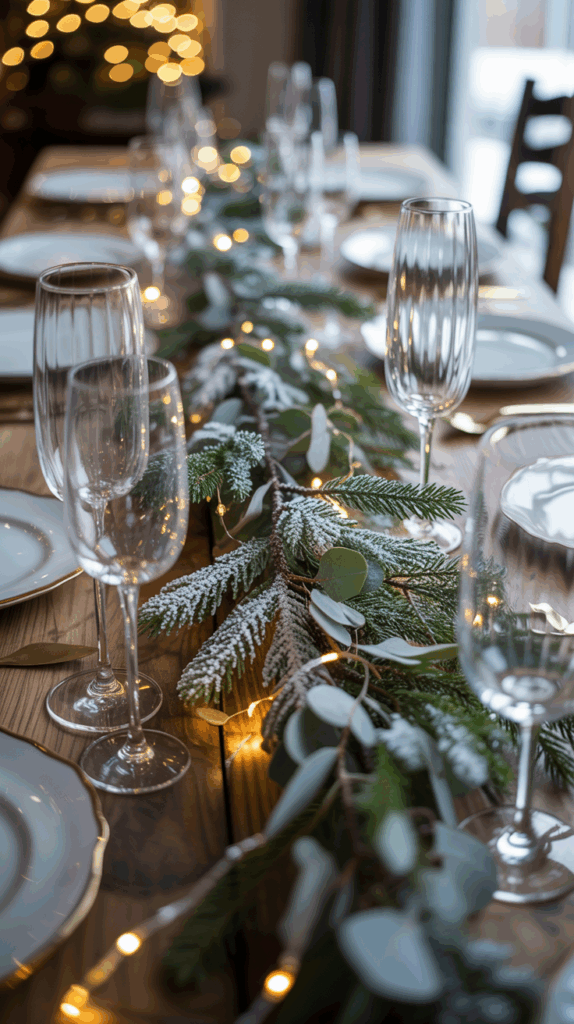
Build a Magical Centerpiece with Lights, Greens, and Snowy Details
I love a centerpiece that looks fancy but takes minutes. This is the heart of my winter wonderland tablescape, and it sets the mood fast. I aim for sparkle, softness, and zero stress. The boys can help tuck lights and sprinkle “snow,” and I can still keep it safe and tidy. Ready for a centerpiece that glows, smells cozy, and leaves room for plates and elbows?
The Easy Centerpiece Formula

I follow a simple formula every time. It always works, even on a busy school night.
- Set a container or tray. A long tray, low bowl, or shallow basket keeps everything contained and easy to move.
- Add a low evergreen base. Layer faux cedar or pine so it stays below eye level. Trim or bend stems to sit flat.
- Tuck in battery fairy lights. Use warm white. Wrap the first inch around the battery pack to hide it, then weave the rest through the greens.
- Add 3 to 5 focal pieces. Think mercury glass trees, small lanterns, or glass hurricanes. Cluster them with varied heights, but keep the tallest piece below seated eye level so you can see your people.
- Finish with pinecones or ornaments. I sprinkle a few near the bases for a natural, snowy look.
Smart wire and battery tips:
- Coil extra wire under the greens, secured with clear tape or a twist tie.
- Place battery packs at the ends or under a removable piece so you can click them on without digging.
- If you use timers, set them to start 30 minutes before guests arrive.
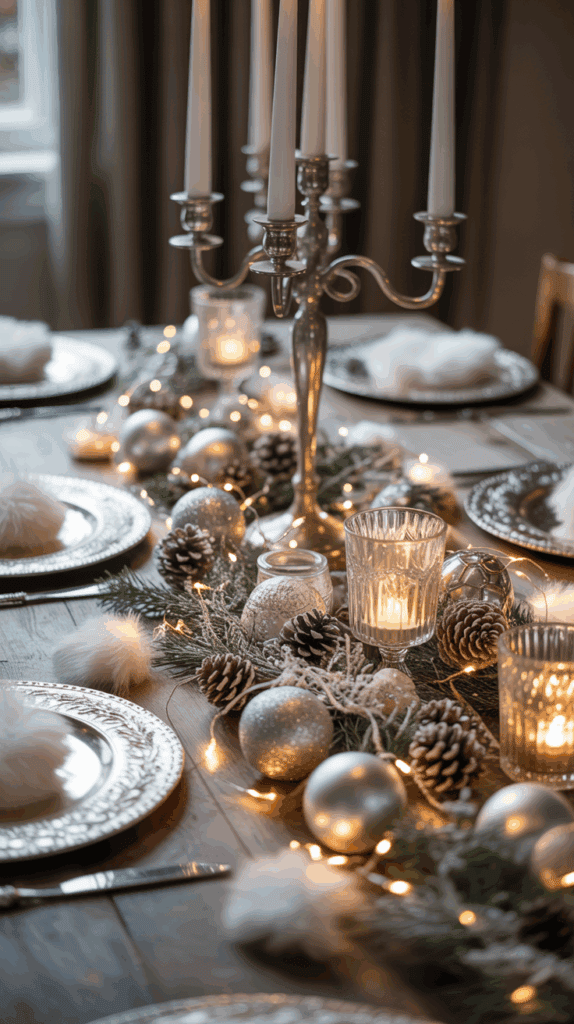
Frosted and Glowing Details

Small frosty touches make the whole table feel magical without a mess.
- Epsom salt “snow” in hurricanes with candles. It looks like fresh powder.
- Glass cloches over tiny trees or a mini village. Instant charm.
- Faux frosted branches tucked into the greenery for texture.
- Snowflake picks near the focal pieces for a playful wink.
Kid safe swaps I rely on:
- Use LED candles with a soft flicker. No heat, still pretty.
- Secure glass, cloches, and hurricanes with a tiny dot of museum gel. It keeps curious hands from tipping things.
Make It Smell Like Winter, Not a Perfume Shop
Scent can make or break dinner. I keep it gentle and clean.
- In the kitchen, simmer one pot with orange slices, a cinnamon stick, and a few cloves. Keep it low and simple.
- On the table, choose unscented candles so food stays the star.
- Add a calm playlist and turn on a lamp or dimmer for a cozy glow that lets the centerpiece shine.
Allergy and pet notes:
- Skip strong pine sprays. Choose unscented or light citrus in the next room.
- Keep simmer pots and greenery out of reach for cats and dogs.
- If guests are scent sensitive, stick to unscented candles and open a window for five minutes before dinner.
With these steps, your centerpiece will sparkle, glow, and smell like winter, all without taking over the table. Simple, pretty, and totally doable with kids around!
Style Each Place Setting: Napkins, Place Cards, and Kid-Friendly Touches

Little hands love to help, so I keep each spot simple, pretty, and sturdy. A few smart choices make the whole table look polished, but still easy to clear after cocoa and cookies. This keeps my winter wonderland tablescape tidy, sparkly, and fun for everyone!
The Stack Formula that Always Works
I follow one stack, every time. It looks full and keeps food service smooth.
- Charger on the bottom for shine and structure.
- Dinner plate centered on the charger.
- Salad plate on top, slightly smaller, so the stack looks neat.
- Bowl or folded napkin on top, depending on the menu.
Spacing matters. I set each plate 2 inches from the table edge so elbows have room. Glassware sits to the right, above the knife. Water glass closest to the plate, wine or a special drink just up and to the right.
Flatware is simple:
- Polished silver for classic winter sparkle.
- Matte black for a modern, cozy vibe that looks amazing with navy or deep green.
Quick check I always do:
- Forks on the left, knife and spoon on the right, knife blade facing in.
- Dessert fork or spoon goes up top, horizontal, if you need it.
- Napkin on the plate or under the fork for a clean line.
Napkin Folds and Simple Rings
Napkins add softness and color. I keep three easy styles on repeat, and the boys love to help pick.
- Knot: Fold the napkin into a long strip, tie a loose knot, fluff the ends. It feels casual and cozy.
- Ribbon-tied roll: Roll the napkin, tie with velvet or satin ribbon for a luxe pop. I like 12 to 16 inches of ribbon per napkin.
- Envelope fold with a sprig of pine: Fold into a rectangle pocket, tuck a tiny cedar sprig or a cinnamon stick. Simple and sweet.
Wrinkle fix when time is tight:
- A quick pass with a hot iron and a spritz of water.
- No iron handy, use a wrinkle-release spray, smooth with your hands, and let it hang for 5 minutes.
Little extras I love:
- Add a small bell to the ribbon for holiday sparkle.
- Slip a candy cane or a tiny chocolate into the envelope fold for a treat.
Place Cards and Mini Menus that Feel Special

Names make guests smile, and they solve the seating shuffle. Keep it simple and let it shine.
Easy ideas:
- White card with a silver pen. Clean, bright, and fast.
- Acrylic place cards you can wipe and reuse. Write with a paint pen, then remove later with rubbing alcohol.
- Snowflake ornament with a name tag. Tie on a tiny tag and send it home as a favor.
Mini menus should be short:
- List the main, sides, and dessert on a small card.
- One card per person, or one per couple. Place it on the salad plate or tucked into a napkin pocket.
Kid-friendly helper tip:
- Use alphabet stickers for names. Kids can help, and it looks cute and bold.
- Stickers work on card stock, ornaments, and even ribbon.
Styling note:
- Keep fonts or handwriting consistent across the table. It reads as calm and intentional.
A Matching Kids Setting that Survives Spills
Kids want to feel included, not sidelined. I mirror the adult look with pieces that can handle a tumble.
What works best:
- Plastic chargers for shine without worry.
- Melamine plates that stack well and wipe clean.
- Shatterproof cups with a stable base. Clear Tritan looks like glass in photos.
Add a tiny activity so little hands stay busy:
- A snowflake coloring card with two crayons at each seat.
- A mini bag of faux snow slime with a sticker label. I keep it sealed until after dinner.
Keep the palette tight so it matches:
- Use the same three colors from the main table. For example, white, silver, and soft blue.
- Repeat one detail, like the ribbon or a small pine sprig, so the kids’ spots feel connected.
Fast setup routine I rely on:
- Tray the kids’ settings in the kitchen, then place them in one go.
- Tuck a wipe under each charger for quick cleanups.
- Add a small treat at the end of the meal, like a mint or a marshmallow pop, as a reward for great table manners.
With these place setting tricks, your table looks polished, your guests feel seen, and your kids feel proud to be part of the magic. Simple, sturdy, and so pretty!
Budget, DIY, and Cleanup Tips for Busy Moms
I love pretty, but I also need fast. If you want a gorgeous table without spending a fortune, these tips will save your sanity. I use them for my winter wonderland tablescape every year, and they stand up to three boys, hot cocoa, and cookie crumbs!
Shop Your Home and Thrift Smart
Before I buy anything, I shop my house. I make a quick list, then pull from cabinets, closets, and the holiday bin. It feels like a treasure hunt, and it costs nothing.
Here is my 5-minute hunt list:
- Glass jars for candles, faux snow, and mini ornaments
- Cake stands for height and layers
- White dishes to keep the table calm and bright
- Silver ornaments for sparkle without glitter
- Cozy throws to fold as a runner or chair wrap
When I pop into a thrift store, I scan for sturdy, easy-to-clean basics:
- Clear glass cylinders for hurricanes, flowers, or fairy lights
- Mirror tiles to bounce candlelight and add glow
- Candle holders in glass or metal for height and structure
I clean every thrifted find before it hits my table. It takes a few minutes and makes a huge difference.
- Glass: Soak in warm water with a squirt of dish soap. Remove sticker residue with rubbing alcohol or a bit of cooking oil, then rinse and dry with a lint-free cloth.
- Metal: Polish lightly with a microfiber cloth. Use a tiny bit of Bar Keepers Friend on tough spots, then rinse and dry.
- Mirror tiles: Wipe with glass cleaner, then buff dry to avoid streaks.
- Textiles: Wash throws on cold, gentle spin, and air dry. Toss in two clean tennis balls to fluff.
Now blend the old with the new. It keeps the look personal and saves money.
- Fill glass jars with Epsom salt and a tea light.
- Stack cake stands to stagger heights, then add a bowl of silver ornaments.
- Use white dishes as your base, then add color with napkins.
- Fold a cozy throw as a runner. It gives instant warmth and texture.
Pro tip I use every time:
- Group items in threes, keep heights low, and repeat one shiny accent across the table. It looks pulled together without feeling fussy.
Fast DIYs that Look Luxe
I want the fancy look without the mess. These quick projects are paint-and-go, glitter-free, and totally kid friendly.
Epsom Salt Faux Snow Jars
- Fill a clean jar one-third full with Epsom salt.
- Nestle a tea light or LED candle into the salt.
- Add a tiny pine branch or a silver ornament on top of the “snow.”
- Cluster three jars together for a soft glow.
Frosted Pinecones with Matte White Paint
- Bake pinecones at 200°F for 20 minutes to dry them. Let cool.
- Use matte white acrylic paint and a small brush. Dry brush the tips only.
- Let dry for 15 minutes. Seal with clear spray if kids will handle them.
- Pile in a bowl, or tuck around hurricanes for a snowy look.
Freezer Paper Snowflake Stencils on Napkins
- Cut freezer paper into snowflakes. Keep it simple with bold cuts.
- Place shiny side down on a cotton napkin, then press with a hot iron for a few seconds so it sticks.
- Dab on fabric paint with a foam brush. Light, even coats.
- Peel the paper after 5 minutes, then let napkins dry per the paint label.
- Wash on cold later, and iron if needed.
Velvet Ribbon Swap on Plain Napkin Rings
- Wrap velvet ribbon around a simple ring. Cut to fit with a 1-inch overlap.
- Glue the edge with hot glue or a strong fabric adhesive.
- Add a tiny silver bell or a small charm if you want a pop.
- Slide onto a rolled napkin. Instant fancy, zero glitter.
No-mess promise:
- Use LED candles, not real ones, inside jars if little hands are near.
- Stick to matte paint and fabric paint. It dries fast and will not shed sparkles.
- Work on a sheet of parchment so cleanup is one toss.
Reuse and Store Without the Chaos
I like pieces that move from winter to spring with one small tweak. It saves space, money, and time.
Neutral staples that work hard:
- White dishes, cream linens, and clear glasses
- Silver or glass candle holders and plain votives
- Natural wood boards and neutral chargers
- Velvet or satin ribbon in cream, silver, or soft blue
Smart storage keeps next season simple. Here is my routine after guests leave.
- Label clear bins by category: candles, linens, ornaments, lights.
- Wrap lights around cardboard and secure the plug with a piece of painter’s tape.
- Store candles upright in a shallow bin, with a sheet of tissue between layers.
- Keep a small caddy with extra AA and coin cell batteries, matches or a lighter, scissors, and painter’s tape. I stash it with the bins so I do not go hunting.
What to toss, donate, or keep:
- Toss: chipped glass, warped candles, stained napkins that do not come clean.
- Donate: duplicate items you never reach for, extra vases, dated decor you no longer love.
- Keep: white dishes, clear glass, neutral linens, mirror tiles, and classic candle holders. These carry you into spring with a new ribbon or a fresh sprig of green.
My 10-minute morning after surface reset:
- Clear plates and glasses into one bin or tray.
- Toss napkins in the laundry, pretreat stains fast.
- Blow out or click off candles, then collect all votives into a box.
- Lift the runner and shake it outside, or vacuum crumbs on low.
- Gather decor from the center onto a tray so you can move it in one trip.
- Wipe the table with a damp microfiber cloth and a few drops of dish soap.
- Coil fairy lights and wrap them around cardboard, label the strand.
- Return chairs and placemats to their spots, straighten chargers if they stay out.
- Load the dishwasher. Start it on quick wash.
- Take out the trash and compost greens. Done!
Little sanity savers:
- Keep one empty bin on hand for “misc table bits,” then sort it later.
- Snap a photo of your setup before cleanup. It is your blueprint for next time.
- Store a set of unscented candles with the centerpiece tray. You are ready in minutes for round two.
These budget tricks, simple DIYs, and tidy storage steps keep the magic fun and the mess small. You get the look, the glow, and your morning back. Win!

Conclusion
Here is my simple formula for a magical winter wonderland tablescape, and it works every time. Choose a calm palette, layer a sturdy base, build a safe, glowing centerpiece, and style easy place settings with a kid friendly twist. Use what you already own, then add one or two special pieces, like velvet ribbon or a pair of hurricanes, to make it shine.
Keep the setup low, soft, and safe so food and faces stay the focus. Repeat textures, tuck in a little sparkle, and let the lights do the heavy lifting. The goal is cozy, not crowded, so you can sit, sip, and enjoy the chatter.
My boys love the twinkle and the tiny surprises at each seat, and I love the fast cleanup that lets me join the fun. Try this look this weekend, snap a few photos, and share them with me. I would love to see your spin on the magic!
This post may contain affiliate links. Read the full disclosure here.