Flocked Christmas Tree Decorating Ideas That Look Fresh
Hi friends! I’m a mom of three wild, silly boys, and nothing says cozy winter magic to us like decorating a flocked tree together. If you’re hunting for flocked christmas tree decorating ideas that actually look and feel just like fresh snow (without a huge mess or fuss), you’re in the right spot! Flocked trees fill our home with so much joy and that dreamy wintry look. My favorite part? Letting the kids jump in, laugh, and help turn our living room into a sparkling, memory-filled space for the season!
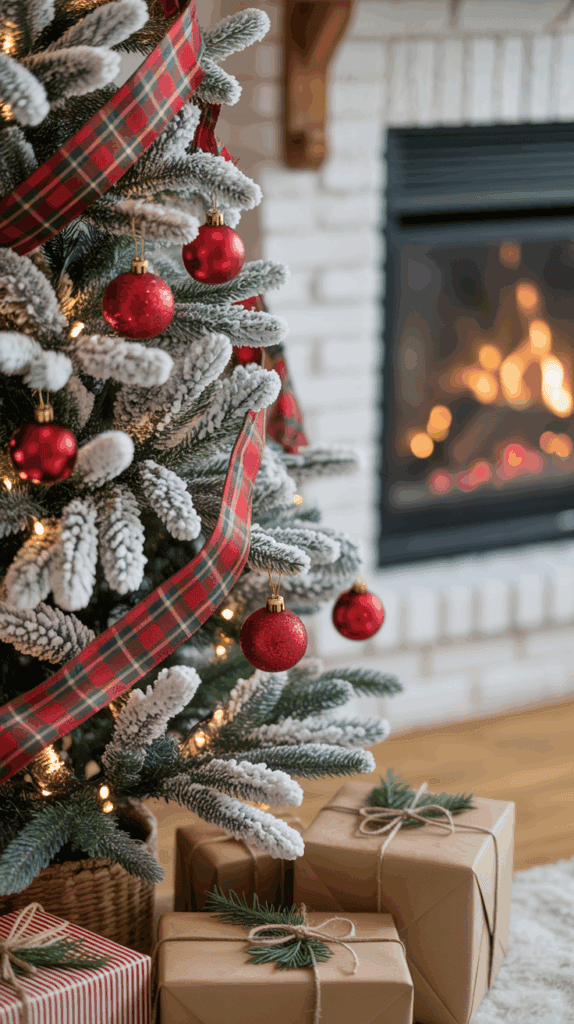
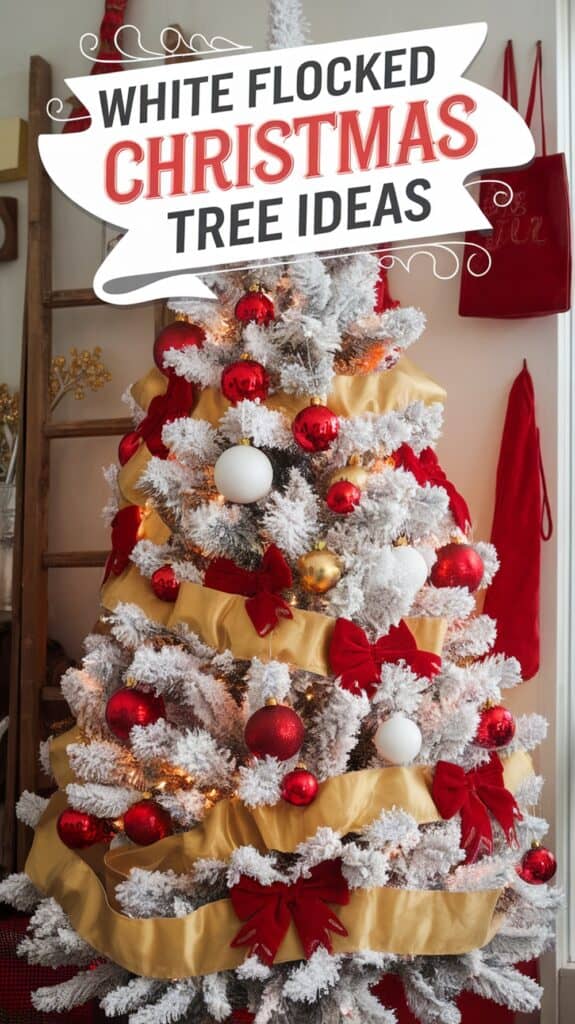
This flocked artificial tree makes your home feel like a winter wonderland.
I’m here to show you simple and creative ideas that’ll make your tree the star of your holiday, no matter how playful your helpers get! With just a few easy touches, you can bring that snowy wonderland feeling right inside. Don’t worry about the mess—somehow, the giggles and snow “flakes” end up all over, and that’s half the fun. Let’s jump in and make this holiday one to remember!
Getting the Look: Choosing and Setting Up the Perfect Flocked Christmas Tree
Picking the perfect flocked Christmas tree is always a big highlight in our house! When you want that real-snow look without braving the cold, nothing beats a beautiful flocked tree. If you’re searching for flocked Christmas tree decorating ideas that hit just right, a lot of the magic comes down to choosing the right tree at the start. I love sharing the little tricks that help me keep setup easy, keep the kids happy, and make our living room feel like an instant winter wonderland.
Picking the Right Size and Shape

Before bringing home the tree, I take a quick look around our living room and pick the best spot for it. Measuring the space first saves me every single year. Trust me, nothing feels more “mom fail” than getting a tree that’s way too wide for the corner or scraping the ceiling!
When choosing your tree, keep these things in mind:
- Ceiling Height: Most homes do best with a 7 to 7.5 foot tree. If your ceilings are high, go a little taller, but make sure there’s room for your family’s favorite topper!
- Floor Space: Our family squeezes the tree between the couch and TV, so a slimmer tree works. Wide open rooms can handle a fuller, round shape.
- Tree Shape: Some trees are pencil-thin, while others are lush and bushy. If you have littles (and their toys) everywhere like I do, a skinnier tree leaves more play space. I save the big fluffy styles for years when we host extra family.
A quick tip: Always double check the stand width! Some stands stick out a lot farther than you expect.
Flocked vs. Heavily Flocked Styles
Flocking adds that snowy look, but you get to decide how much “snow” you want inside. Every flocked tree is a little different, so I always look for these main types:
- Lightly Flocked: Gentle white dusting. Looks like the first flurries of winter. If you want a hint of snow and lots of green peeking through, this one’s perfect.
- Heavily Flocked: Full-on snow storm! You’ll see just a bit of green. These are dreamy if you’re after a real “snowed-in” feeling.
- Icy or Frost-Tipped: Some trees have only their tips touched with flock, giving you that frosty sparkle without as much mess.
It’s nice to remember: Lightly flocked trees are less messy if you have little hands (and vacuuming) to worry about.
Pre-Lit or Unlit? What Works Best for Busy Moms
This is my annual debate. Kids want ALL the twinkly lights, but I want as little hassle as possible! Here are the things I always weigh:
- Pre-Lit Trees: These save so much time. No fussing with tangled wires. If one bulb goes out, most new trees let the rest keep shining (thank you, whoever invented that!).
- Unlit Trees: More budget-friendly, and you can pick your favorite lights. If our big strand of colored lights survived from last year (which is hard to believe), I sometimes grab an unlit tree and let the boys go wild. Just expect more time stringing lights.
Pre-lit is usually my pick if I’m short on time or need a peaceful setup when the boys are bouncing around.
Setting Up: Making Tree Assembly Easy (Even With Kids Running Around)
Getting your flocked tree up is actually easier than with a real tree. No sticky sap, no saws, and no wrestling with crooked trunks! Our family has a setup routine that turns into its own holiday tradition.
Here’s how I make it smooth, even with little helpers sprinting by:
- Lay down a drop cloth or old sheet first. Flock can shed a little, especially on the first assembly.
- Assemble in sections. Most trees split into 2-3 parts. I have each boy “fluff” their section, spreading out the branches so it looks full and snow-dusted.
- Vacuum or sweep under the tree area. Once we’re done setting up (and giggling about the fake “snowstorm”), I give the whole area a quick clean.
- Let the tree settle. If possible, leave the tree standing for an hour before decorating. The flocking “sets” a bit and won’t come off as much on your ornaments.
Setting up the tree with the kids is, honestly, just as much fun as decorating. I talk about snowy days or share silly stories while we work, and suddenly the living room glows with that holiday spirit.
Key Extras: What Makes a Flocked Tree Stay Gorgeous All Season
Flocked trees are super low-maintenance, but a few extras make the whole process a breeze:
- Tree Skirt or Mat: Catches any little fallen flock bits and looks cozy under gifts.
- Gentle Touch: Show the kids not to roughhouse with the branches, so the snow stays pretty.
- Storage Bag: When the season is done, use a tree storage bag (not just the usual box). This keeps your flocked tree looking great year after year.
Choosing the right flocked tree is just like picking the perfect cozy sweater. It fits your space, matches your family, and makes the holidays feel extra special! Get ready for even more flocked Christmas tree decorating ideas, because you’re about to make some snowy magic right at home.
Magical Bases: Creating a Snowy Foundation Under the Tree
The base of your flocked Christmas tree gets more attention than you think! It’s the spot where the gifts pile up, the pets nap, and the magic starts before you even add ornaments. When I look for flocked Christmas tree decorating ideas that really pop, I always start by making the bottom of the tree feel just as special as the top. You don’t need a fancy setup, just some creativity, a few cozy layers, and maybe a sprinkle of patience (especially if your kids think the base is a new play fort).
Picking the Right Tree Skirt for a Wintry Look
Tree skirts are a lifesaver for busy moms like me. They don’t just catch those stray flock bits and pine needles, they add a big wow factor to your tree. Our family favorite is a plush white skirt that looks like fresh snow. It hides the stand, works with any color scheme, and makes every little gift look extra special the second it lands.
Try these skirt styles for instant snowy charm:
- Faux fur: Soft, fluffy, and scream “cozy cabin in a snowstorm.” They’re cuddly enough that you might find your dog curled up on it.
- Quilted white: I love a thick, quilt-like fabric because it stands up to heavy gift piles, speedy trucks, or wild toddler feet.
- Knit or chunky woven: Adds texture without stealing attention. Think of a warm winter sweater, just for your tree!
If you want a little sparkle, pick a skirt with tiny sequins or silver threads. The lights from the tree will make it shimmer at night! You can even make your own from a white blanket or a piece of velvet fabric if you’re feeling crafty.
Creating DIY Faux Snow Layers

Some years, I want even more snowy magic at the bottom. That’s when I pull out my box of faux snow supplies. The best part? It’s less mess than the boys tracking in the real thing after sledding!
Here are simple ways I’ve added layers of “snow” to the foundation:
- Batting or quilt stuffing: Fluffy, cheap, and looks like snowdrifts around the tree. Tuck the edges under your skirt for a puffy look.
- Polyester fiberfill: Which you can get from any craft store. Tear it into pieces and shape little mounds for a playful, snowy appearance.
- White fleece blankets: If you have one on hand, just scrunch and layer until it builds up that soft base.
For houses with little kids or pets, I try to keep any small bits secured down. A few gift boxes or heavier ornaments at the edge helps hold things in place.
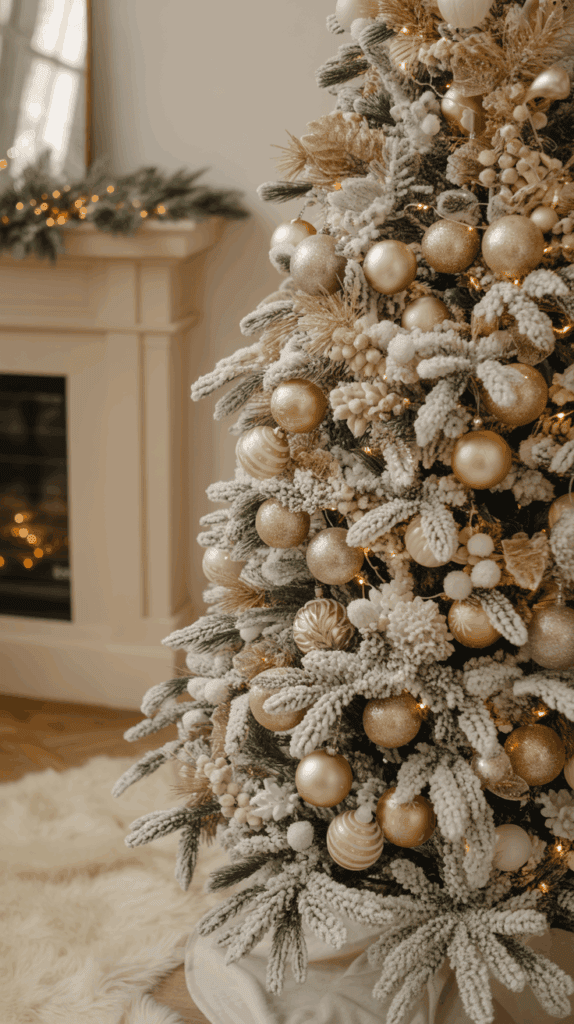
Incorporating Metallic or Glitter Accents (the “Frosted Icing” Look)
Since a flocked tree already has that snow-kissed vibe, adding the right metallic or glitter pieces at the base makes it shine even more. I think of these sparkly touches like the icing on my kids’ gingerbread houses—fun, eye-catching, and always a hit in photos.
Ideas for adding a frosted finish:
- Silver or mirrored trays: Place gifts, lanterns, or candles on trays for a reflective, snowy glow under the tree.
- Glittered sticks or faux snowballs: Bunch together some white branches or soft snowballs around the base for a little extra sparkle.
- Mini string lights woven through the skirt: Tuck a few warm lights into your tree skirt or batting. They make the whole base glow once the sun goes down!
A little goes a long way. The point is to give that snowy foundation some shimmer without overloading it.
Snow-Covered “Gift Display” Tricks

The way you set out gifts also adds to the magical base effect. I love to group my presents so it looks like they’re peeking through little drifts of snow. It never fails to make the kids gasp (and rush over to check who the big ones are for).
Here’s what works great:
- Stack gifts so some sit a little higher, using boxes hidden under the skirt to add height for a snowbank feel.
- If you wrap presents in white or silver paper, the effect is even more snowy.
- Add a few “snow-dusted” pinecones or greenery sprigs on top of the piles for a woodland touch.
In our house, Santa sometimes leaves a couple of extra “snow tracks” with cotton balls or powder near the tree base before Christmas morning. It’s silly and simple, but oh, the squeals!
Quick Comparison Table: Snowy Base Options
Not sure which snow base works for your crew? Here’s a quick side-by-side for busy moms:
| Option | Cost | Mess Level | Softness | Best For |
|---|---|---|---|---|
| Faux Fur Skirt | $$$ | Low | Very | Cozy, high-traffic homes |
| Quilt/Batting Layer | $ | Low | High | DIYers, layered snow look |
| Fiberfill “Drifts” | $ | Medium | High | Whimsical, snowy pile effect |
| Sequin/Glitter Skirt | $$ | Low | Medium | Extra sparkle, glam themes |
| White Fleece Blanket | $ | Low | High | Quick fix, softest texture |
The right foundation sets the stage for every ornament, garland, and memory. It’s like rolling out a snowy red carpet for all the Christmas fun to come!
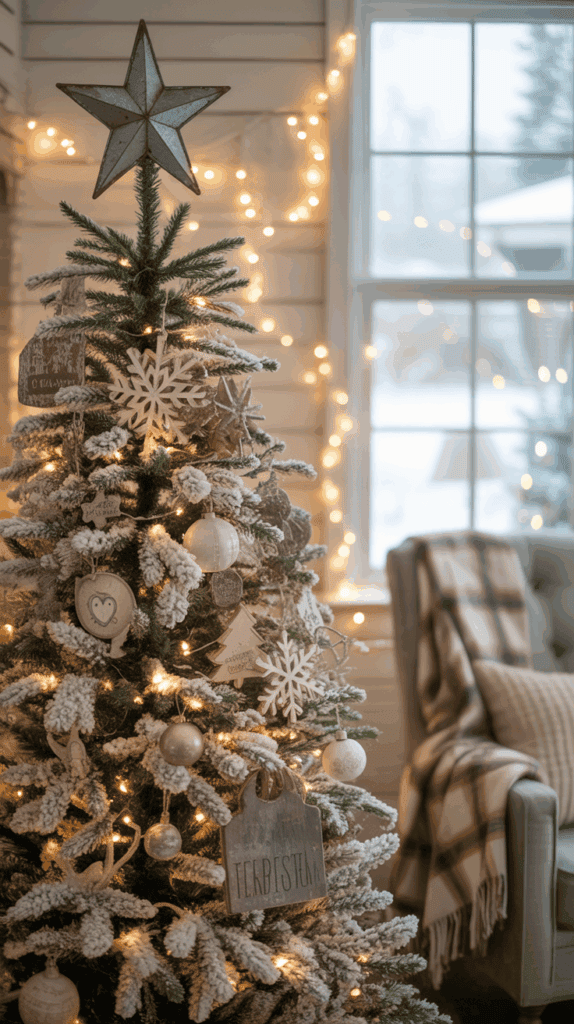
Frosty-Themed Ornaments and Decorations: Whimsical, Family-Friendly Touches
Nothing brings a flocked tree to life like frosty-themed ornaments and twinkly decorations that feel magical. When I talk to other moms about flocked Christmas tree decorating ideas, the first thing I share is how much fun we have making personalized, snowy ornaments as a family. Letting my boys dive in, get a little messy, and create their own “snow-storm” ornaments fills our living room with laughter and memories that last even longer than the decorations themselves! These cute, wintery touches bring the snowy outside feeling right into our cozy space, and the projects below are the ones my crew asks for every year.
DIY Snowy Ornaments From Everyday Materials
Homemade snowy ornaments are a must here—they’re cheap, easy, and way more meaningful than store-bought ones. The whole process becomes a fun family event, and even little hands can help at every step. If you’re looking to sneak some creativity into your day, these projects are kid-approved, quick to set up, and add a whimsical, family-focused finish to your flocked tree.
Here are some of my favorite ways to make snowy ornaments from things you already have around the house:
1. Sparkly Salt Dough Ornaments
Salt dough ornaments are a classic. The best part? You probably have everything you need in your pantry. For the “snow” effect, roll them in glitter or paint them white.
What You Need:
- 1 cup flour
- 1/2 cup salt
- 1/2 cup water
- White paint or glue
- Silver or clear glitter
- String or ribbon for hanging
Steps:
- Stir together the flour, salt, and water until a dough forms. If it’s sticky, add a bit more flour.
- Roll out the dough and use cookie cutters for stars, snowflakes, or mitten shapes.
- Help your kids poke a hole at the top of each ornament for hanging.
- Bake at 200°F for 2-3 hours until hard. Once cool, let the kids paint the ornaments white, then brush with glue and sprinkle on glitter for a frosty look.
- Add names, dates, or funny faces for personal flair. Tie ribbon through the holes and hang!
My kids love stamping their handprints into the dough. There’s nothing sweeter than finding those tiny prints on the tree year after year.
2. Epsom Salt “Icy” Baubles
Epsom salt looks almost exactly like snow or icy frost! I keep a bag in the bathroom cabinet, and it works perfectly for this project.
What You Need:
- Clear plastic or glass ball ornaments
- White glue or Mod Podge
- Epsom salt
- Small paintbrush
Steps:
- Take off the ornament top. Brush glue all around the outside of the ball.
- Roll the ornament in a bowl of Epsom salt until it’s fully coated!
- Let them dry in a cup or on an egg carton.
- Once dry, fill them with a bit of extra salt, ribbon, or even small pine sprigs.
Each ball glimmers just like fresh snow, and the kids love shaking them for a “blizzard.”
3. Cotton Ball Snow Friends
If your family is anything like mine, you always have cotton balls tumbling around the bathroom drawer. This craft is adorable, easy, and mess is minimal—win!
What You Need:
- Cotton balls
- White glue
- Googly eyes
- Tiny buttons or beads for noses
- Pipe cleaners or felt for scarves
- Cardstock circles (optional, as a sturdy base)
Steps:
- Help your kids make small snowmen with two or three cotton balls (a little glue keeps them stacked).
- Add googly eyes, button noses, and pipe cleaner “scarves.”
- Glue the snowmen on cardstock if you want them sturdier.
- Use yarn at the top to hang.
You can turn this into a whole snowy animal crew! Tiny hats, mini bows, or silly faces make each snow friend unique and giggle-worthy.
4. Glitter Pinecones
On our winter walks, the boys love grabbing pinecones by the handful. With a little glitter, they look like they’ve just fallen from a snowy tree.
What You Need:
- Pinecones (washed and dry)
- White glue
- White or silver glitter
- String
Steps:
- Brush the edges of each pinecone with glue.
- Dust with glitter until it sparkles like ice.
- Let dry, then tie a string around the top to hang on your flocked tree.
Try adding names in glitter glue if you want to celebrate each kiddo on the tree. The sparkly cones double as keepsakes—my boys always check to see if I’ve kept their cone from last year.
5. Snowy Family Photo Ornaments
Personalized ornaments make the tree even more special. Print out small family photos, glue them onto white or silver cardstock, and decorate the edges with glued-on faux snow or glitter.
- Punch a hole at the top for ribbon.
- Add “2024” or little snowy doodles.
- The kids can even draw their own “frames” in marker.
Not only do these look sweet, but pulling them out each year is a whole fun trip down memory lane!
Making It a Family Activity
Turning these projects into family time is the best part. Set up a craft table with newspapers or extra towels underneath. Lay out small bowls for glitter, salt, buttons, and paint. Let kids pick their supplies and go wild personalizing each creation.
A few tips I’ve learned:
- Assign each kid their own “work zone.” Less bickering, more giggles.
- Keep wipes or damp cloths handy for sticky hands.
- Play favorite holiday music in the background. Our go-to is always “Frosty the Snowman”—the “thumpety-thump-thump” gets everyone in the mood!
When we make these together, the room fills with laughter and I get to sneak in a little one-on-one time with each of my boys. Their ornaments might be uneven or covered in extra glue, but they are proudly displayed front and center year after year. That homemade charm fits beautifully with any flocked tree.
Ways to Personalize Each Ornament
Letting everyone have a say in decorating is what makes your tree feel truly yours. Here are some fun personalization ideas:
- Write names and ages on the back of each ornament so you remember the year and how small those hands were.
- Paint each ornament in favorite colors if your kids want a rainbow “snow” effect.
- Use glitter glue to draw initials, hearts, or stars for a whimsical finish.
- Add ribbons in team colors or with fun patterns to make each one pop on the white branches.
When you use these family-friendly, frosty-themed decorations, your whole flocked tree looks like a snow day exploded in your living room—in the best way. It’s a tradition with heart, sparkle, and a whole lot of personality!
Lighting Tips: Making Your Flocked Tree Sparkle Like Fresh Snow
If you want that pure, snowy magic, the right tree lights are key! Every year, when I’m brainstorming flocked Christmas tree decorating ideas, lighting is the first thing I think about. The lights can make your whole room feel softer and more magical, just like the world does after a fresh snowfall. Whether your vibe is classic glow or full twinkle-town, you can make your flocked tree shine and shimmer so it looks straight out of a storybook.
Picking the Right Type of Lights
I get a little picky with lights! With a flocked tree, you want something that will highlight the snowy branches and not overpower them. I’ve tried all the options—warm white, cool white, and even colorful blinky ones (my boys’ favorite). Each brings a different kind of snowy drama.
- Warm white lights: These have a cozy, candle-lit effect. They look just like the golden hour sun on snow—soft, gentle, and never harsh.
- Cool white lights: Crisp, icy, and bright. This is my go-to for a real “frosted morning” look. The white branches seem to glow even more.
- Twinkling or “fairy” lights: Miniature bulbs add a delicate, sparkly vibe that makes the flocking look like it’s studded with tiny snow crystals.
- Colored lights: If the kids beg for color, I keep it simple. A single color, like all blue or all red, can give a fun retro feel without looking messy.
When you’re shopping, look for lights labeled “soft white” or “warm LED” if you want that golden, snowy shimmer. For a snowy effect, steer clear of heavy, thick bulb strings (they can smother those frosty tips).
How to String Lights for a Snowy Glow
Stringing lights can feel like wrestling a giant sparkly serpent, but I promise there’s an easier way with a flocked tree! Here’s my simple routine for even, snowy sparkle—kids always want to help with this part.
- Start with the lights OFF! You see everything—no missed patches.
- Wind lights around the trunk from bottom to top. This adds a lovely glow from the inside out.
- Weave the lights out along each branch, but tuck some deeper in. I aim for a “layered” look, so the whole tree glows, not just the tips.
- Step back every so often and squint. If it looks snowy and glowy even through tired mom eyes, you’re on the right track!
- Plug in to check. Add or shuffle a strand if you see any dark spots.
TIP: If one strand blinks out after you decorate—don’t panic! I keep a mini pack of battery-operated fairy lights to fill any sneaky dark gap in a pinch.
How Many Lights Do You Need?
This is the question I get the most! Too few lights and it looks patchy. Too many, and you lose the lovely flocked texture. Here’s a cheat sheet I keep handy:
| Tree Height | Minimum Lights | For Extra Sparkle |
|---|---|---|
| 6 feet | 400-600 | 700-900 |
| 7.5 feet | 700-900 | 1,000-1,400 |
| 9 feet | 1,000+ | 1,500+ |
I usually go “medium” on the sparkle scale and add extra if my kids think it’s not “magic” enough! The formula I use: 100-150 lights per foot of tree, depending on how snowy and twinkly I want it.
Adding Sparkle With Special Effects
Sometimes, you want to add that little something extra. These are the tricks I use when I want my flocked Christmas tree to really wow at night:
- Twinkle or slow-fade strands: These add gentle movement, like moonlight on snowdrifts. Too many flashers can look busy, so stick with a few for accent.
- Layer different bulb sizes: Mixing classic mini lights with a few larger retro bulbs gives dimension and that storybook feel.
- Icicle lights tucked inside: I sometimes run a strand of mini icicles just on the inner layer for extra sparkle without changing the look from the outside.
For kiddo fun, let them pick out one novelty strand (think snowflakes or stars). I tuck these around the bottom where they can admire “their” lights up close.
Hiding Wires and Protecting Flocked Tips
Messy green wires can ruin the snowy look. Here’s how I keep things tidy and safe:
- White or clear wire lights: These blend in perfectly on flocked trees. You’ll barely see them.
- Gentle hands: Flocked branches are soft, so I show the boys how to lift, not yank, when adding lights.
- Cord management: I wind any leftover wire gently behind the trunk or under the skirt. Out of sight, out of mind!
If a branch gets “un-flocked” while we’re decorating, I tap on a little artificial snow spray and it’s fixed in seconds.
When to Add Ornaments
One of my best time-saving tricks is to light the whole tree before adding a single ornament. Lights first gives you the base sparkle. After that, every ornament you hang gets its own little “spotlight.”
I let the boys drop a ball or two while we’re stringing just to keep them busy and giggling, but I always finish the sparkle before our big family decorating night. That way, every frosty ornament shines just like it’s caught in fresh snowfall.
Lighting your flocked Christmas tree is pure magic, and the right setup makes it shine like a winter wonderland. The kids get to gasp; you get the peaceful, cozy glow after they finally crash for bed. Now the tree is ready for all the ornaments, garlands, and fun details to come!
Finishing Touches: Accents That Take the Winter Wonderland Over the Top
When I look for flocked Christmas tree decorating ideas that truly make the room sparkle, I always focus on the finishing touches. These little accents are what push your winter wonderland from pretty to pure magic! I always tell my boys that it’s the last sprinkles that make the whole thing feel extra special, kind of like the top on a cupcake. Whether you love classic details or playful surprises, these simple tricks will leave both grown-ups and kids wowed.
Add Clip-On Birds, Snowy Owls, and Woodland Creatures
A flocked tree already feels like a snowy forest, so why not complete the scene with some cute friends? I love tucking in soft, clip-on birds or fuzzy owls perched on snowy branches. The boys think it’s so cool, almost like a mini adventure right in our living room.
- Feathered birds: Look for white, silver, or soft pastel birds to keep things gentle and wintry.
- Owls: Tiny, fluffy owls with big eyes always get a laugh. They’re like the tree’s secret guardians!
- Woodland animals: Add a few tiny reindeer, squirrels, or foxes to make the tree feel right out of a snowy storybook.
Tucking these creatures in at different heights creates the feeling that your flocked tree is hiding its own snowy forest.
Sprinkle on Frosty Picks and Glitzy Sprays
Nothing beats adding a few sparkling picks and sprays to make your tree pop. I use these the way I’d use sprinkles on cookies—a little goes a long way, but they’re what everyone notices first!
- Snowflake picks: Slide them in at the tips of branches so they poke out. They mimic real snowflakes landing before melting away.
- Glitter stems: Silver, platinum, or icy blue sprays add shimmer without overdoing it.
- Berry picks: Frosted berries in white or deep red give the look of winter bushes dusted by snow.
My trick is to arrange these after all the ornaments go up, aiming for spots where the tree seems a little empty. The picks fill space and bounce light in the prettiest way!
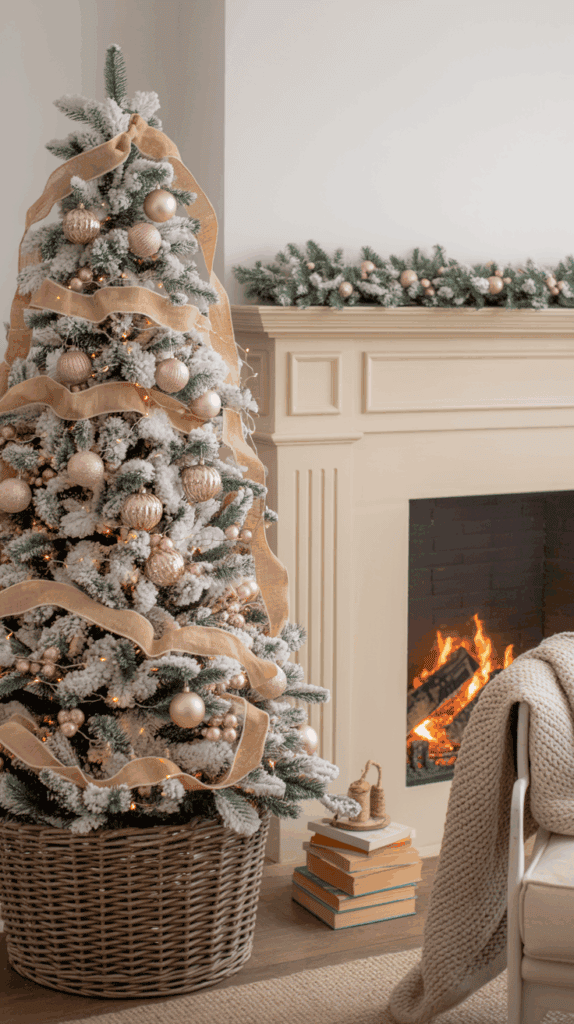
Use Ribbons for a Soft, Snow-Drift Effect
Ribbons make a flocked Christmas tree look finished and dreamy. I loosely weave wide, soft white or silver ribbon in and out of branches, letting it drape like snow settled on each layer.
A simple approach I use:
- Cut ribbon into long strips (usually 2-3 feet each).
- Start at the top and gently tuck each end into the tree, letting the middle drape.
- Layer with thinner ribbons in icy blue or pale gray if you want more movement or texture.
If you want extra sparkle, grab ribbon with metallic edges or a subtle shimmer. Crushed velvet or soft satin also gives a luxury feel without much fuss.
Add Sparkling Icicle Ornaments or Droplets
Icicle ornaments are my secret to making the whole tree look like it’s just thawing out from a fresh snow. These glass or acrylic pieces reflect all the lights and catch every eye.
- Hang icicles in clusters: Place a few together near light bulbs for a bar-of-frost effect.
- Mix short and long sizes for more interest.
- Acrylic droplets or teardrop ornaments add that frozen rain look!
The first year I did icicles, the boys just stared at how they glimmered at night. Now they each claim a spot for their favorite “super giant” icicle!
Drape Beaded Garlands or Snowflake Chains
Beaded garlands make the perfect finishing line across a flocked tree, and snowflake chains add a playful, layered effect. If your style is old-school cozy, wooden bead strings can look like snowy pebbles lined up in a row.
Some ways I use garlands:
- Clear or pearl beads: Looks like frozen rain or dewdrops.
- Snowflake cut-out garlands: Perfect for craft time, and my boys love seeing their handiwork front and center.
- Silver tinsel ropes: A little sparkle for a vintage flair.
I drape garlands loosely so they swoop between branches for a flowy, snowy look. Too tight and they hide the pretty flocking, too loose and little ones might use them as tug-of-war (ask me how I know).
Mini Lanterns, Bells, or Jingle Accents
Little hanging details like mini lanterns or jingle bells bring festive sound and extra glow to a flocked tree. Every year, I pop on a handful of small gold or white bells and a few battery-powered mini lanterns that flicker like a campfire.
- Lantern ornaments: Add soft light, perfect for evening cuddles with cocoa.
- Jingle bells: Easy for kids to hang, and they make the tree “sing” if anyone brushes by.
- Metal snowflakes or stars: A bit of shine for empty spots or tree edges.
The sound of bells and the soft light from lanterns make the whole living room feel like a snowy village square.
Bring in Scented Accents for a True Winter Feel
Sometimes you need a little more than just what you see. I sneak in a few scented ornaments or hang cinnamon sticks wrapped in ribbon. Pine-scented sticks or even dried orange slices tucked near the lights make the whole tree area smell like pure cozy winter.
- Pine or balsam sachets: Smell great and hide between branches.
- Cinnamon or clove bundles: Bring back memories of baking and festivity.
- Dried fruit: Looks sweet and rustic, with a soft hint of citrus.
These smells always remind my boys that Christmas is close, and every time they walk by, they get a hint of something warm and homey.
Table: Quick Ideas for Over-the-Top Accents
To make things easy, I pulled together my favorite finishing touches and what they add:
| Accent | Look/Feel | Kid-Friendly | Quick to Add | Adds Scent |
|---|---|---|---|---|
| Clip-on birds/animals | Whimsical, storybook | Yes | Yes | |
| Icicle ornaments/droplets | Shimmery, frozen | Yes | Yes | |
| Glitter picks/snowflake stems | Sparkly, full | With help | Yes | |
| Soft or sparkling ribbon | Flowing, snowy drifts | Yes | Yes | |
| Beaded/snowflake garlands | Playful, layered | Yes | Yes | |
| Mini bells/lanterns | Musical, cozy glow | Yes | Yes | |
| Scented bundles/orange slices | Rustic, festive | Yes | Yes | Yes |
Finishing touches matter so much, especially if your goal is to make your home feel magical and full of wonder. Adding even just one or two of these accents will turn your flocked Christmas tree into a true showstopper that has your family (and every guest) stopping to admire it again and again! The best part is, with a few special final touches, you’ll never blend in with a plain tree. Every detail adds to your Christmas story.
Conclusion
Decorating a flocked Christmas tree with my wild bunch always reminds me that these simple moments turn into our best family traditions. Trying new flocked Christmas tree decorating ideas is easier than it seems, and every tiny hand brings the snowy look to life in a way that feels both magical and real. When the tree goes up and the room starts to glow, I swear it brings out the same wonder I felt as a kid.
What matters most is the laughter, teamwork, and memories you build together. Whether you grab a clever base, toss on sparkle, or just let the kids have at the ornaments, you can create your own snow-dusted masterpiece. I’d love for you to share your family’s tips or favorite tree stories in the comments!
One more tip before you go: once your tree is all done, turn off the main lights, let the tree shine, and snap a photo of the kids in front with their biggest grins. You’ll catch that holiday magic every time. Thanks for joining me on this happy little winter adventure!
This post may contain affiliate links. Read the full disclosure here.