Ideas to Decorate a Table for Valentine’s Day on a Budget
Valentine’s Day at my house means three excited little boys, sticky fingers, and lots of giggles at the table! I love making holidays feel special for my family, but I definitely don’t have the time or budget for fancy decor. That’s why I’m always looking for simple ideas to decorate a table for valentine’s day that feel sweet and thoughtful, without a big price tag or a huge mess to clean up. If it can be done during nap time or between school pick-ups, it is my kind of project.
In this guide, I’ll share how I use what we already have at home, a few dollar store finds, and easy DIYs the kids can actually help with. The goal is quick, budget-friendly, and realistic for busy moms, not Pinterest-perfect setups that take all day. Think cheap basics used in creative ways, little personal touches from the kids, and a cozy table that feels special but still lived-in. I’ll walk you through planning the look, pulling pieces from around the house, adding the boys’ handmade details, and tying it all together so you can enjoy the night without stressing over the decor.

Start With A Simple Plan So You Do Not Overspend

Before I pull out a single plate, I like to stop and make a tiny plan. Nothing fancy, just a quick idea in my head of colors, mood, and what I already have. That one little step keeps my ideas to decorate a table for valentine’s day from turning into a big shopping trip I did not mean to take!
Pick One Color Story And Stick To It

The fastest way to make a table look pulled together is to choose a simple color story. I like to stick with 2 or 3 colors and repeat them. That alone makes everything feel intentional, even if the actual pieces are very basic.
I usually start by looking at what I already have. I check:
- Everyday plates
- Cloth or paper napkins
- Tablecloths or runners
- Placemats
- Serving bowls or trays
If I notice I have a white tablecloth and red napkins, then I call that my plan and build around it. No overthinking. The colors you already own are your best hint.
Here are a few easy Valentine color combos that feel sweet but still kid friendly:
- Red and white: Classic and bold. Great with basic white dishes and a pop of red hearts or ribbon.
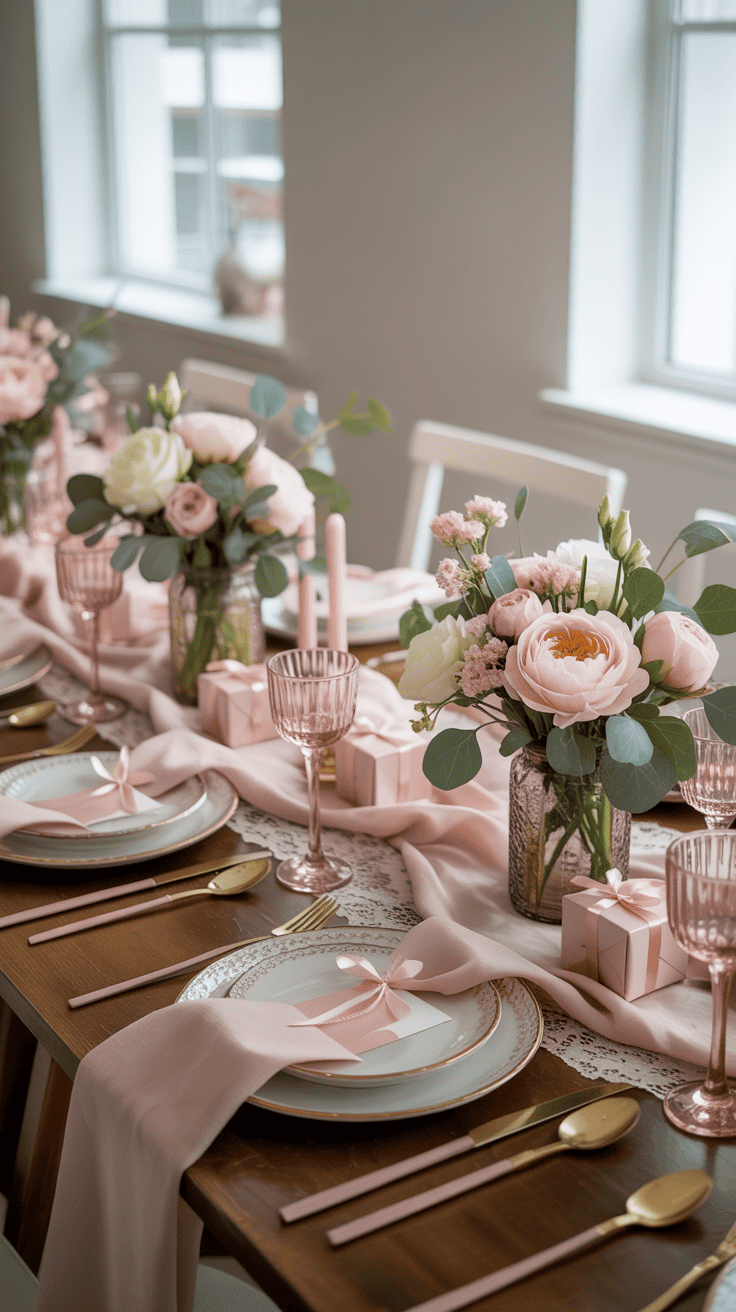
- Pink and white: Soft and cute. Perfect with little girls or toddlers who love pastel tones.
- Pink, red, and gold: A tiny bit fancy. I like this if I am using gold flatware or gold-rimmed glasses.
- Red, white, and light blue: Fun and fresh. Works really well if your everyday dishes are blue.
- Blush pink, white, and wood tones: Cozy and simple. This feels calm and still romantic.
Once I pick the colors, I try to repeat them across the table:
- Plates in one color, napkins in another
- A runner that matches the napkins
- Candles or flowers that match the main color
I also give myself permission to skip the full Valentine set at the store. I do not need plates with hearts, napkins with sayings, and cups with glitter. I get a tighter, prettier look when I use:
- Solid color napkins I already own
- A neutral tablecloth I use all year
- Striped or polka dot plates from another holiday
For example, I have red Christmas salad plates that look perfect on top of my white dinner plates for Valentine’s Day. I pair them with pink paper napkins and suddenly it looks like I shopped just for this. The boys do not care that the plates came from December, they just see fun colors and a special table.
When I stick to one color story, I need fewer items, which means less money and less clutter to store later. That is a win in my book.
Set A Small Budget And Shop The House First

After I pick my colors, I set a tiny budget. I usually tell myself, “You get 10 to 20 dollars, and that is it.” Having a clear number keeps me from tossing random things in my cart just because they are cute.
Before I go anywhere, I shop my house. I grab a little basket and do a quick walk-through. I check:
- Kitchen drawers for mason jars, extra napkins, and cookie cutters
- The pantry for cake stands, trays, or cupcake liners
- My decor bin for candles, small vases, and leftover ribbon
- The kids’ art pile for heart drawings and cute scribbles
- The holiday tubs for anything red, white, pink, or sparkly
Some of my favorite “found” items have been:
- Mason jars as vases or candle holders
- Glass bottles from sparkling water with a single flower in each
- Kids’ artwork cut into hearts and scattered down the runner
- Scrap ribbon tied around napkins or jars
- Leftover party balloons in coordinating colors
I also love reusing Christmas and birthday decor with a Valentine twist. It saves so much money and it feels good to use what we already own.
A few easy ideas:
- Fill a bowl with red ornaments and tuck in a few paper hearts
- String white twinkle lights down the center of the table with a strip of fabric as a runner
- Use a red Christmas runner with pink napkins for a new look
- Take white or gold birthday candles and group them on a tray for a soft glow
- Reuse confetti or streamers in pinks, reds, or metallic tones
Most of the magic comes from how you arrange things, not from buying more. Three mason jars with grocery store flowers in your chosen colors can look like a florist came by, if you line them up down the center. A stack of plain white plates with a little paper heart on top of each one feels special and costs almost nothing.
Once I see everything I already have, I usually only need 1 or 2 small things, like a pack of paper napkins or a bag of candy hearts. That fits right into my tiny budget and keeps the whole project stress free.
Decide The Mood: Romantic Dinner, Family Night, Or Kids’ Party

Before I set out a single fork, I like to pick the mood. This helps so much. It keeps me from mixing five different ideas and it saves me from impulse buys in the store.
I usually pick from three simple vibes:
Cozy romantic dinner for parents
This is the late-night version after the kids go to bed. I keep it calm and simple.- A few soft candles or tea lights on a tray
- Cloth napkins in my chosen color
- Maybe real glasses instead of our usual plastic cups
- A simple centerpiece, like one vase with flowers
I turn down the big overhead light and let the candles and maybe one lamp do the work. It feels special without much effort.
Fun family meal with everyone at the table
This is my usual, with three boys all talking at once and someone always asking for more bread. I want it to feel cute but still practical.- Matching plates and napkins in my color story, even if they are paper
- A low centerpiece so we can see each other
- Little treats at each plate, like a cookie or a chocolate heart wrapped in foil
I might add a simple place card with each child’s name and a short note on the back. It can be as easy as folding a scrap of cardstock and writing, “You are kind” or “You are silly and I love it.”
Playful kids’ party table
This is the high-energy version. Perfect if you invite cousins or neighbors.- Silly heart confetti scattered down the center
- Colorful paper straws in jars
- Stickers at each place setting
- A cupcake stand or snack board in the middle
I skip real candles here and stick to battery tea lights if I want a glow. I also pull out plastic tablecloths so clean up is easy.
When I decide the mood first, decorating gets much easier. I know if I should spend my budget on candles, paper goods, or fun extras for the kids. I also know which DIYs are worth my time. For example:
- Romantic mood: I might quickly tie ribbon around cloth napkins.
- Family night: I print or write simple love notes for each plate.
- Kids’ party: I let the kids punch or cut paper hearts for confetti.
That one tiny choice, the mood, guides every other decision and keeps the table cute, simple, and on budget.
Dress The Table With Cheap Basics That Look High End

This is my favorite part of planning ideas to decorate a table for valentine’s day, because this is where the “cheap but pretty” magic really happens. I am all about taking basic, everyday things and making them feel special with simple tweaks. No one at my table is checking price tags, they just see cozy, colorful, and fun.
When I think “high end,” I think of layers, texture, and a little repeat of color. You can get that same look at home with sheets, old blankets, regular dishes, and a few Valentine touches for just a few dollars.
Use What You Have For A Tablecloth Or Runner
I almost never buy a new tablecloth anymore. I walk through the house and grab what I already have. It is so much faster, and my boys never notice the difference. They just see a “fancy” table and get excited!
Here are a few real-life things I use all the time:
- A white sheet as a tablecloth
- A folded blanket or throw as a runner
- A pretty scarf laid down the center of the table
A white sheet works just like a store-bought cloth. I toss it over the table, smooth it with my hands, and let it hang. If it is a little big, I tuck the extra corners under. Done. If you have a fitted sheet, you can even pull it around the table and hide the edges.
A folded blanket or throw can look very cozy in winter. I fold mine into a long rectangle and run it down the middle. It adds texture and color, and it feels warm and inviting. A plaid blanket from Christmas can turn into a Valentine runner when I pair it with pink napkins.
Scarves are great if you want a softer, flowy look. I have used:
- A floral scarf
- A red or pink scarf from my closet
- A light, gauzy scarf layered over a white cloth
One of my favorite tricks is to mix textures. That is what makes it look “high end” without spending much. A few ideas:
- Lay a lace curtain over a solid sheet for a romantic feel
- Put a strip of burlap over a white cloth for a rustic look
- Use kraft paper on top of a cloth for a kid-friendly layer
For a family Valentine dinner with kids, I love using kraft paper or a roll of white paper as a runner. I tape it under the edges of the table so it stays put, then hand the boys crayons or washable markers. They draw hearts, write their names, and doodle silly faces. It keeps them busy while I finish dinner and becomes part of the decor.
The most important thing is to keep it simple. Do not stress over wrinkles, crooked lines, or tiny stains. This is a real home, not a hotel. I usually give everything a quick shake, smooth it with my hands, and move on. Once the plates, food, and candles are out, no one sees the little flaws.
Mix Everyday Dishes With One Cute Valentine Touch
You do not need a full Valentine dish set to make the table feel on-theme. I use my regular, everyday dishes and add one fun Valentine detail at each place setting. That one little thing pulls the whole table together.
Here are a few easy ways I layer:
- Plain white or solid plates with a small heart-shaped dessert plate on top
- A themed paper plate set on top of my everyday dinner plate
- A simple heart cut from colored paper and placed on each plate
If you like to keep things neutral, stick with white or solid plates on the bottom. Then add the fun piece on top. It might be:
- A red paper heart plate
- A pink salad plate from another holiday
- A heart-shaped bowl for dessert
I usually check the dollar store, Target Dollar Spot, or discount stores for small packs of Valentine plates or napkins. I skip the giant sets. I only buy enough for the people at my table, maybe plus one or two extras for snacks later. A pack of 8 dessert plates can last me a couple of years if I only use a few at a time.
If you do not want to buy special plates at all, you can still get the same look with paper hearts. I cut hearts from:
- Red or pink construction paper
- Leftover scrapbook paper
- Old kids’ paintings or drawings
I place one heart in the center of each plate. Sometimes I write a little word on each one, like “Loved,” “Brave,” or “Kind.” The boys always race to read their word, which is so sweet.
To save even more money, I often skip fancy glasses. I use:
- Glass jars as makeshift stemware
- Mugs for hot cocoa or milk
A row of matching jars with straws instantly looks styled. If you want it to feel more grown-up, tie a tiny piece of ribbon around each jar in your main color.
The secret that makes everything look polished is symmetry. I lay out each place setting the same way:
- Plate in the center
- Napkin either under or to the side
- Fork and spoon in the same spot for everyone
- Cup or jar above the plate
Even if the pieces are cheap, the table looks “finished” because it is balanced. It tricks the eye in the best way.
Fold Napkins And Add Simple Details For A Fancy Feel
Napkins are one of the easiest places to add a little “wow” without much cost. You do not need to learn any complicated fancy folds. Simple is enough, especially with kids at the table.
Here are a few napkin ideas that I use all the time:
Roll and tie with ribbon or yarn
I lay the napkin flat, roll it into a loose tube, then tie it in the center with:- A scrap of red ribbon
- Baker’s twine
- Even yarn or thin string
I tuck a tiny paper heart under the ribbon if I want a little extra color. It looks sweet and takes about 10 seconds per napkin. My boys love helping tie the knots and pull the ribbons tight.
Tuck a paper heart or small chocolate inside
I fold the napkin in half into a rectangle, then fold again to make a pocket. I tuck in:- A paper heart with their name
- A small wrapped chocolate
- A little lollipop
It feels like a mini surprise at each spot. Kids get so excited when they see that little treat waiting for them.
Place the napkin under the plate so it hangs off the edge
This one is the fastest. I put the napkin down first so part of it hangs over the table edge in front of the chair, then I set the plate on top. It adds color and makes the whole table look layered without any folding skills.
If money is tight, paper napkins are completely fine. They can still look nice if you:
- Stick to one or two solid colors
- Fold them neatly in half or into a simple rectangle
- Layer a printed napkin on top of a solid one
I use cloth napkins when I have them clean, and paper when I do not. No guilt. The kids honestly do not care, they care that the table feels special.
I also love letting the boys help with the napkin details. They can:
- Tie the ribbons
- Place the chocolates in each pocket
- Set the heart notes on top
They feel proud, and I feel like we created the table together. That happy energy is what makes the whole setup feel “fancy,” even when everything on the table is basic and budget friendly.
Create A Sweet Centerpiece With Dollar Store And DIY Finds
When I run out of ideas to decorate a table for valentine’s day, I always come back to simple centerpieces made with jars, candles, and things we already own. They are fast, cheap, and the boys can help, which is a big win in my book. You do not need fancy vases or expensive florals. A few glass jars, some candy, and a little light can turn the center of your table into something really sweet.
I like to think of the centerpiece as the “heart” of the table. If that part feels cozy and pulled together, the rest can be super simple. Paper plates, pasta for dinner, and a cute centerpiece still make the night feel special.
Most of what I use comes from the dollar store, my kitchen, or the kids’ art box. If I can set it up in 10 to 15 minutes while someone is asking for a snack, then it counts as a successful Valentine project around here!
Build A Heart Filled Centerpiece From Jars And Candles
My favorite fast centerpiece starts with one simple step. I grab 3 to 5 jars or mismatched glasses and line them up down the center of the table. They do not have to match. In fact, the mix of sizes and shapes makes it feel more relaxed and fun.
Then I “anchor” the whole row so it looks intentional. I set the jars on:
- A tray or baking sheet
- A wooden cutting board
- A folded strip of fabric or a scarf
That base pulls everything together and instantly looks more styled. If you only change one thing, do this step. It makes a big difference.
Now for the fun part, filling the jars. I like to mix a few different ideas so it feels full and interesting:
- Tea lights or candles in some jars
- Wrapped candy in others, like foil hearts or red-and-pink chocolates
- Paper hearts in a few, either loose or on sticks
On a kid-heavy night, I skip real flames. Little hands and open fire do not mix in my house. Here are my favorite safer options:
- LED tea lights tucked into jars for a soft glow
- Battery pillar candles in one or two larger jars
- Fairy lights coiled inside a big jar or bottle
Fairy lights in a clear jar look so magical. My boys always gasp when I turn them on, which cracks me up because it is such a simple trick.
I try hard to use what we already own before I buy anything. I look for:
- Pasta sauce jars washed and labels removed
- Old jam jars or baby food jars
- Short drinking glasses that have chipped rims (I just do not drink from them)
If I want more color, I drop a handful of paper hearts into the bottom of a jar before I add a candle or fairy lights. Even scrap printer paper or the kids’ old drawings work. I just cut them into hearts and call it good.
In the end, you get a centerpiece that feels soft, glowing, and full of hearts, and it probably cost less than a fancy coffee.
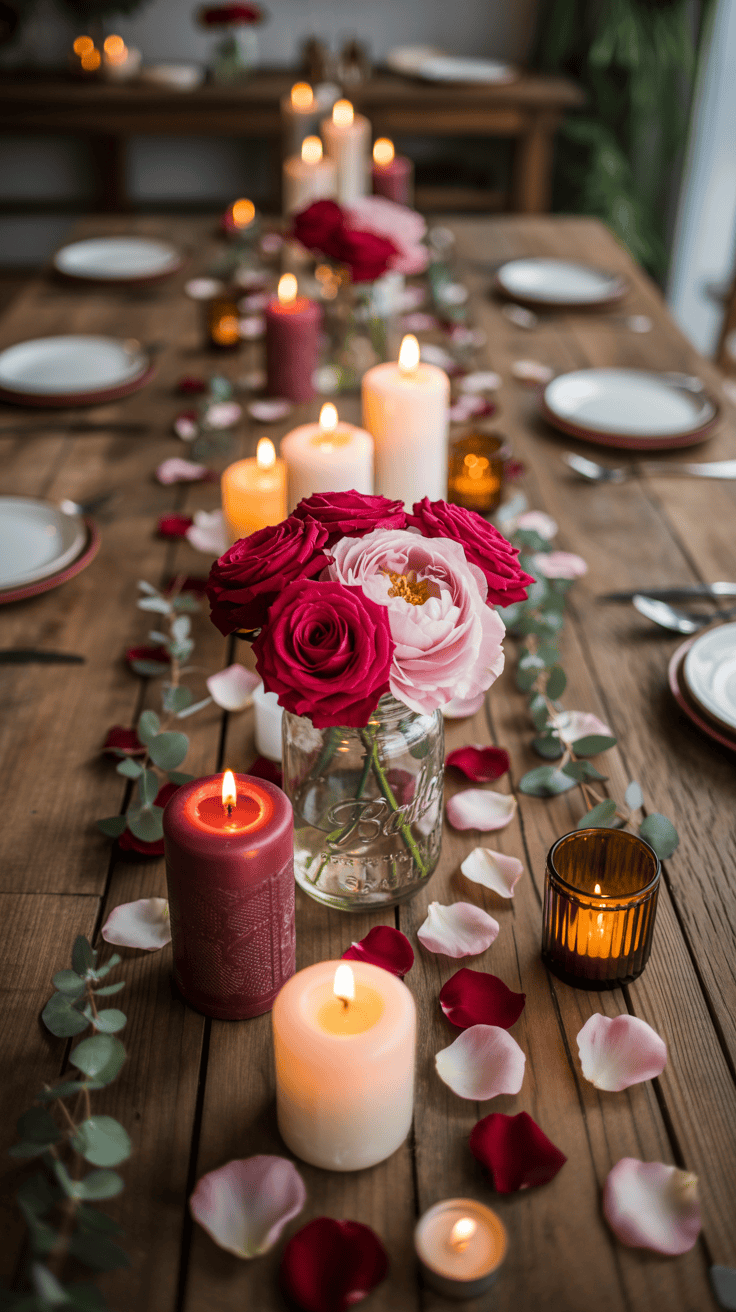
Use Grocery Store Flowers In Clever, Budget Friendly Ways
When I want the table to feel a little extra special, I grab one small bunch of flowers from the grocery store. Just one. Not three, not five. One simple bunch, then I stretch it across the whole table.
The trick is to cut the stems short. I trim them so they fit in small jars or glasses instead of one tall vase. Short flowers feel more casual and make it easy to see everyone across the table. I usually end up with 3 to 5 little “mini bouquets.”
Here is how I stretch that one bunch:
- Cut all the stems at different lengths, mostly short.
- Spread them out in several small jars, glasses, or tiny vases.
- Mix in greenery from the yard, like clippings from bushes or herbs.
A few sprigs of rosemary or eucalyptus smell amazing and fill out each jar. If I do not have greenery outside, I cut a couple of leaves from a houseplant and tuck them in. No one at my table is inspecting the plant names.
For a cute Valentine twist, I also like to add paper hearts on sticks. I cut hearts from red or pink paper, tape them to wooden skewers or toothpicks, then poke them into the jars with the flowers. It looks so fun, and the kids can help make the hearts.
If flowers are not in the budget, color can still show up in the middle of the table. I use:
- Red or pink apples piled in a clear bowl or on a cake stand
- Strawberries in a white bowl
- Grapes in a glass dish
Fruit gives you that same pop of red and pink, and you can eat it later. No waste, which I love.
When I use jars or vases, I almost always stick to odd numbers. Three, five, or seven pieces down the center feel more natural and stylish than an even number. It is such a small detail, but it really helps the table look pulled together without any extra cost.
Make Kid Friendly DIY Centerpieces With Paper And Crayons

On the nights when my boys want to be part of the decorating, we go full DIY with paper, crayons, and tape. The center of the table turns into a little love note zone, and they are so proud of it.
One easy idea is a jar filled with paper hearts. I cut a few, they cut a few, and it all goes into one big glass jar or vase. Sometimes we write tiny notes on the hearts, like “I love you because you make me laugh,” or “You are a great builder.” Then I just set that jar in the middle of the table. Simple and very sweet.
Another favorite is a tiny “love” banner hanging across two jars. I do it like this:
- Cut small triangles or hearts from paper.
- Write one letter on each piece to spell “LOVE” or “XOXO.”
- Tape or glue the pieces to a string or yarn.
- Tie or tape each end to a jar, cup, or small vase.
It looks like a mini party stretched across the centerpiece, and the kids love seeing their letters on display.
If I want a little height without buying anything, I grab a stack of books. I wrap one or two in red or pink paper, then tie a ribbon around the stack like a present. A jar of hearts or a small vase of flowers on top finishes it off. It is such an easy way to lift the centerpiece and make it feel styled.
One of my personal traditions is letting my boys draw little love notes or pictures on paper hearts. They draw stick figure families, scribbly hearts, or silly faces. Then we:
- Clip the hearts to a string with clothespins and stretch it across the table or the front of the centerpiece, or
- Tape the hearts to wooden skewers or lollipop sticks and stand them in jars like little “love bouquets.”
The hearts are never perfect. The lines are wobbly, the colors are wild, and sometimes the words are spelled in very creative ways. That is exactly what I love about it. Those tiny imperfections make the table feel personal and real, not staged.
At the end of the night, I usually save a few of their favorite hearts in a folder. The rest can be recycled without guilt. The memories are in the fun we had while we set the table together, not in how “Pinterest worthy” the centerpiece looked. And honestly, that is the best part.
Add Personal Touches That Make The Table Feel Extra Special
The sweetest ideas to decorate a table for valentine’s day are usually the personal ones. Fancy plates are nice, but those little “this is for YOU” touches are what my boys remember and talk about later. I like to think of this part as the heart of the whole setup, where the decor turns into real memories and tiny keepsakes you can hold onto.
Create Easy DIY Place Cards And Love Notes
DIY place cards are one of my favorite simple projects, because they cost almost nothing and feel so thoughtful. I usually do these during nap time or while the boys are busy with a snack.
I start with whatever sturdy paper I can find. A few ideas that work really well:
- Plain white or colored cardstock
- Scrapbook paper with fun patterns
- Cereal boxes covered with pretty paper or wrapping paper
I cut simple rectangles or hearts, nothing fancy. For rectangles, I either leave them flat or fold them into little tents so they stand up. For hearts, I just cut by hand. They are never perfect, but that actually makes them cuter and more personal.
On the front, I write each family member’s name in my neatest handwriting. Sometimes I use a black pen, sometimes I let myself have fun with colored markers. Then on the back, I write one short reason I love that person. Just one line. Short and sweet.
Some examples I have used:
- “You give the best hugs.”
- “You make everyone laugh at the table.”
- “You are so kind to your brothers.”
- “You always help me in the kitchen.”
I place the card right on their plate or propped against their cup. The boys flip them over so fast to read the back. It is so simple, but they light up, every time.
If you have little kids, this is a great place to let them help. You can:
- Give them a stack of blank place cards
- Put out stickers, crayons, or washable markers
- Let them cover the edges with hearts, stars, or scribbles
You can write the names and love notes, and they can handle the decorating. It looks adorable and keeps them busy for a few minutes, which is always a win.
One more thing I love about these place cards is that they make sweet keepsakes. At the end of dinner, I tuck them into a small memory box, a folder, or even a big Ziploc labeled with the year. It is such a joy to look back and see what I wrote for them when they were tiny, and how their drawings and stickers looked that year.
These are not fancy printables, just simple paper and honest words. That is what makes them feel special.
Use Candy And Snacks As Cute, Edible Decor
Edible decor is my secret trick when I am short on time. It fills the table, looks festive, and then it gets eaten, so I do not have to store anything later. Perfect for a busy mom life.
I usually start with one or two types of candy and one snack that is not pure sugar. A few easy ideas:
- Small bowls of conversation hearts in the center of the table
- Chocolate kisses scattered around the centerpiece like confetti
- Heart-shaped cookies stacked on a cake stand or pretty plate
If sugar is a concern, or if your kids are like mine and turn into wild animals after too much candy, you can still keep the table fun. I like to mix in:
- Mini marshmallows in cute cups
- Pretzels in heart-themed bowls or silicone cupcake liners
- Popcorn in red or pink cups
That way, they get the fun Valentine look without a giant sugar crash before bedtime.
I try to think about portion control as part of the decor. Instead of dumping a whole bag of candy on the table, I:
- Use smaller bowls
- Mix candy with other snacks
- Limit the candy to one or two little “zones” on the table
One of my favorite traditions is giving each of my boys a tiny goodie bag at their seat. Nothing big or expensive. I use small clear bags or snack-size Ziplocks, and I add:
- A few conversation hearts
- A couple of chocolate kisses or small wrapped chocolates
- A few mini marshmallows, pretzels, or popcorn pieces
Then I slip in a tiny note that says something like, “Happy Valentine’s, I love being your mom,” or “You are my favorite 7-year-old.” I tie the bag with ribbon or a twist tie and set it on their plate or by their glass.
This little goodie bag works as:
- Decor, because it adds color and texture to each place setting
- A favor, because they get to open and enjoy it
- A sweet message, because there is a note tucked inside
They always ask, “Is this for me?” even though they know the answer. Those small treats and words make the whole dinner feel like a party.
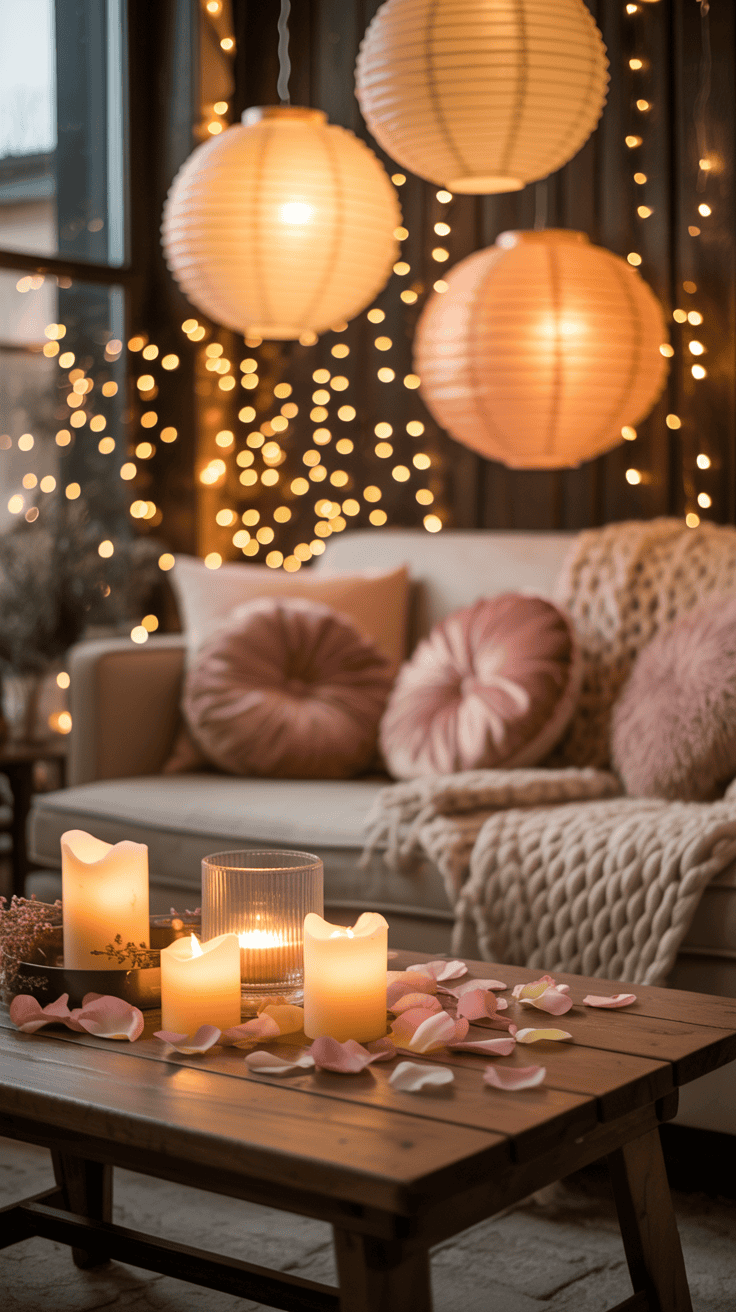
Set The Mood With Light, Music, And Simple Extras
Once the table is set, I like to play with the mood a bit. This part is free or very cheap, and it changes the whole feel of the room.
First, I deal with the lighting. I almost always turn off the bright overhead light and rely on softer light instead. Even if my dining room is a mess around the edges, softer light makes it feel cozy and magical.
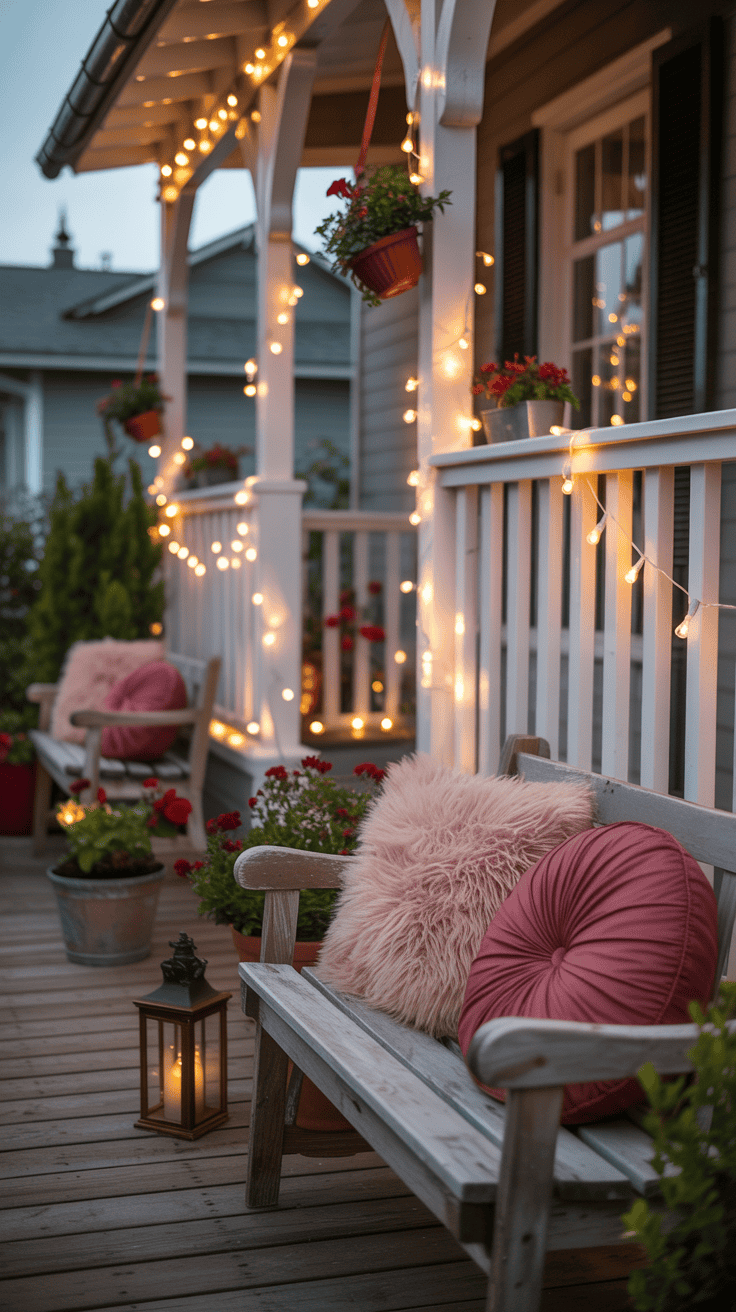
Some easy lighting ideas:
- Lamps turned on in the corners of the room
- A strand of white string lights down the center of the table
- A few candles or LED tea lights grouped in jars
Just that simple change makes even our everyday table feel like a special date with the kids. Real candles are lovely for a parent-only dinner. When the boys are at the table, I usually stick to battery candles for safety. They still give that sweet flicker.
Next, I like to add soft music in the background. Nothing loud, just a quiet playlist. I mix:
- A few classic love songs
- Some of our favorite family songs
- Maybe one or two songs the kids love to sing along to
The music helps everyone slow down a bit. My boys stay at the table longer when the room feels calm and fun like that.
For extra little touches, I keep it very simple and use what we have:
- Paper confetti, cut from scrap paper or old drawings, lightly sprinkled down the center
- Heart-shaped cookie cutters arranged on the table like little sculptures or placed around candles
- Ribbons or bows tied to the backs of chairs or around jar vases
I do not go crazy with confetti, because I do not want to be sweeping it up for three days. Just a small handful scattered down the runner is enough to hint at a party.
One important thing I remind myself every year: I do not need to clean the whole house for this. I focus on the table area. I clear just the surfaces we will see, throw clutter into a basket if I have to, wipe the table, and style that one spot.
A pretty table in the middle of a lived-in house still feels special. The kids will remember the place cards, the twinkle lights, the little goodie bags, and the music. They will not remember if the laundry basket was sitting in the hallway.
Personal touches are what turn simple ideas into real memories. A name card with kind words, a tiny bag of treats, and soft lights can turn a normal Tuesday night dinner into a Valentine moment your kids will talk about for years.
Keep It Stress Free: Involve The Kids And Use What You Have Next Year
By this point in the planning, you probably have plenty of ideas to decorate a table for valentine’s day, but I promise, it does not have to turn into a huge project. I like to treat decorating as a quick family moment, not a long, fussy task. The boys get to help, I keep my sanity, and we all actually enjoy sitting down at the table when it is done.
Turn Decorating Into A Quick Family Activity
On Valentine’s Day, I usually turn decorating into a little 30-minute team job with my three boys. They love it, and I love that it is fast and simple.
I give each of them one clear job so no one is fighting over who does what.
Here is how it usually looks at our house:
- Boy #1: Plates and napkins
He sets out the plates at each seat, then adds napkins. If they are a little crooked, that is fine. I just remind him, “One plate, one napkin, one cup,” and let him go. - Boy #2: Centerpieces
He helps me carry jars, candles, or flowers to the table. I might place the more fragile pieces myself first, then let him arrange the safer things. For example, I set the main vase, then he adds jars with paper hearts or small bowls of candy. - Boy #3: Paper hearts and “sprinkles”
This one loves anything that feels like confetti. I hand him a small pile of paper hearts and tell him to “sprinkle love” down the middle of the table. Sometimes they end up in funny little piles, and that is okay.
I try to keep our whole decorating time under 30 to 45 minutes. After that, kids get tired, hungry, or cranky, and the fun disappears fast. If I know I want candles or breakable pieces on the table, I quietly pre-set the fragile items before I invite the boys to help. Then most of what they handle is safe and kid-proof.
I also have to remind myself to let go of perfect symmetry when the kids help. Plates might not be in a perfect line. Paper hearts might be heavy on one side. Cups might not match. None of that matters in the moment.
What I really want is:
- Their fingerprints on the night
- Laughter while we set things out
- The little “I helped!” glow on their faces
When we sit down to eat and they proudly say, “I did the hearts!” or “I set the plates!”, that is worth way more than any Pinterest-perfect setup. The table feels like ours, not just mine.
Store A Small “Valentine Box” So You Spend Less Next Year
Once the fun is over and the table is cleared, I try to think ahead a little. Future me is always grateful when I take five extra minutes to pack things well.
I keep one small “Valentine box” in our storage area. Nothing huge, just a shoebox-size bin or a small tote. After dinner, I sort what can be used again and tuck it all inside:
- Leftover napkins that are not ripped or stained
- Reusable banners or garlands
- Plastic or fabric table runners
- Heart cookie cutters
- Little jars, votives, and battery candles
- Any sweet homemade pieces the boys made that I want to keep
I also grab a scrap of paper and write a short note to myself and tuck it in the box. Something like:
- “Kids loved the paper heart confetti, do that again.”
- “Too many sweets, skip the candy bowls next year.”
- “Napkin color worked great, do red again with white plates.”
The note takes one minute, but it saves me from repeating the same mistakes or overbuying next time.
Every year, about a week before Valentine’s Day, I pull out that little box and spread everything on the table. I look at what we already have, then I decide if we really need anything else. Most years, I only buy one or two small new items, like:
- A fresh pack of pretty napkins
- One new banner
- A small bunch of flowers or candy
This tiny habit has helped me spend less over time and keep our decor simple and familiar for the boys. I am not starting from scratch each year, I am building on what we already love.
The best part is how effortless it feels. I open the box, remember what worked, let the kids help set it all out again, and our table is Valentine-ready in no time.

Conclusion
When I zoom out and look at all these ideas to decorate a table for valentine’s day, it really comes back to a few simple things. I start with a small plan and budget, shop my own house, then dress the table with cheap basics that still feel pretty. A sheet as a tablecloth, a few jars pulled from the pantry, and a tiny splash of red or pink go a long way.
From there, I keep the centerpiece easy and stress free. Jars with candles, grocery store flowers, or even a bowl of fruit can become the heart of the table. The magic happens when I add those personal touches from the kids, like wobbly paper hearts, handwritten place cards, and little notes saying what we love about each other. Those details are the real decor.
I remind myself that I do not need a big budget or a spotless house to make Valentine’s feel special. Frozen pizza or takeout on a sweet table still feels like a celebration! My best advice is to pick one or two ideas to try this year, not all of them, and enjoy the giggles, the crumbs, and the memories more than the decor.
This post may contain affiliate links. Read the full disclosure here.