Red and Pink Valentines Day Nails That Pop in Every Photo
As a busy mom of three loud, sticky, wild little boys, my nails are one of the few things that still feel like “me”, so I get way too excited about red and pink valentines day nails every year. I love knowing that when we snap a quick selfie, a sweet classroom party photo, or a rare date-night picture, my nails look cute instead of chipped and sad. The trick is finding designs that are fun and a little flirty, but still practical for grabbing snacks, wiping faces, and opening a hundred juice boxes a day.
In this post, I’m sharing nail ideas that actually look good in real life and in photos, not just on super-edited Pinterest hands. You’ll see simple options you can swipe on in five minutes during nap time, plus a few “treat yourself” ideas if you’re heading to the salon. I’ve got ideas for short mom-nails, longer nails, press-ons, and even budget-friendly polish combos that still feel special.
Whether you’re snapping pics at the class party, doing a quick mirror selfie, or holding hands at dinner, I want your nails to pop without a ton of effort. Think easy hearts, soft pinks, bold reds, and little details that stand out when you grab your coffee or hold your kiddo’s hand. Grab your favorite polish (or that pile of random bottles under the sink), and let’s pick a look that feels fun, flattering, and actually doable for real mom life!
How to Pick Red and Pink Valentine’s Day Nails That Photograph Beautifully
When I plan my red and pink valentines day nails, I always think about how they will look in photos, not just in my kitchen light or under the store bulbs. The right color and design can make your hands look soft, polished, and put together, even if you are holding a half-eaten snack and a crumpled school paper at the same time. A few smart choices with shade, contrast, and nail shape make a huge difference.
Choose the Right Shades of Red and Pink for Your Skin Tone
You do not need a color theory class to pick pretty reds and pinks that flatter your skin. You just need a few simple tricks.
For fair skin, I like:
- Blue-red shades, like a classic cherry lipstick. They look bold but still soft in photos.
- Soft baby pink for a sweet, gentle look. If it feels too light, I add a second coat so it does not disappear on camera.
For medium or olive skin, try:
- Cherry red or true red, which really pops without looking too dark.
- Dusty rose that has a tiny bit of brown in it. It shows up better in pictures than a super pale pink.
For deep skin tones, rich colors shine:
- Berry pink and raspberry shades look gorgeous and bright in photos.
- A deep, glossy red that still reads red, not black, when you snap a quick selfie.
Some reds can look almost brown or black in low light, and very pale pinks can wash out so they just look like bare nails. I like to paint one nail, hold my hand up to the window, then take a fast phone photo. If the color still looks bright and clear on my screen, I know it will look pretty on Valentine pictures too.
Why Contrast and Simple Designs Look Better in Photos
Fancy nail art is fun to scroll through, but tiny details often disappear in real life pictures. Our phones try to focus on faces, kids, and movement, so small designs get blurry or look like random dots.
High-contrast, simple designs show up much better. Think:
- Red hearts on a soft pink base
- Pink tips on a red French manicure
- Color-block nails with half red, half pink
These looks stand out even when:
- You snap a rushed picture in the school parking lot.
- Your bathroom light is a little yellow.
- A kid bumps your arm while you take a mirror selfie. Happens to me daily.
Tiny hearts, thin lines, or very detailed art can look amazing in person, but in photos they can blend together. I like to ask myself, “Can I see the shape from across the room?” If I can, it will probably show up well in a photo too.
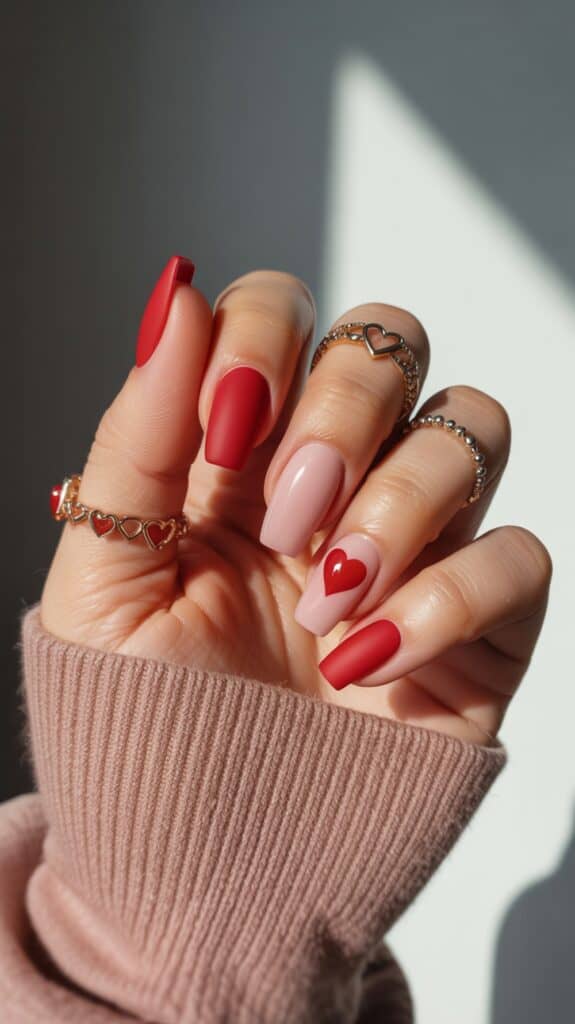
Some simple, bold ideas that really pop:
- Pink nails with one red accent nail on each hand.
- Classic red nails with one big white heart on the ring finger.
- Pink base with chunky red French tips for a playful, modern feel.
Simple does not mean boring. It just means your pretty nails will actually be visible in the picture instead of hiding in the background.
Photo Friendly Nail Length and Shape for Everyday Mom Life
As a mom of three boys, my nails live a wild life. They go from bath time to Lego building to snack duty and back again. I want them to look cute for photos, but they also have to survive dishes, sports, and buckling car seats.
I have found a few shapes that look great in pictures and still feel practical:
- Short square: Clean, modern, and perfect for bold red or pink. It makes colors look strong and tidy.
- Short squoval (square with slightly rounded edges): My personal favorite. It looks soft in photos and does not catch on clothes or backpacks.
- Almond: A little more glam, but still wearable if you keep them short to medium. Almond nails make your fingers look longer and more graceful in pictures.
Super long nails can look stunning, but for me they last about five minutes before someone needs help opening a juice pouch or zipping a coat. If you love long nails and they work for you, go for it. If they make you nervous around your toddler’s face, keep them shorter and enjoy the freedom.
The main goal is this: you should feel confident and comfortable. Trendy shapes online might not fit your life with kids, and that is okay. A pretty short almond, a neat squoval, or a tiny square nail with glossy red or soft pink polish can look just as special in photos.
When you feel good about your nails, it shows in every picture, whether you are dressed up for date night or standing in your kitchen in leggings, holding a heart-shaped cookie and a wiggly little boy.
Cute Red and Pink Valentine’s Day Nail Ideas That Pop on Camera

This is the part I get the most excited about, the fun ideas you can actually wear and photograph without feeling overdone. When I plan my red and pink valentines day nails, I think about quick selfies, messy kitchen photos, and little hands grabbing mine, not just perfect salon shots.
I like designs that are simple to understand at a glance, but still feel playful and special for Valentine’s. Clean shapes, strong color, and a little sparkle go a long way, especially when you are snapping photos on the go with kids.
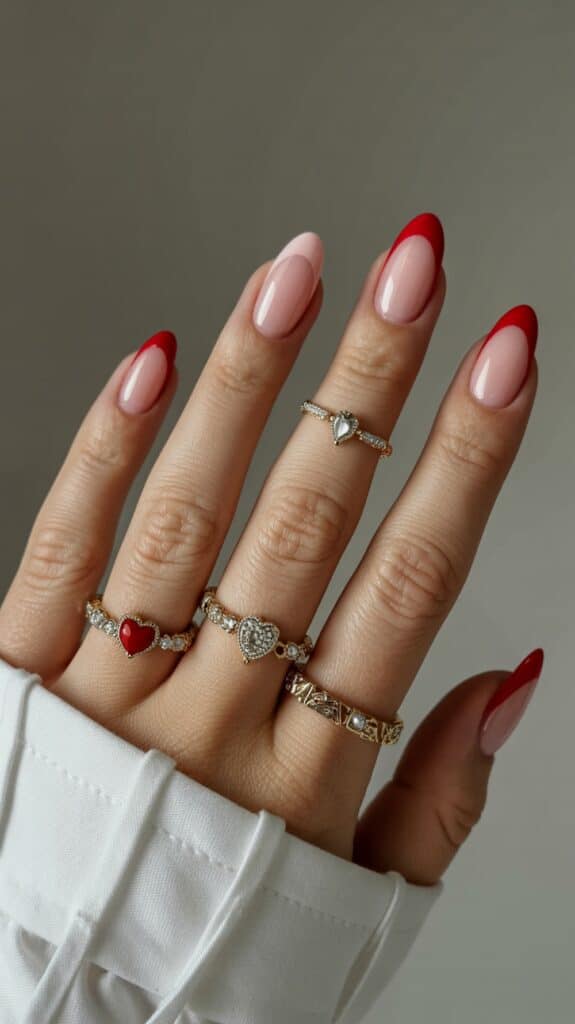
Classic Red and Pink French Tips That Look Chic in Every Selfie
French tips are my safe place when I want something that always looks polished. They are clean, bright, and easy to photograph, even when my background is a pile of toys and snack wrappers.
Some of my favorite Valentine French tip ideas are:
- Red tips on a soft pink base: This is classic and bold. The soft pink makes your hands look smooth, and the red line at the tip jumps out in photos.
- Pink tips with one red accent nail: Light pink tips on a sheer or nude base look sweet, then one full red nail on each hand gives that holiday pop.
- Alternating red and pink tips: One finger with a red tip, the next with a pink tip. It looks playful but still tidy, especially on short nails.
French tips photograph well because the line at the tip gives a clear shape to your nails. Your phone camera picks up that bright edge, so your hands do not blend into the background. Even in a busy picture, the tips frame your fingers and make them look neat.
The best part for mom life, these looks work beautifully on short nails. You do not need long, dramatic shapes. Short square or squoval nails with a strong red or pink tip look chic in close-ups and feel practical when you are wrestling a stroller or peeling fruit snacks.
You can also do them at home:
- Use French tip guides or nail tape to get a straight line.
- Paint the tip, peel the guide, then seal with top coat.
- If you are shaky, start with a soft pink base, then paint the tip thicker. You can always clean the line with a tiny brush and acetone.
My quick mom hack for getting both hands done without losing my mind, I do my dominant hand first, very slowly, while the kids are busy. I rest my painting hand flat on a table and keep my elbow still. Once that hand is finished and dry, I tackle the easier hand. If I mess up a line, I tap a little polish remover on a flat brush or even the corner of a makeup sponge and gently swipe the edge straight. No full re-do, no meltdown.
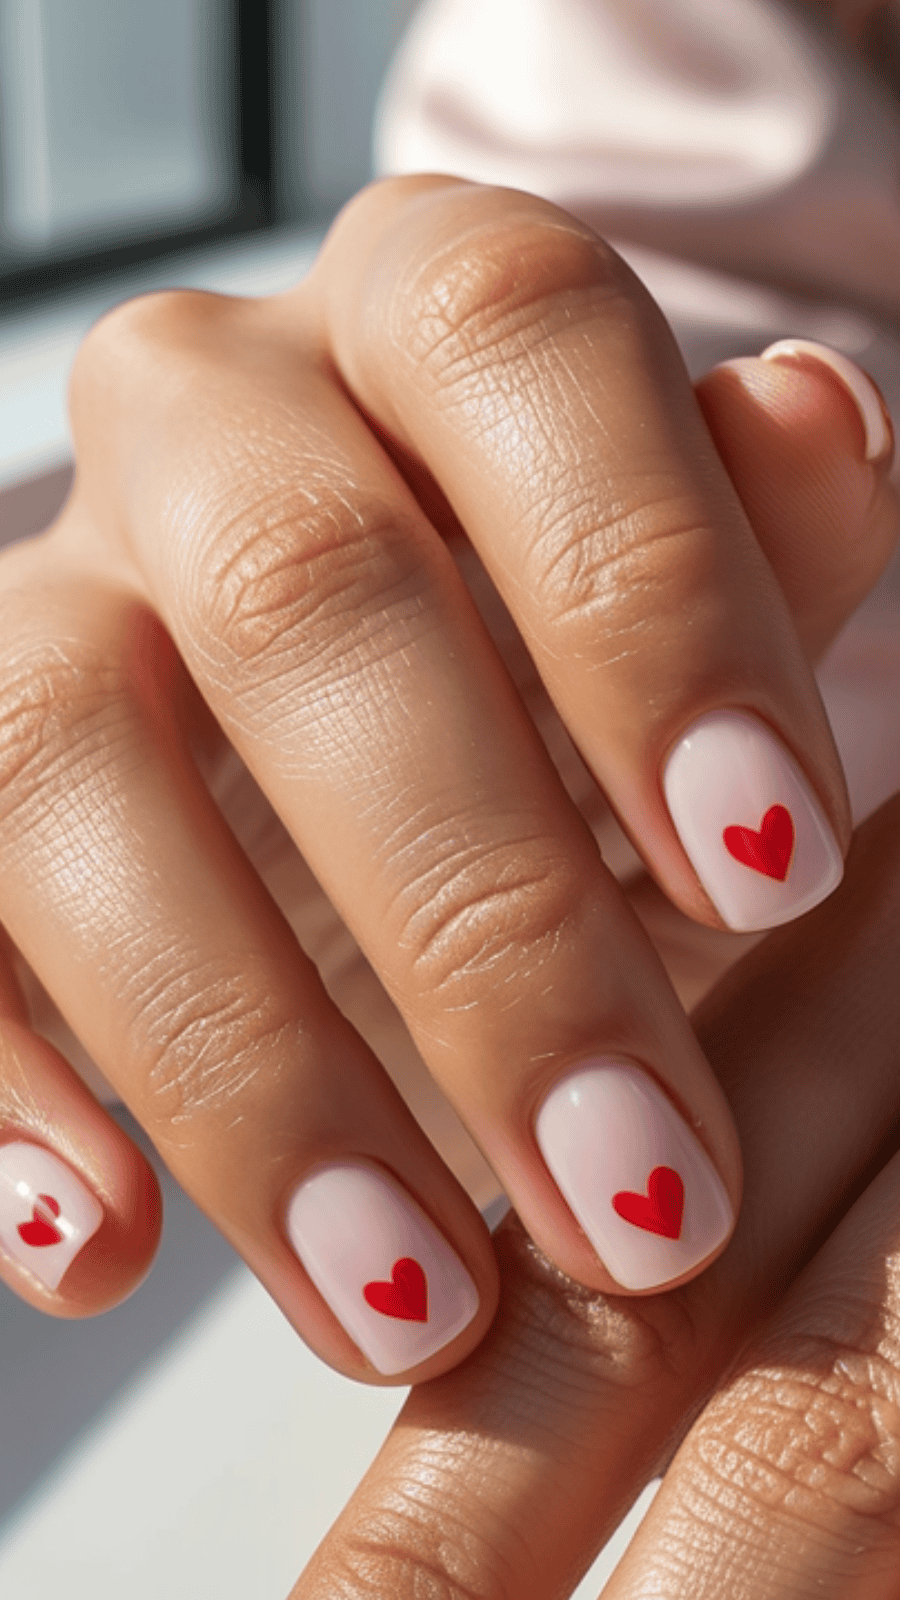
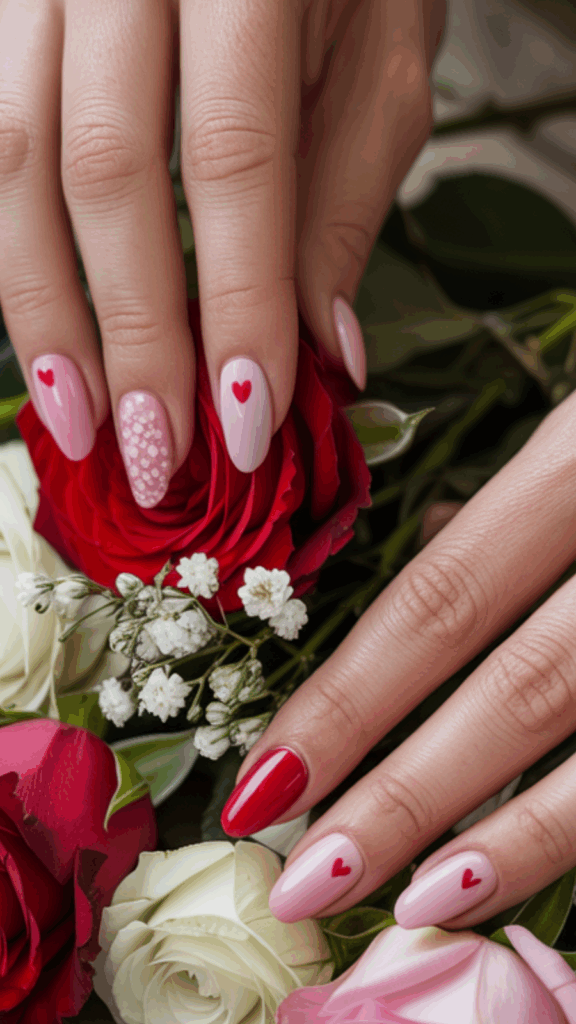
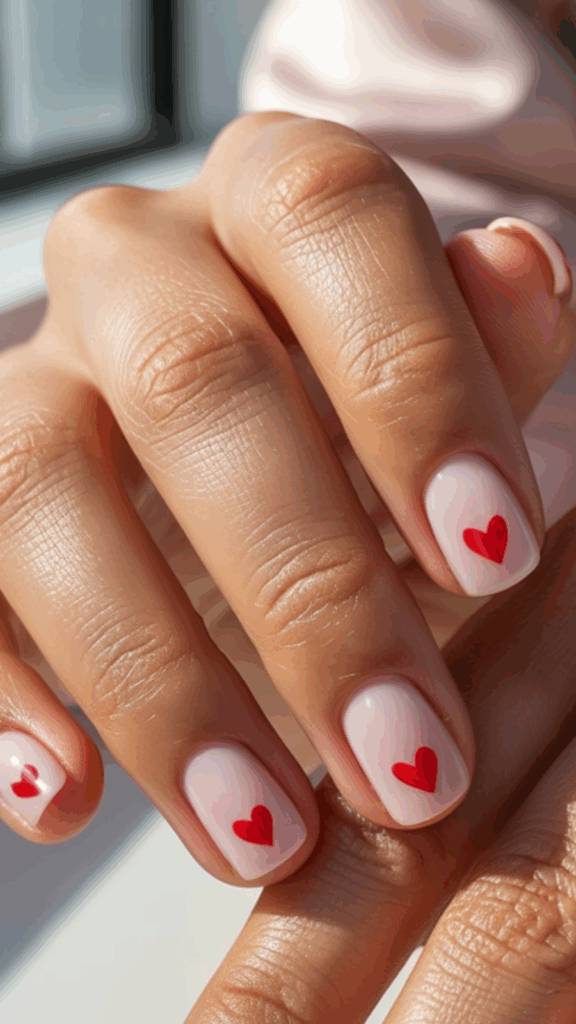
Heart Accent Nails for Sweet, Simple Valentine’s Photos
Heart accent nails are my go-to when I want something cute that does not take forever. I love that I can have one or two special nails, then keep the rest solid and quick.
A few easy heart ideas:
- Tiny red hearts on a pink base: Soft pink on every nail, then one or two nails with tiny red hearts scattered at the tip or near the cuticle.
- Pink hearts on a red base: Bold red nails with one or two pink hearts on the ring finger feel sweet and strong at the same time.
- One statement heart: A single, centered heart at the cuticle or on the tip of one nail can look very chic in close-up photos.
Accent nails are perfect for moms because you are not trying to paint tiny designs on all ten fingers while kids ask for snacks. You get the fun of nail art with only a little extra time.
Hearts also frame beautifully in photos:
- Holding a coffee cup or travel mug, the heart nail faces outward.
- Grabbing kids’ Valentine crafts or cards, the heart peeks out in every shot.
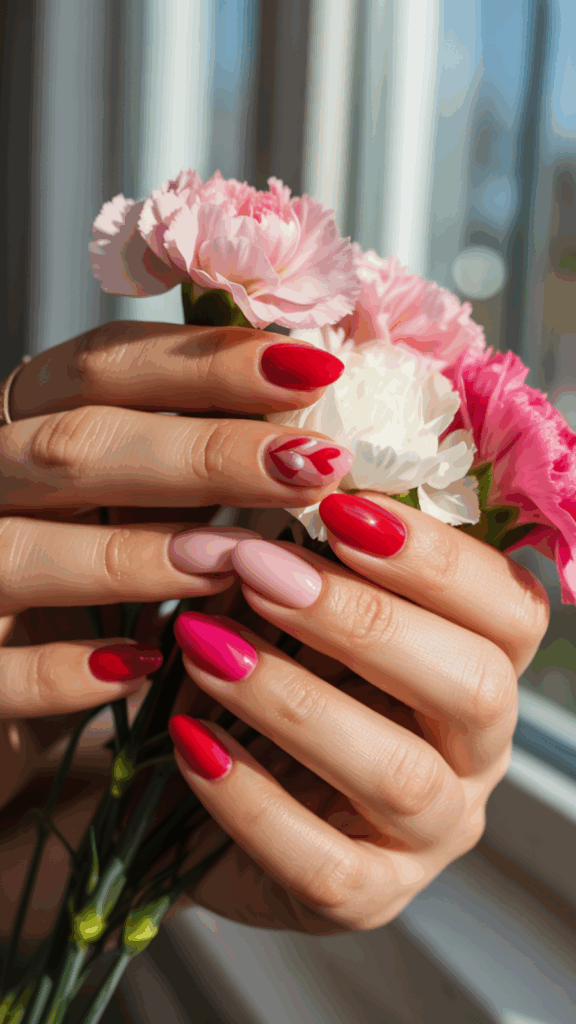
- Holding a small bouquet or even a crumpled paper flower from school, the heart pulls focus right where you want it.
For easy DIY hearts, I like:
- Dotting tools: Make two dots side by side, then pull them down to a point for a heart.
- Toothpicks or bobby pins: Use the rounded end to dot, then shape gently.
- Stickers or decals: Stick a tiny heart on top of dry polish, press it down, and seal it with top coat. Zero art skills needed.
If I am short on time, I paint all my nails pink, add one red heart sticker to each ring finger, and call it done. It still feels special when I see my hands in pictures with the boys.
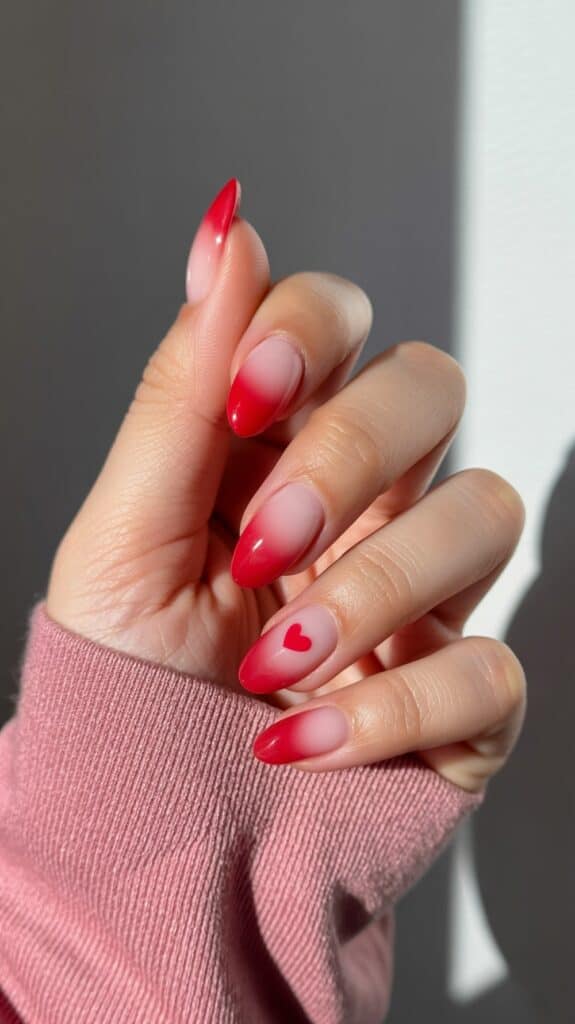
Ombre and Gradient Red and Pink Nails That Glow on Camera
Ombre or gradient nails sound fancy, but they are just colors that fade into each other instead of a harsh line. Think of it like a sunset on your nails, where one color slowly turns into another.
For Valentine’s, I love:
- Red fading into pink: Deep red at the tip that fades into soft pink near the cuticle. It looks bold at the edge but gentle near your skin.
- Blush base fading into deep red tips: This is gorgeous in photos. Your nails look soft near the cuticle, then rich and strong at the tip.
Gradients look great on camera because they catch the light and add depth. Your nails do not look flat or blocky. The fade gives a little shadow and highlight, so even quick photos have a touch of dimension.
If you like salon visits, you can ask for:
- Gel ombre: Smooth and glossy, with a seamless fade.
- Dip powder ombre: Very durable, helpful if you are constantly washing dishes or bathing kids.
At home, the sponge method works well:
- Paint a light base color and let it dry.
- On a small makeup sponge, paint a stripe of pink and a stripe of red right beside it.
- Dab the sponge on your nail, moving slightly up and down to blend.
- Clean your skin, then finish with a good top coat.
It is not perfect the first time, but once you put on top coat, the blend softens and looks much smoother.
I like pairing ombre nails with:
- Chunky knit sweaters, so the fade peeks out when I hold my coffee.
- Soft neutral tops, where the red and pink become the “accessory” in the picture.
- Valentine tees or dresses for the kids, so when we all pile into a photo, my nails tie the colors together without much effort.
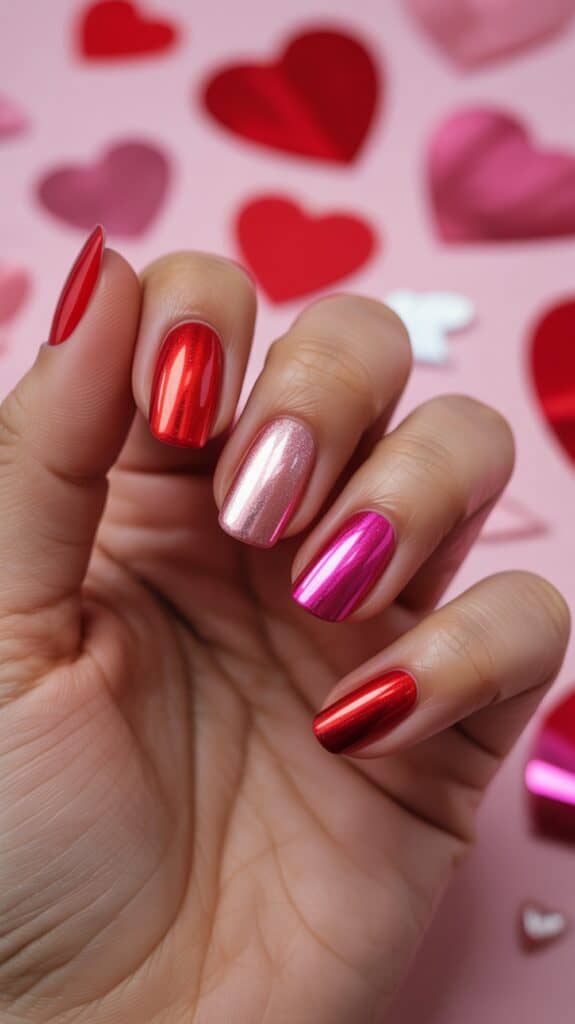
Glitter, Chrome, and Shimmer Ideas That Sparkle in Pictures

A little sparkle makes Valentine nails feel party-ready, but I try not to go full disco ball. On camera, a small amount of shine can catch the light and look magical, while too much chunky glitter can look clumpy or harsh.
Some easy ways to add just enough sparkle:
- Glitter tips: Red or pink nails with a thin line of glitter only on the tips. Think French manicure, but with sparkle instead of solid color.
- One chrome accent nail: All red or pink nails, then one metallic or chrome nail on each hand for a fun twist.
- Thin shimmer stripe: If you are wearing both red and pink, add a skinny shimmer stripe where the two colors meet. It gives a clean “divider” line that looks beautiful in close-ups.
I try to skip super chunky glitter on every nail, because it can look bumpy in photos and feel rough when I am washing little hands or changing clothes. Finer glitter, shimmer polishes, or a single chrome nail usually look smoother and more polished.
For the kids, sparkle can be a big hit too, even with boys. My boys think:
- A tiny glitter heart on one thumb is “cool” and “like superhero armor”.
- A shimmery accent nail on their pointer finger is fun when they point at things in pictures.
If they want in on it, I pick a clear base with a bit of shimmer or a sheer glitter. It feels special, but it comes off quickly when they are over it.
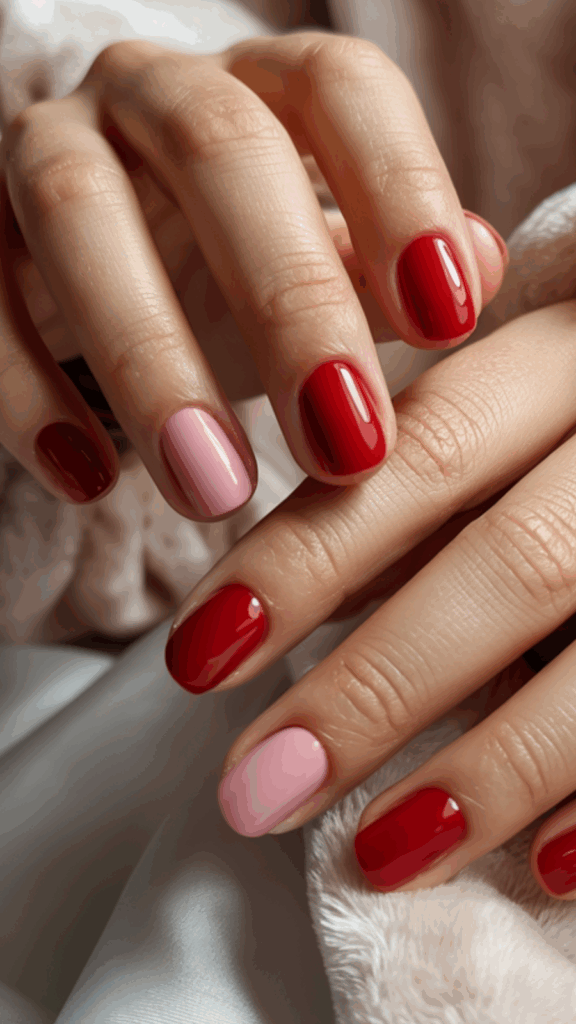
Minimalist Red and Pink Nail Looks for Low Maintenance Moms
Sometimes I have big nail plans, then life happens. On those weeks, I go straight to very simple, minimalist red and pink looks that still show up beautifully in pictures.
Easy ideas when you have almost no time:
- Solid red with one pink nail on each hand. It looks planned, but takes the same effort as painting them all red.
- All pink with one red heart on a ring finger or thumb. Sweet, simple, and quick.
- Alternating red and pink nails. Paint one red, the next pink, and repeat. No art skills needed.
Solid colors are so underrated. Clean, glossy red or pink looks bright and strong in photos, even with no designs at all. Your nails act like little color blocks that frame your hands when you hold your kids, your coffee, or your Valentine treats.
If you feel “not crafty” or nervous about nail art, start here. You do not have to be good at designs to have pretty nails. A smooth coat of polish and a shiny top coat can look just as special as detailed art, especially in busy real-life photos.
I like to remind myself:
- Simple nails chip more gracefully.
- Touch-ups take two minutes.
- I do not have to hide my hands in pictures, even on rushed days.
If all you manage is one coat of pink while the kids watch a cartoon, that still counts. It is a small way to add a bit of joy for yourself, and it will absolutely show in your Valentine photos!
Easy At Home Tips to Make Your Valentine’s Nails Last (and Look Fresh in Photos)
Cute nails are fun, but keeping them looking fresh for a full week with kids, dishes, and Valentine parties is a whole new challenge. I want my red and pink valentines day nails to still look pretty on day three, not just for that first bathroom selfie right after I paint them. With a few simple habits at home, your nails can stay glossy and photo-ready without you babysitting them all day.
Quick Prep Steps for Smooth, Photo Ready Nails
Prep sounds boring, but it is the secret to polish that actually sticks. When I skip prep, I am peeling and chipping by bedtime. When I take ten extra minutes, my manicure survives class parties, grocery runs, and a Friday night movie.
Here is what I do before any polish touches my nails:
- Trim and shape
I grab my clippers and nail file while the boys are busy with a show.- I trim any long or uneven nails so they match in length.
- Then I file in one direction into a simple shape, usually short squoval.
This keeps the ends smooth so they do not snag on clothes or snack bags.
- Gently push back cuticles
After a shower, or after soaking my hands in warm water for a minute, I use a cuticle pusher or an orange stick.- I gently push the cuticles back, not scrape.
- If there is extra dry skin, I snip the tiny hangnails only, nothing more.
This gives more nail space for polish so it can grip better and look neat at the base.
- Lightly buff the surface
I use a soft buffer and go over each nail with a few quick strokes.- The goal is to smooth ridges, not grind the nail down.
- I keep it light so my nails do not get thin or weak.
A smooth surface helps polish look even and helps light bounce nicely in photos.
- Clean the nails so polish can stick
This is the step that really helps: I wipe each nail with a bit of rubbing alcohol or nail polish remover on a cotton pad.- It removes oils, lotion, and kid fingerprints.
- It gives you that squeaky clean surface polish loves.
Smooth, clean nails reflect light better, so reds and pinks look shiny and even in pictures. Bumpy, oily nails can make polish look streaky or dull, especially with flash or bright kitchen lights.
After all that, I quickly wash my hands with soap and water to remove dust and debris. Then I moisturize, but I keep it light. I use a bit of hand cream on my skin and cuticles only, and I avoid putting thick lotion right on the nail plate. Heavy lotion right before painting can cause polish to bubble and slide around, which is so frustrating when you are trying to get it done before bedtime.
Once everything is dry, my nails feel smooth, clean, and ready for all that pretty Valentine color.
Base Coats, Top Coats, and Little Habits That Prevent Chips
Base coat and top coat sound like extra work, but they make a huge difference, especially with red. I think of them like the kids wearing undershirts and jackets. The polish is the cute outfit. The base and top are the layers that keep it safe.
Here is how I keep things simple.
Why I always use a base coat, especially with red:
- Red can stain your natural nails and leave them yellow or pink.
- A base coat acts like a tiny shield between your nail and the color.
- It helps the color polish grab on better, so it does not peel off in sheets.
I swipe on a thin, even layer of base coat and let it dry for a minute or two. It does not need to be perfect. It just needs to cover the nail.
Why a shiny top coat is your best friend in photos:
- It adds that glossy, wet look that makes nails pop in pictures.
- It helps smooth small streaks and brush marks.
- It protects against chips when you are opening lunch boxes and buckling car seats all day.
I apply top coat as my last step, and I always drag it slightly over the tip of the nail. That extra detail helps seal the edge.
Speaking of tips, capping the free edge is a tiny habit that keeps my nails from chipping as fast. When I paint color or top coat, I run the brush lightly along the very edge of the nail. It is like wrapping the color around the front. That edge takes the most hits during the day, so sealing it helps the polish last.
Then there are the little daily habits that really stretch out a manicure:
- Wearing gloves for dishes and cleaning:
Hot water and soap are rough on polish. I keep a pair of gloves under the sink. If I am washing a big load of dishes or scrubbing a pan, the gloves go on. It takes two extra seconds and saves my nails. - Touching up with top coat:
Every couple of days, usually at night when the boys are watching a movie, I swipe a quick layer of top coat on. It refreshes the shine and covers tiny scratches. - Being aware of nail “jobs”:
I try not to use my nails to open cans or scrape stickers. I grab a spoon or a butter knife instead. My nails thank me later.
These tiny habits are how I keep one manicure going through a whole week of life. Class parties, date night, grocery store trips, weekend birthday parties with the kids. My nails are not perfect, but they still look glossy and bright in our pictures, and that makes me feel a little more pulled together in the chaos.
Fast Fixes for Chipped Valentine Nails Before a Photo
Sometimes, even with all the prep and care, a nail chips at the worst time. Kids do not care that your polish is still drying when they need help with shoes or snacks. So I keep a few quick rescue tricks for those last-minute photo moments.
Here are my favorite emergency fixes that take just a few minutes.
1. Add a glitter tip to hide chips
If the tips are chipped but the base still looks good, I grab a bottle of glitter polish.
- I paint a thin glitter tip over the chipped area.
- I fade it slightly down the nail so it looks intentional.
Suddenly it looks like a fun glitter French design, not a broken manicure.
2. Use a deeper red or pink just on the tips
If my nails have grown out or the color at the base is a little dull, I do a quick two-tone trick.
- I pick a slightly deeper red or pink polish.
- I paint only the tips, kind of like a French manicure but thicker.
It refreshes the whole look and hides the old edges. In photos, it just looks like a cute new design.
3. Keep a backup Valentine press-on set
On true emergency days, I pull out press-ons.
- I keep one pretty Valentine-themed set in my bathroom drawer.
- If my nails are beyond saving and we have a party or photo, I can pop them on in ten minutes.
They cover everything, and no one in the school pickup line knows I scrambled in the last hour.
Let me tell you about the time this really saved me. Last year, right before my middle son’s Valentine party, I slammed my hand in the minivan door. One nail chipped halfway across. Of course, we were already running late, and I knew there would be class photos and a million mom selfies with cupcakes.
I ran back inside, grabbed a bottle of chunky red glitter, and painted glitter tips on every nail, covering the broken spot. Then I slapped on a quick layer of top coat, waved my hands in front of the fan, and flew out the door with a tray of store-bought cookies.
In the class pictures, you cannot even tell which nail was chipped. The glitter tips just look fun and festive. I was still a hot mess in every other way, but my nails looked happy and cute, and that gave me a tiny boost of confidence when I was crouching in front of that whole classroom of kids.
I always remind myself, imperfect nails are still beautiful. Our hands are busy loving our kids, cleaning up messes, and doing real life. A little chip does not ruin that. These quick fixes are not about perfection. They are just tiny tools to help you feel a bit more confident when you are in front of the camera, holding sticky little hands and smiling for the memory.
How to Pose Your Hands So Your Valentine’s Day Nails Pop in Every Photo
I can spend all this time painting my red and pink valentines day nails, but if my hands look stiff or awkward in pictures, the whole look falls flat. The way you hold your hands matters just as much as the polish. The good news is, you do not need to pose like a model. Simple, natural movements look the sweetest, especially when you are in the middle of real mom life.
Simple Hand Poses That Feel Natural, Not Awkward
The best poses are the ones you already do a hundred times a day. I like to think of it as “using my hands with a tiny bit of intention” instead of full-on posing.
A few of my favorite easy, natural hand poses:
- Gently holding a mug
Wrap your fingers softly around a coffee mug or travel cup. Keep your grip loose, like you are warming your hands, not squeezing the life out of it. Slightly curve your fingers so they look soft, and let your thumb relax instead of sticking straight up. - Resting a hand on your sweater
Lightly place one hand on your chest, collar, or on the edge of your cardigan. You can pinch the fabric a bit, or just let your fingertips rest there. This pulls your nails into the frame without screaming, “Look at my hands!” - Touching your face or hair
Tuck a piece of hair behind your ear, rest your chin on the back of your hand, or graze your fingertips along your cheek. Keep your fingers a little bent, not straight like claws. Think “soft spaghetti” fingers, not “frozen french fry” fingers. - Wrapping your hand around your child’s hand
This is my favorite one. Hold your child’s hand on the way into school, or gently cup their tiny fingers in both of yours. Your nails peek out while the focus stays on that sweet connection.
When I want my fingers to look relaxed, I stretch my hand out, then shake it for a second, and let it fall naturally into a gentle curve. However it lands is usually the best shape. I try not to press my fingers tightly together. A little space between them keeps everything looking soft and flattering.
And honestly, you do not need perfect poses. Some of my favorite nail photos are completely unplanned. A quick snap of my hand holding a sticky popsicle or high-fiving one of my boys tells the story better than any staged shot. Candid, slightly messy moments show off your nails in the most honest way, and that always looks beautiful.
Using Light, Backgrounds, and Props to Make Colors Pop

Once your hands feel comfortable, the next little secret is the light and what is around them. You do not need a fancy camera. You just need light that is kind and simple backgrounds that let your red and pink shine.
For lighting, I try to stick to:
- Near a window during the day
I stand facing the window or at a slight angle. Soft daylight makes reds and pinks look bright and even, without harsh shadows on my fingers. - Avoiding strong overhead lights
Kitchen lights or bathroom lights can throw weird yellow tones and make skin look tired. If I have to use them, I turn my body slightly so the light hits my nails from the side, not straight down.
Backgrounds do a lot of the heavy lifting too. I like to keep them simple so my nails stand out:
- A white plate while I hold a cookie or cupcake.
- A neutral sweater in cream, gray, or beige when I am holding my mug.
- A wood table with my hand resting by a snack plate or Valentine craft.
Around Valentine’s Day, I also grab easy props that are already sitting around the house:
- Kids’ handmade cards
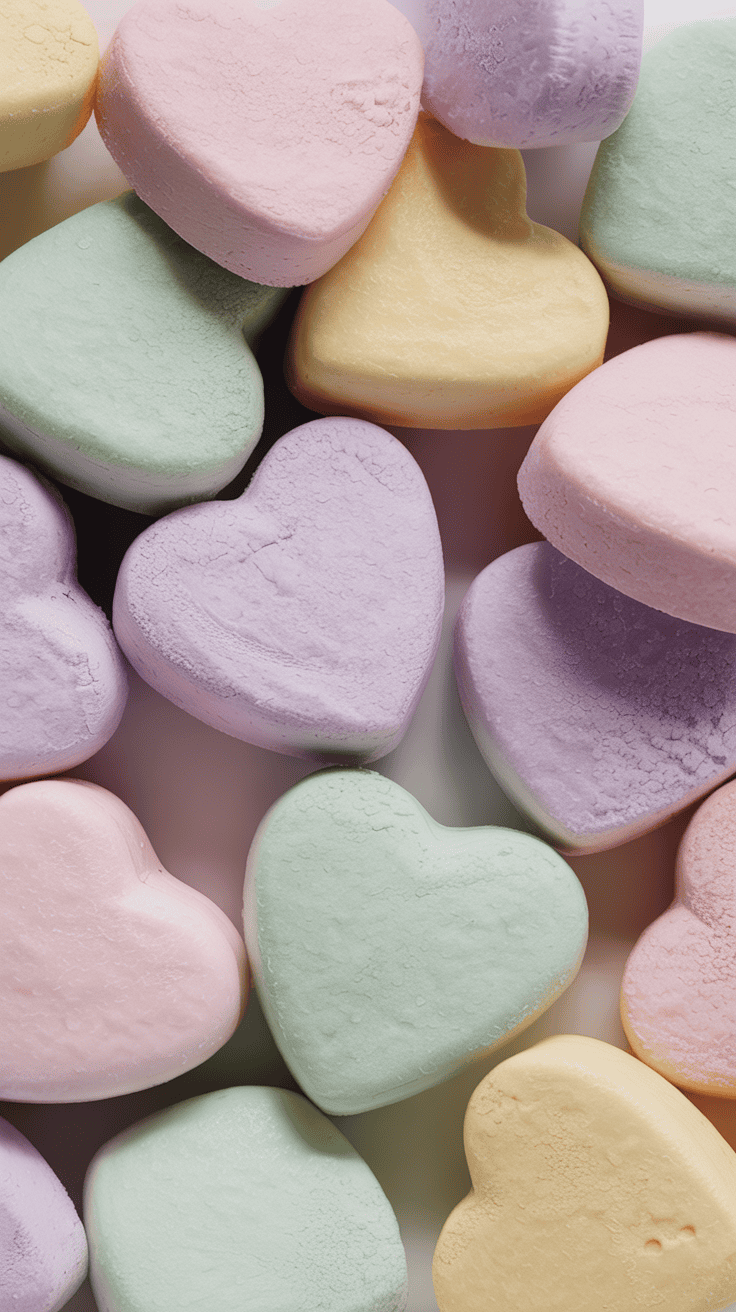
- Candy hearts in a little pile
- A small bunch of flowers or a single rose
- A pink or red blanket, tossed over my lap
I might hold a kids’ card in one hand, with my nails resting along the edge. Or scoop a handful of candy hearts so the colors frame my polish. Tiny props like that add context and make the photo feel like a real moment, not a photoshoot.
Even small shifts help. I often:
- Tilt my hand a bit toward the light instead of straight at the camera.
- Rotate my wrist so there is less shadow on one side.
- Step half a foot closer to the window.
That tiny change can make the nail color look brighter, smoother, and more even in the picture. It is like turning your face toward the light, but for your hands.
Fun Photo Ideas With Kids That Show Off Your Nails Too
My favorite nail photos always include my boys. They never sit still, someone is usually sticky, and our house is never spotless, but those pictures feel like us. The nails are just a little bonus.
Here are some simple, real-life photo ideas that sneak your nails into the frame while you love on your kids:
- Holding hands on the way to school
Snap a quick photo from above while you walk in. Your painted nails wrap around their little fingers, and you can see their backpack, jacket, or tiny shoes. It is the sweetest everyday memory. - Baking cookies together
Flour on the counter, sprinkles everywhere, kids in mismatched pajamas. Rest your hand on the rolling pin, the mixing bowl, or the cookie sheet. Your nails will pop against the dough and sprinkles, even if the kitchen looks wild. - Helping with Valentine cards
Take a photo of your hand steadying the paper while your child writes their name, or while you hold a glue stick or marker. The cards, crayons, and little hands make a colorful backdrop that shows off your nails in the middle of real mom work. - Family movie night snack photo
Put popcorn or candy in a big bowl and grab a handful with your kids. Take a quick overhead shot of everyone’s hands reaching in. It is fun, a little chaotic, and your polish will stand out against the snacks and blankets.
When I take these photos, I always remind myself that connection comes first. The point is not a perfect manicure shot, it is that I am there, in the picture, with my kids. Pretty nails are just the cherry on top.
If your kitchen is messy, keep going. If your shirt is wrinkled, keep going. I have photos where there are dishes piled behind us, toys scattered on the floor, and one kid in a Halloween shirt in February. Those are the ones that make me teary later.
So let your nails show, but do not stress about every little detail. A little polish, a soft hand pose, good light from a window, and a real moment with your kids is more than enough.

Conclusion
When I step back and look at it all, red and pink valentines day nails are really just a fun little way to treat myself in the middle of regular mom chaos. Picking shades that flatter my skin, keeping the designs simple so they actually show up in photos, and choosing shapes that survive snack time and car seats makes the whole thing feel doable, not stressful.
I love knowing that a quick heart accent, an easy ombré, or a classic red or pink mani can still look great when I am holding sticky hands or a coffee cup. With a good base coat, a shiny top coat, and a few touch-up tricks, my nails stay photo-ready long enough to make it through class parties and date night. And those simple posing tips and kid-friendly photo ideas turn everyday moments into sweet little memories I can scroll back to later.
You do not have to be a nail artist or an influencer to enjoy cute Valentine nails. You just need one tiny step that feels fun. Paint one accent nail, try a new shade of pink, or add a glitter tip while the kids watch a show, and make it a silly, shared moment with them.
From one boy-mom to another, your hands are already doing the important work, the polish is just the sparkle on top!
This post may contain affiliate links. Read the full disclosure here.