Rustic Fall Wedding Centerpieces With Natural Texture and Charm
Rustic fall wedding centerpieces instantly fill a space with warmth, texture, and heart. I love how they bring the season’s best to the table—worn wood, crunchy leaves, and cozy details that tell a little love story of their own. My three wild and creative boys (who make sure every day stays interesting) are always rooting for messy, hands-on ideas, and I think that spirit inspires my love for centerpieces that feel down-to-earth and full of life!
This mason jar centerpiece kit adds that charming, handmade feel to any wedding table.
If you’re looking for ideas that mix autumn’s natural charm with a real mom’s touch, you’re in the right place. I can’t wait to share simple ways to make your wedding day feel special and true to your family. These ideas are easy, budget-friendly, and fun to put together—trust me, if my boys can get involved, anyone can!

Choosing the Right Natural Materials


Finding the perfect natural touches really sets rustic fall wedding centerpieces apart. It’s all about using what nature gives us in fall: worn wood, colorful leaves, bumpy pinecones, and plump fall fruits. When I dive into planning a family event with my boys, we head outside with baskets to see what treasures we can bring home. For anyone who wants centerpieces with real charm and simple beauty, picking out the right materials makes all the difference. Rustic fall wedding centerpieces should feel inviting and effortless, welcoming everyone to the table just like home.
Wood Slices and Reclaimed Logs

Wood adds warmth and a sturdy base to any rustic centerpiece. My boys love helping search for fallen branches or old fence posts, and honestly, gathering wood becomes a little adventure in itself. Here’s how I keep it safe and easy for everyone, even with eager little hands around:
- Source Wood Safely: Look for branches, logs, or old lumber in your yard, local parks, or even from friends. Avoid wood that looks moldy or bug-ridden.
- Prepping Steps: Always wash and dry the wood first. Use a saw (a small handsaw works great) to cut your pieces into nice, even slices, about 1-2 inches thick. For logs, aim for sections 3-6 inches tall.
- Sand for Safety: Sand the edges and surfaces thoroughly. Kids will want to touch and stack, so I make sure every rough spot is smooth. A basic sanding sponge or even a nail file can do the trick in a pinch.
- Layering Ideas: Stack slices to create height or use a single slice under each centerpiece. Mix and match tall logs and flat rounds for variety. Top with jars, candles, or little vases.
I use my wood slices year after year! They look better over time, picking up creamy wax marks from candles or sweet little scratches from flower stems.
Autumn Foliage and Pinecones

Nothing feels more like fall than a table scattered with crunchy leaves and spiky pinecones. My boys go wild gathering these from the yard. It’s amazing how much color and texture a handful of leaves and a cluster of pinecones can bring to your wedding tables!
- Gathering Fresh Leaves: Collect leaves in the brightest reds, yellows, and oranges you can find. Go for sturdy ones that haven’t dried out yet. If rain is coming, pick early to avoid soggy, broken bits.
- Preserving Color: To keep those leaves looking pretty (instead of crumbling to dust), gently press them between two sheets of wax paper and iron on low for a few seconds with a towel in between. You can also slip them in a book for a couple days.
- Pinecone Pairings: Arrange pinecones along your wood base and tuck them close to candles or glass jars. The rough, nubby texture plays so well with smooth wax and delicate flowers.
- Candles and Texture: Place pillar candles among piles of pinecones and leaves, or fill shallow bowls with both for a natural, homey centerpiece. The combo of flickering light and rustic bits always feels welcoming.
It’s funny how something so simple can make your table look like it came out of a magazine. Plus, if pinecones disappear by the end of the night, you’ll know which kid pocketed them!
Seasonal Fruits and Gourds

Bringing real fruit into the mix adds both color and a bit of whimsy. I get so many smiles by filling our centerpieces with glossy apples, pears, and those adorable little pumpkins and gourds. They catch the candlelight and look good enough to eat (though I warn the kids…these are for display).
- Apples and Pears: Choose fruits with bright skins and no bruises. Set them right on your wood slices, or tuck clusters around flowers and candles.
- Mini Pumpkins and Gourds: Shop for these in all shapes and colors—white, orange, striped, even knobby ones. Mix sizes for a free-spirited look.
- Keeping Everything Fresh:
- Leave fruits in a cool spot until it’s time to decorate.
- Rub apples or pears with a tiny bit of coconut oil to make them shine and slow down browning.
- Avoid cutting any fruit until after your photos, since fresh cuts brown fast.
- No Waste: After the celebration, let the kids pick their favorite pumpkins to take home, or chop apples for snacks later.
Setting out real fruits and gourds keeps things lively, and it’s a smart way to keep centerpieces affordable and easy. My boys still talk about the wedding where each table “won” a pumpkin for being the silliest dancers!
So, if you want centerpieces with texture, color, and lots of personality, reach for these natural, seasonal favorites. Your family—and your guests—will feel right at home.
Color Palette and Texture Pairings

Choosing the right color palette and playing with different textures can turn rustic fall wedding centerpieces into showstoppers. Every mom knows the power of colors and fabrics to set a cozy mood—it’s like picking the perfect sweater for chilly weather! Here’s how I love to mix warm, earthy shades and tactile materials for a feeling that’s as comfy as your favorite flannel.
Warm Earth Tones and Metallic Accents

I always start with colors that remind me of crunchy leaves and sunset skies. For rustic fall wedding centerpieces, I lean into burnt orange, deep red, and a splash of copper or bronze. These shades feel so inviting and homey.
Why do these work together so well? Burnt orange and deep red bring that classic, rich fall warmth. Copper or bronze adds just enough shimmer to catch the candlelight without feeling too fancy. Instead of clashing, they blend and boost each other. When these colors are side by side, your centerpieces pop with energy and depth.
Here’s why I think this combo never fails:
- Burnt Orange: Reminds me of warm pumpkin pie and piles of leaves.
- Deep Red: Like a cozy flannel or mom’s favorite lipstick for a holiday dinner.
- Copper/Bronze: Feels special but not fussy, the way sunlight glows on autumn fields.
I love to use these colors in everything—flowers, ribbons, and even little metallic votives. When copper meets fall reds and oranges, it’s pure magic on the table.
Mixing Matte and Glossy Finishes

Texture matters as much as color. If you want your rustic fall wedding centerpieces to look layered and lively, play with matte and glossy finishes. The trick is keeping the look balanced, not messy.
I mix matte burlap with shiny glass jars or vases. The burlap is earthy and soft, while the glass jars bring in a little reflection—like puddles after rain! This difference keeps eyes bouncing around your table.
Here’s how I keep the look pull-together:
- Keep It Simple: Use burlap as a runner or wrap for jars. Add clear glass vases or bottles for height.
- Repeat the Contrast: If I use a glossy vase, I add a matte ribbon or set it atop a wooden slice.
- Don’t Go Overboard: Too many shinies, and it feels too formal. Too much matte, and it gets a bit flat. You just want a little “wow” sparkle to keep things fun.
A quick tip: If you want a softer shine, look for jars with a frosted or “sea glass” look instead of high-gloss. Your burlap will still stand out.
Fabric Elements Like Burlap and Linen
Fabric is a mom’s secret weapon for pulling everything together. Burlap and linen add touchable charm and family-friendly vibes to rustic fall wedding centerpieces.
Wrapping stems or jars in burlap makes them look super cozy. I snip strips wide enough to hide the knots and always double-check for stray fibers so little hands stay safe—no itchy surprises! Linen ribbons add a lighter touch and look sweet tied in simple bows.
For kid-friendly centerpieces, I focus on these fabric hacks:
- Cut Carefully: Trim ribbons and burlap so no loose strings dangle. I run a lighter (super quick!) along the edge for a second to seal it.
- Double Wrap: If the jar has rough edges, double up the burlap strip and tie tight—that way no glass scratches or pokes.
- Sturdy Ribbon Bows: Use thick linen or cotton so bows hold their shape, even if the kids tug a few times.
A few of my favorite fabric touches:
- Wrap small flower bouquets in burlap and secure with twine.
- Tie chunky linen bows around the necks of bottles, then snug them with a soft floral pin.
- Layer narrow strips of burlap over table runners in your main color palette.
These soft, natural fabrics make the centerpieces feel homemade but still special—exactly what I love for rustic fall weddings where kids run wild and everyone feels at home.
DIY Centerpiece Designs

If you’ve been dreaming up rustic fall wedding centerpieces with layers of natural texture and tons of family charm, this is where the fun really starts! I always find that do-it-yourself centerpieces bring out so much personality. They let you mix simple materials, a little bit of heart, and your family’s special touch. These ideas are easy to pull together, even with little helpers bouncing at your side! Let’s get right into some of my favorite centerpiece projects that bring out all the warmth and cozy fall feeling without any fuss.
Simple Candle and Branch Arrangement
There’s just something about flickering candlelight and natural wood that takes me right back to autumn evenings with my boys. This centerpiece is as easy as pie, and it pulls in all the rustic textures I love! All you need are:
- Short branches or twigs, collected from your own backyard
- A handful of tea lights (battery ones if you have curious little hands at the table)
- A sprinkle of green moss
Start by laying your branches in a loose bundle in the middle of your table. Stack them so a few cross over each other, almost like a little campfire. I tuck wisps of moss between the branches, which adds soft color and covers up any broken ends. Set out the tea lights around the pile, nestled on top of the moss or just beside the wood. When you light them, the whole set-up feels like a woodland glen!
If you want to make it extra special, let the kids help find the best-shaped sticks or arrange the moss. I always check the branches for bugs first. This arrangement looks beautiful on top of a wood slice, and if you want a safer option for kids’ tables, just use flameless candles. The cozy glow and earthy scent create a space that’s inviting and relaxed—my favorite combination.
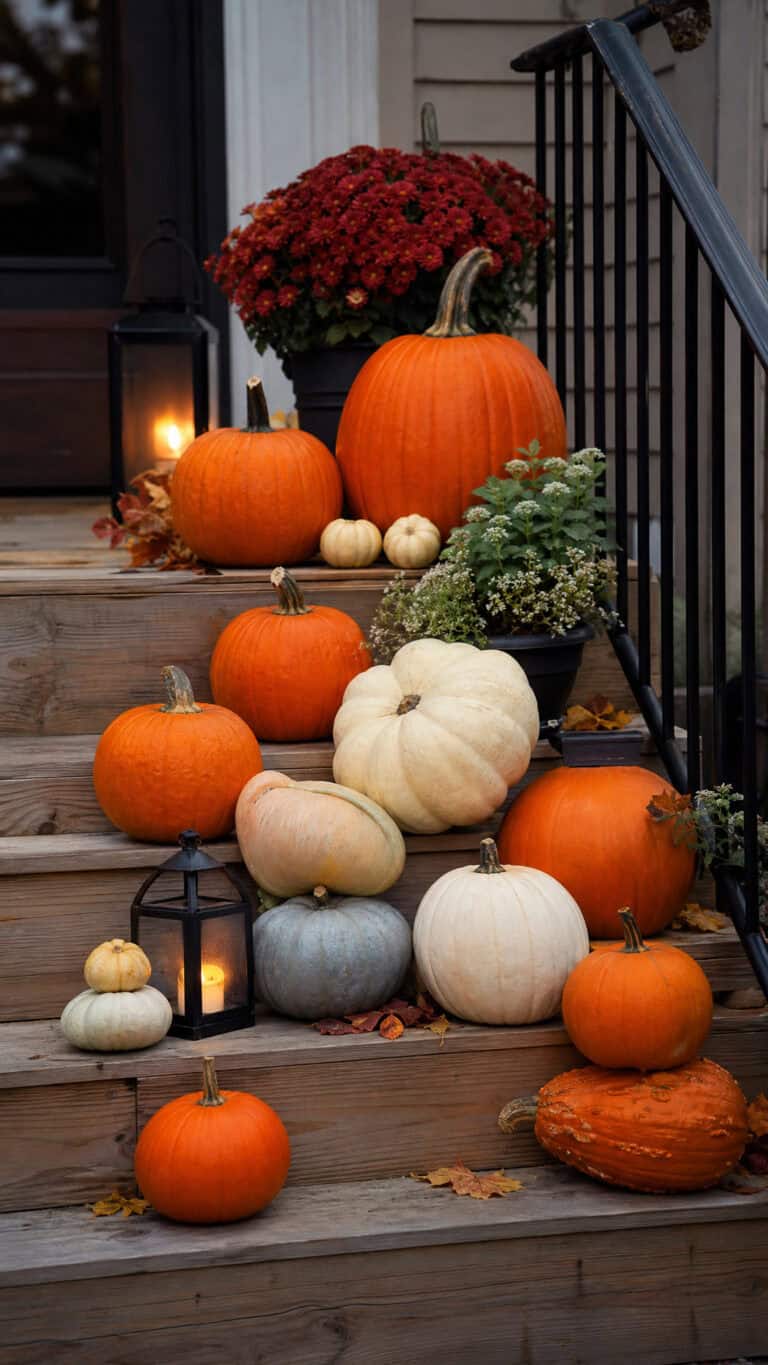
Tiered Pumpkin and Apple Display
Stacking pumpkins and apples into a centerpiece has always been a big hit at our fall get-togethers. It reminds me of old orchard wagons, and there’s so much color and fun in a display like this! Here’s how I do it while keeping things sturdy (and safe from wild little hands):
- Gather pumpkins in a few sizes (mix small and medium ones) and a bag or two of apples in different shades.
- Place the largest pumpkin at the bottom as your base.
- Stack a smaller pumpkin or a cluster of apples on top, balancing carefully.
- Anchor each layer with twine—wrap it right around the pumpkin stems and tuck it under apples for grip.
Once the stack feels stable, I weave sprigs of greenery (like eucalyptus or even some fall leaves) around the base and between layers. This softens the edges and looks so natural. The kids love being in charge of picking out which apple “deserves” to be on top! Sometimes we even put a big ribbon at the peak for a pop of color.
Quick safety tip: Always stack on a solid tray or wood slice so the centerpiece doesn’t wobble. And if you have extra apples, let the kids claim some as snacks when the party wraps up. This whole display brings out the best fall colors and feels playful and fresh.
Mason Jar Rustic Bouquet
Nothing says home to me like fresh flowers in a mason jar. For rustic fall wedding centerpieces, I love filling jars with whatever wildflowers or herbs are in season. Add a sprig of eucalyptus, and it’s pure magic! Here’s my super simple jar bouquet plan:
- Grab a few wide-mouth mason jars (clear ones work best)
- Fill each with fresh-picked wildflowers or grocery store blooms
- Add a handful of herbs—think rosemary or sage for that lovely scent
- Tuck in a sprig of eucalyptus for gray-green contrast
Arrange the blooms so some spill over the sides. Don’t fuss about making them perfect; the charm is in the wild, gathered look. I like to tie a burlap ribbon or wrap a strip of burlap around the jar’s neck, then pin on a homemade tag. Write your initials, table number, or a little thank-you message. My boys always want to doodle their “art” on these tags—your family can do the same!
These bouquets are lightweight and easy to move, plus you can prep them a day in advance. Scatter them along long tables or cluster a few together for extra fullness. Every guest will notice the fragrance and color, and those burlap touches just pull the look together so well.
If you want your rustic fall wedding centerpieces to feel personal, inviting, and full of love, try any of these DIY ideas. Simple materials, a dash of nature, and a little help from the kids can truly transform your tables.
Budget‑Friendly Tips and Sourcing
Stretching every dollar is a must when you’re planning rustic fall wedding centerpieces, especially if your days look like mine: three wild boys, a never-ending snack routine, and sticky fingerprints everywhere. The good news? You don’t have to spend a fortune to get show-stopping centerpieces full of natural warmth and handmade charm! I love how a little resourcefulness and creativity can make even the simplest finds look like they belong on the cover of a magazine.
Thrift Store Finds and Upcycling
One of my favorite ways to stay on budget is a good old thrift store hunt. Every time I pop in (usually with at least one kid in tow, begging for a toy dinosaur), I keep my eyes open for items that can be spruced up and used as centerpiece bases. Some of the best are:
- Old picture frames (these look cute as trays or backdrops for candles and jars)
- Metal buckets or pails (they’re perfect for dried flowers, pinecones, or even apples)
- Mason jars in all sizes
- Small wooden crates or boxes
- Vintage books (stack them to add height and interest)
- Glass pitchers and vases
- Ceramic bowls and fairy-sized teapots
The trick is thinking outside the box. Last fall, I found a batch of metal baking tins and used them to hold clusters of mini gourds. My boys thought it was hilarious! You can spray paint or wrap these items in burlap, twine, or fabric scraps for a quick refresh. I promise nobody will guess their thrifty origins.
Here’s my quick thrift store “must-grab” list for rustic fall wedding centerpieces:
| Thrift Find | Rustic Use |
|---|---|
| Picture frames | Tray, backdrop, chalkboard menu |
| Metal buckets | Flower or fruit holder |
| Mason jars | Candleholder, vase |
| Wooden crates | Platform for centerpieces |
| Vintage books | Layered for height |
| Glass pitchers | Display wildflowers or dried stems |
| Ceramic teapots | Whimsical container for blooms |
Each find can be upcycled into something special for just a few bucks. Sometimes, the quirkier the better!
DIY vs. Pre‑Made Trade‑offs
Now, I get it: sometimes you want to make every centerpiece with your own two hands, but other days (usually when a soccer game runs late or someone puts peanut butter in their hair), you want easy. Both options work! Here’s how I compare them, mom to mom.
DIY Centerpieces
- Cheaper; you control the budget completely.
- You can get the kids involved, which makes it fun and meaningful.
- More time-consuming and sometimes a little messy.
- Feels super personal—guests notice the homemade touches.
Pre‑Made Pieces
- Costs more up front; the convenience can add up, especially for larger weddings.
- Saves time and keeps your hands clean.
- Perfect if you’re tight on time or patience is in short supply that week.
- Not as personal, but very reliable and ready to use.
Here’s a breakdown for quick reference:
| Option | Cost | Time Spent | Personal Satisfaction |
|---|---|---|---|
| DIY | Low, flexible | Moderate | High |
| Pre‑Made | Medium–High | Low | Medium |
For me, blending both is best! I pick a few DIY projects to do with my kids so we all feel part of the day, then fill in gaps with some pre‑made elements. That way, I’m not stuck gluing pinecones at midnight.
Seasonal Market Buying Guide
Fall farmers markets are full of treasures for rustic fall wedding centerpieces. My boys run straight for the pumpkin bins every time, and I can’t help packing my cart with foliage and woodsy decor. To stay focused and on budget, I stick to a little checklist.
Here’s what I always look for at markets and local stalls:
- Fresh foliage like eucalyptus, dried wheat, or wildflowers (ask if it’s cut fresh that day)
- Locally grown pumpkins in all colors—white, orange, striped, or bumpy
- Mini gourds and squash for variety and pop
- Handmade wooden accents, like little slabs, candleholders, or tiny crates
- Jute twine or burlap bundles, often sold on the cheap for wrapping or tying
- Dried corn, seasonal berries, and bittersweet for extra texture
A few quick tips: Talk to the vendors! They often have “seconds” or odd-shaped pumpkins for much less. Some will even bundle foliage at the end of the day if you ask. I set the kids loose picking gourds or counting apples for the table. It turns the trip into an adventure, and you get exactly what you need for decorations.
So, whether you love a thrift store score or prefer the buzz of the Saturday market, you can fill your wedding tables with charm and texture without emptying your wallet. A little planning, a good eye for bargains, and sharing it all with your family can make budget-friendly centerpieces extra memorable!
Setting the Table and Final Touches
When it comes to rustic fall wedding centerpieces, all those last little details are what pull the whole look together. I always say, your centerpiece sets the mood, but the final touches on your table make each guest feel truly welcomed and at home. I love finding ways to tie in earthy colors and special family mementos, and nothing beats the glow of pretty lights as the day turns to evening. If you want your tables to feel warm and full of heart, a few easy (and affordable) ideas can make a huge difference!
Coordinating Napkins and Place Cards
Getting the right napkin and place card combo might seem small, but it really changes the look of your whole table. I’m a big fan of using kraft paper cards—they’re so simple and you can have your kids help punch holes or write names with a white gel pen! They just beg for a bit of twine or jute string tied into a bow. If your handwriting isn’t perfect, don’t worry. A little “messiness” looks lovely and homey.
For napkins, I always stick with solid earth tones like:
- Dusty orange
- Deep olive green
- Warm beige or light brown
- Classic cream
These natural shades tie right in with both the centerpiece and the rest of your rustic wedding theme. I fold them in simple rectangles and tuck the kraft card (with its twine tie) right on top. Sometimes, for extra fun, my boys help me tie bundles of cinnamon sticks to set with the napkin—instant fall fragrance and a sweet touch!
Here are a couple of my favorite quick napkin and card pairings:
| Napkin Color | Place Card Feature | Extra Touch |
|---|---|---|
| Dusty Orange | Kraft paper with twine | Cinnamon stick |
| Olive Green | Handwritten names | Dried leaf accent |
| Cream | Simple ink stamp | Acorn or pine sprig |
It’s these little details that tell guests, “I thought of you!” Plus, matching your napkins and place cards to your rustic fall wedding centerpieces brings the whole table to life.
Adding Personal Mementos
Nothing gives a table more heart than sharing pieces of your family story. I love to slip in tiny keepsakes that mean something special. This part always gets my mom friends a little misty-eyed!
You can tuck in things like:
- Baby shoes from your kids (the smaller, the sweeter!)
- Little silver charms or lockets that have been in your family
- Bits of lace from your grandma’s old tablecloth
- A clipped button from a favorite shirt
For my sister’s wedding, we set out my boys’ first baby shoes at each table, tied with old ribbon. It made everyone smile and gave folks something sweet to talk about. I know lots of moms who do this with small photo charms or even a toy or two from when they were little. If your family has a tradition, show it off right on the table! It adds a real burst of love and sparks happy memories.
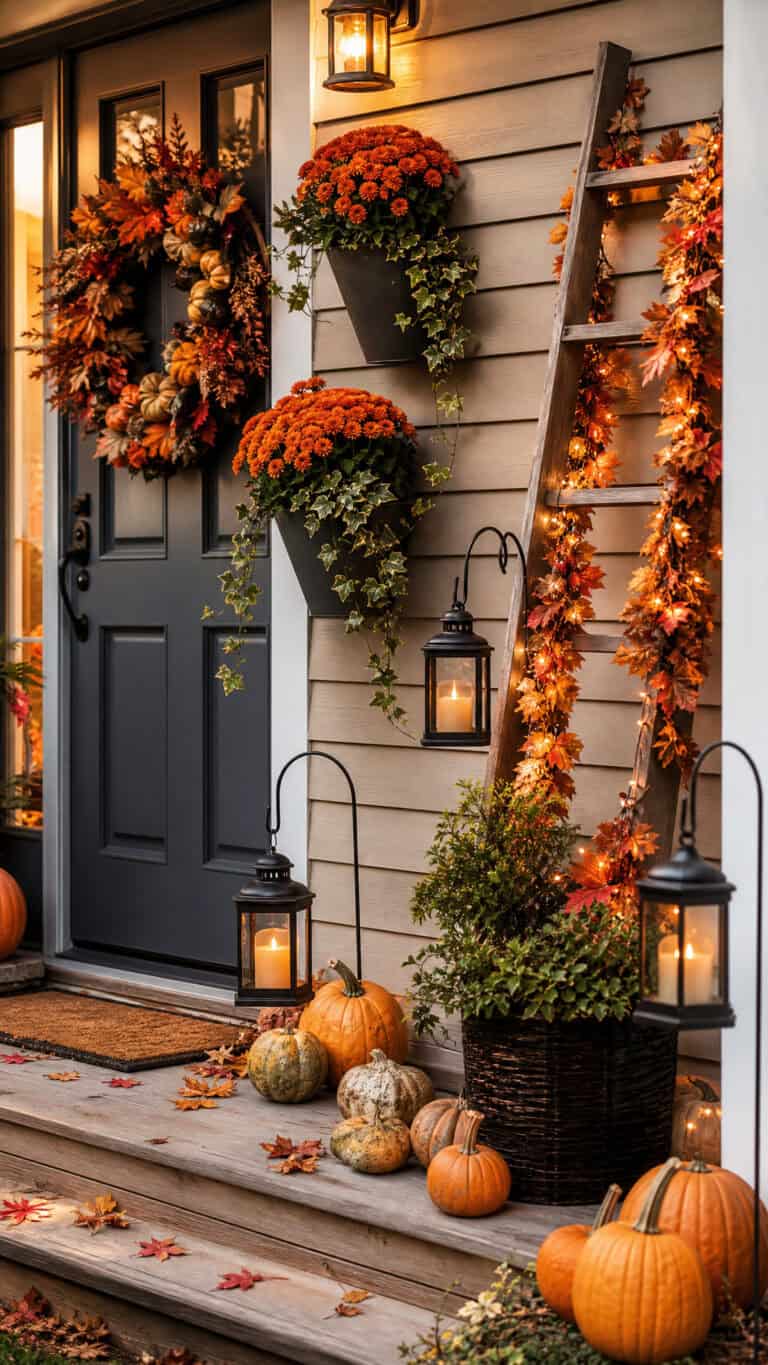
Lighting and Ambience
There is just something magical about fall wedding nights when the light starts to dim and everything glows. Lighting is where rustic fall wedding centerpieces truly shine—literally! I turn to three favorites: string lights, lanterns, and candles.
- String Lights: I run twinkle lights down the center of the tables. Battery ones are easy and safe, and you don’t have to search for outlets. They bring a soft, starry feel that gets everyone grinning.
- Lanterns: I like to use old-fashioned metal lanterns (sometimes I find them at thrift stores!) and slip in candles or little fairy lights. Cluster a few in different sizes right in the middle of the table or mix them in with flowers, pinecones, and wood slices for that perfect rustic look.
- Candles: There is no such thing as too many candles at a fall wedding! I go for white or cream tea lights in mason jars, a few chunky pillar candles, or even scented ones if allergies aren’t an issue. The smell of vanilla or cinnamon just makes everything cozier.
Here’s how I like to layer the lights for the coziest mood:
- Start with a string of twinkle or fairy lights running along the table.
- Place 2–3 lanterns spaced out for height.
- Add candles in different sizes—all clustered around the rustic fall wedding centerpieces.
This mix gives you soft, flickering light that feels like a hug. And when the sun sets, your tables will glow and shimmer, making every photo look magical.
It’s not hard or expensive to create this look. All you need is a little time, a few helping hands, and a knack for using what you already have. My boys love helping me set out the lights and lanterns (okay, sometimes they try to hide under the table, but we get there in the end!). The atmosphere it creates makes everyone stay at the table just a little bit longer, soaking up those moments.
So don’t be afraid to get creative and personal. The right napkins, meaningful mementos, and warm lighting will pull your rustic fall wedding centerpieces—and your whole celebration—together!

Conclusion
Rustic fall wedding centerpieces are such a joy to create, especially when you bring in natural textures and that warm, cozy charm. Working alongside my boys to gather wood slices, colorful leaves, and seasonal fruits turns decorating into a fun family affair. These centerpieces don’t just look beautiful—they carry a story, a feeling, and memories that linger long after the day is done.
If you’re thinking about making your own, dive in! It’s simple, budget-friendly, and full of heart. I’d love to hear about your favorite centerpiece ideas or see your autumn creations—there’s nothing better than sharing the love and inspiration.
Your tables will feel welcoming and full of life, and your guests will notice the special touches only a mom’s hand can make. Now it’s your turn to create magic with rustic fall wedding centerpieces!
This post may contain affiliate links. Read the full disclosure here.