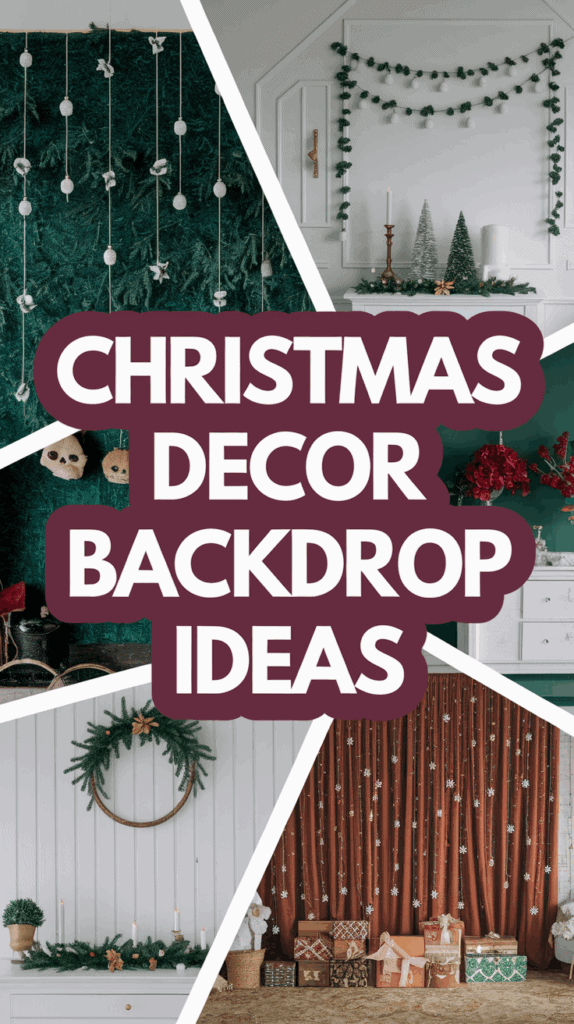
Backdrop Christmas Party Decoration Ideas That Wow Guests
Want easy, affordable, kid-friendly backdrops that pop in photos? You’re in the right spot for backdrop christmas party decoration ideas that make guests say wow. I’m sharing simple looks that photograph beautifully, even in tight spaces, and yes, the kids can help!
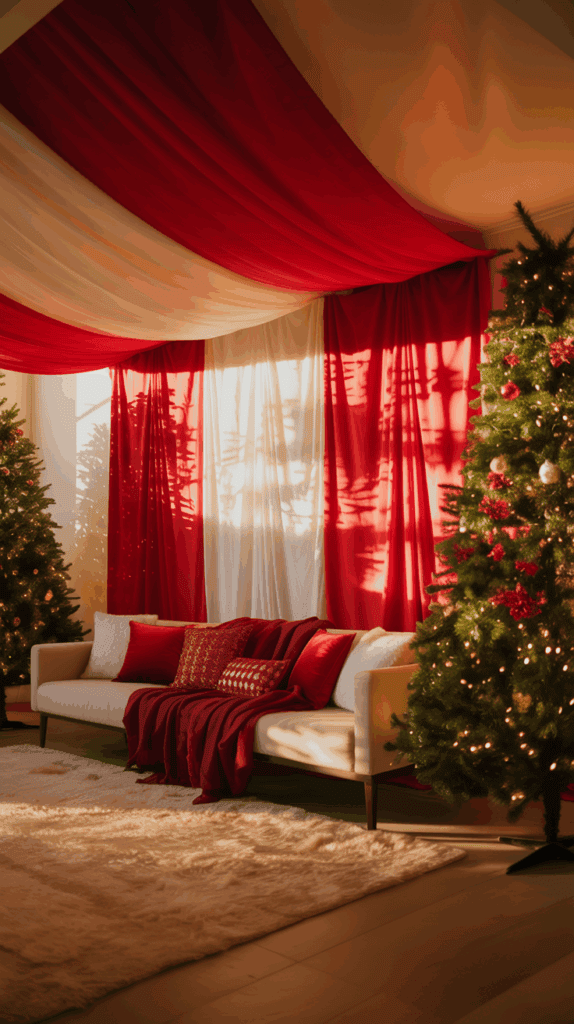
This Christmas backdrop set transforms any room into a magical photo spot.
I’ll show step by step ideas by theme, quick setups for small rooms, and fun, interactive options my three boys love. I’ll include styling and lighting tips that make colors glow without pricey gear. Most supplies come from big box stores or the dollar aisle, which is hard to believe, and I’ll note cost, time, and kid helper tasks so you know what to expect. It’s simple and fun, trust me!
Grab a cocoa, pick a theme, and let’s dive in!
Pick a Theme, Colors, and the Best Wall for Photo‑Ready Magic

Here’s where the fun starts. A clear theme, a simple color plan, and the right wall make photos look polished with zero stress. If you want quick, pretty results for backdrop christmas party decoration ideas, this is the combo I swear by. I keep choices tight, test colors in real light, and pick a wall that is clutter free. It saves time and keeps the kids focused.
Choose a theme that matches your vibe and guest list
I pick a theme based on who is coming and what time we’re hosting. Simple beats fussy, every time.
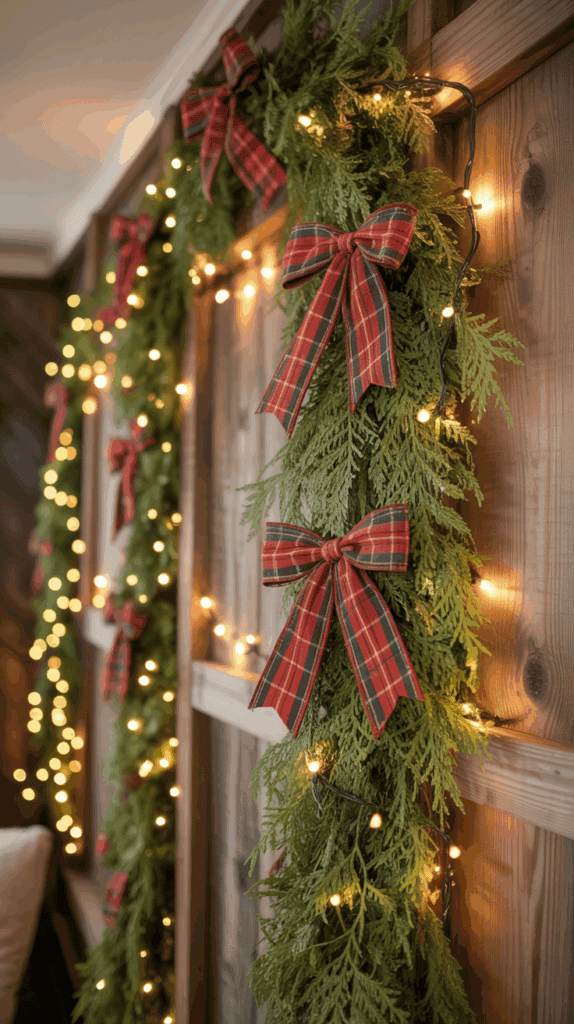
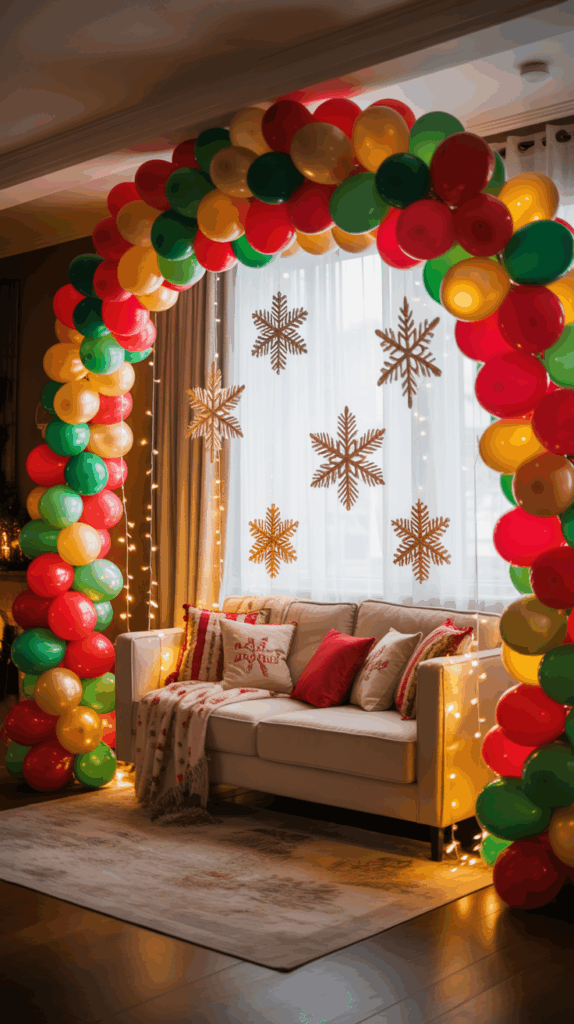
- Classic Red and Green: Think plaid ribbon, red bows, evergreen garland. Best for family brunch or neighborhood drop-ins. It feels warm and familiar, which makes grandparents smile.
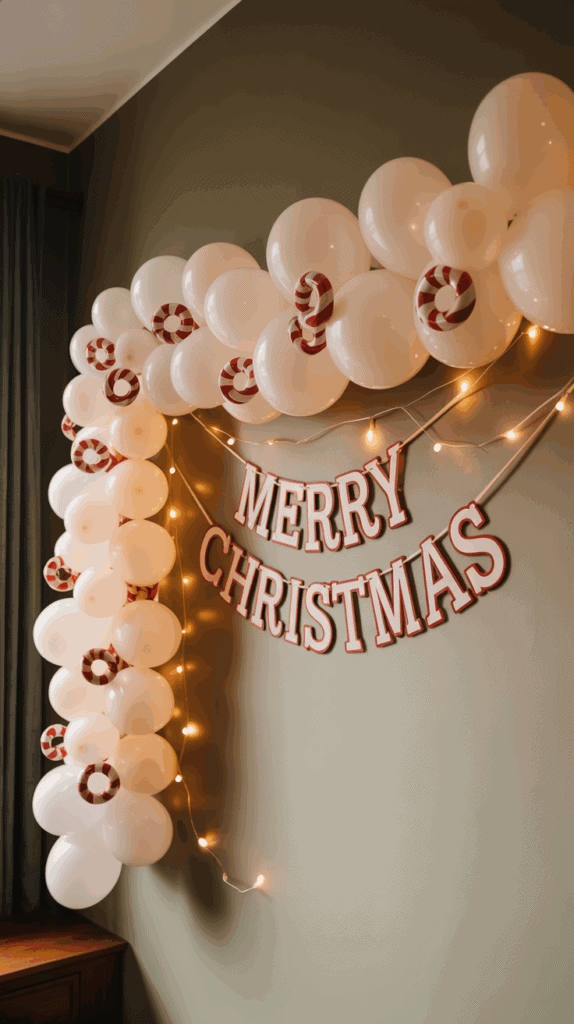
- Winter Wonderland (white, silver, icy blue): Paper snowflakes, faux snow, silver ornaments. Best for kids’ cookie parties or early evening. It photographs bright and clean.
- Rustic Farmhouse (wood, burlap, greenery): Wood crate side table, twine, pinecones, eucalyptus. Best for afternoon open house, especially if your home leans cozy and neutral.
- Candy Cane Lane (red, white stripes): Peppermint garland, striped wrapping paper backdrop, lollipop props. Best for kid-heavy parties, hot cocoa bars, and photo booth fun.
- Cozy Nordic (neutrals, wood, paper stars): Kraft paper, white paper stars, natural linen. Best for calm, minimalist setups and small spaces. It looks beautiful in daylight.
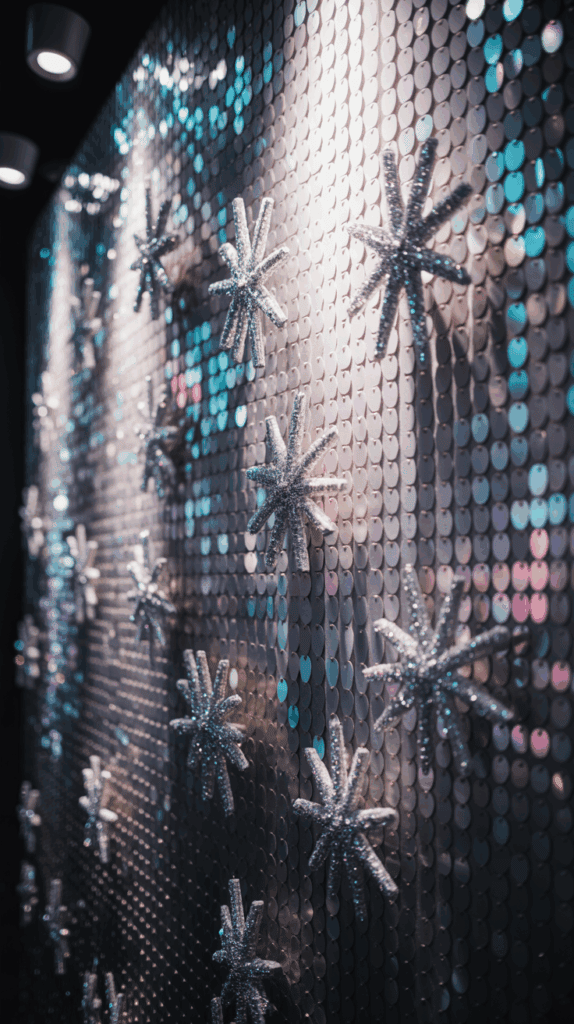
- Glam Gold and Black: Black backdrop, gold sequins, champagne balloons. Best for a nighttime cocktail hour or New Year’s crossover party. It sparkles under warm light.
Tip I use with my boys: pick one hero item per theme, like a giant wreath, a striped backdrop, or an oversized paper star cluster. It gives the backdrop a clear focal point.
Set your color palette with the 60-30-10 trick
This ratio keeps colors balanced and camera friendly. I choose:
- 60 percent for the main color, big areas like backdrop paper or fabric.
- 30 percent for the secondary color, garland, pillows, or ribbon.
- 10 percent for the accent, shiny details or small props.
Copy one of these palettes:
- Forest Green 60, Cranberry 30, Champagne 10
- Icy White 60, Silver 30, Soft Blue 10
- Warm Cream 60, Natural Wood 30, Matte Black 10
- Black 60, Gold 30, Soft Blush 10
Color notes for clean photos:
- Keep whites in the same family. Pair bright white with bright white, or creamy white with creamy white.
- Match metallics. Stick to gold with gold or silver with silver. Mixed metals can look muddy in pictures.
- Test colors in real light. Lay ribbon, fabric, and ornaments near the chosen wall at the time you’ll shoot photos. If it looks good to your eye, it will photograph well.
Measure, map your backdrop, and plan the camera spot
A tiny bit of planning makes group shots easy and safe with kids running around.
- Measure the wall: Width and height. Most living room walls have at least 7 feet of height that you can use.
- Mark the footprint: Use painter’s tape on the floor for the backdrop width, plus where people will stand.
- Ideal size: Go 6 to 8 feet wide for groups, if you can. It prevents shoulders from getting cut off.
- Camera distance: Keep 5 to 7 feet between the camera and the backdrop for phone photos. Faces look flattering, and you avoid wide-angle distortion.
Simple diagram in words:
- Camera on a tripod or chair, then an empty standing zone, then the backdrop against the wall.
- In order: “Camera, empty zone, backdrop.”
Safety check I do with my kids:
- Leave a clear path around the tripod.
- Tape cords along the wall.
- Keep stools and fragile props out of the walking line.
Light like a pro with twinkle lights and warm bulbs
Great light fixes almost everything. I keep it friendly for phones and tired moms.
- Use warm white lights labeled 2700K to 3000K. This keeps skin tones soft and cozy.
- Turn off harsh overheads that create shadows under eyes.
- Place two lamps at 45 degrees to the backdrop, one on each side at chest height. Aim light toward faces, not the floor.
- Do not mix cool and warm bulbs. Pick one temperature and stick with it.
- Add twinkle lights behind sheer fabric for glow. Hide battery packs in a gift box.
Bonus daytime tip:
- Face people toward a window. Put the backdrop opposite the window so light hits faces from the front. If the sun is strong, diffuse it with a sheer curtain.
Quick test I always do:
- Take a photo with a person in place, then zoom in on faces. If the whites of the eyes look gray or the skin looks blue, swap bulbs to warmer ones.
Budget, shopping list, and kid helper jobs
I like to plan budget by size. Here is a simple guide you can copy.
| Setup size | Approx. cost | What you get |
|---|---|---|
| Small | $25 to $60 | Simple backdrop roll or flat sheet, one garland, one string of lights, one focal prop |
| Medium | $60 to $150 | Fabric or paper backdrop, two garlands, 2 to 3 light strings, large focal piece, small balloon accent |
| Wow | $150 to $350+ | Seamless paper or sequin panel, layered garlands, twinkle curtains, oversized focal piece, styled floor props |
Mini shopping list template:
- Backdrop material: kraft paper roll, fabric, or seamless paper.
- Hooks or tape: Command hooks, painter’s tape, or a backdrop stand.
- Lights: warm white string lights, two table lamps or floor lamps.
- One focal piece: wreath, marquee letter, oversized paper star, or a balloon cluster.
- One texture layer: knit throw, faux fur rug, burlap, or eucalyptus garland.
Kid helper jobs that work:
- Fluff and hang garland ends.
- Tape paper snowflakes on the wall.
- Sort ornaments by color in bowls.
- Hold the level while you stick hooks.
- Do the light test smile so you can check shadows.
Keep it simple, keep it safe, and keep it fun. When the setup is clear and the colors sing, your photos will, too. My boys always cheer when they see the lights flip on, which tells me the backdrop is ready.
DIY Backdrop Ideas That Wow on Any Budget
I love fast, pretty setups that make photos sparkle without stress. These backdrop christmas party decoration ideas check all the boxes for busy moms. The steps are simple, the supplies are easy to find, and you can scale each one up or down. I tested these with my three boys, so you’ll see what actually holds up with tiny hands and big energy!
Wrapping Paper Wall with Ribbon Grid
This one is a budget hero and looks polished in photos. It feels like a giant gift on your wall, which makes kids grin.
- Materials: 2 to 3 coordinating rolls of gift wrap, double‑sided tape, Command hooks, thin ribbon, big bow or small sign
- Cost: low
- Time: 30 to 45 minutes
Steps I follow:
- Measure the wall, then line up paper vertically from top to bottom.
- Match seams edge to edge. Overlap slightly so the wall does not peek through.
- Add a ribbon grid, think tic‑tac‑toe, and secure ends on the back with tape.
- Finish with a big bow or a holiday sign in the center.
Smart tips:
- Photo tip: Angle your lamps at 45 degrees to the wall to avoid shine on the paper.
- Safety: Test tape on a small paint patch first. Some paints are fussy and need extra gentle removal.
Style notes I love:
- Use one bold pattern, then a solid and a small print so the grid reads clean.
- Keep the grid lines straight by using a level or a long ruler. My oldest loves being “line inspector!”
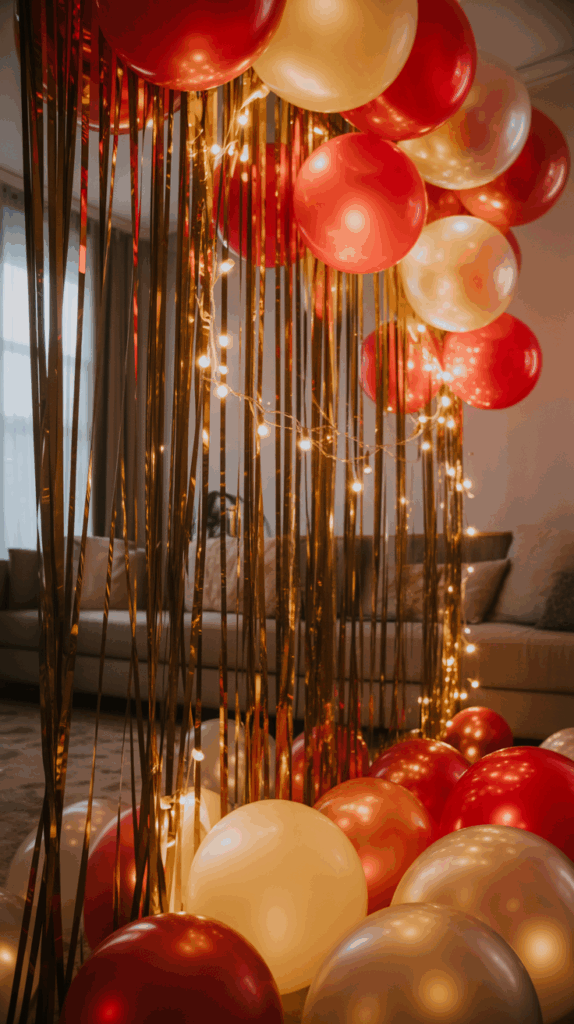
Balloon Garland + Fringe Curtain Sparkle
High impact, low stress, and the fringe does the shimmer for you. Kids love handing me balloons while I build the garland.
- Materials: assorted balloons, pump, fishing line or garland strip, foil fringe curtain, star balloons, removable hooks
- Cost: low to medium
- Time: 60 to 90 minutes
How I build it:
- Inflate small, medium, and large balloons. Make clusters of three to five.
- Thread clusters onto a garland strip or tie to fishing line.
- Hang the foil fringe curtain first with removable hooks.
- Layer the balloon garland across the top corner and down one side.
- Add star balloons where you see gaps.
Make it photo ready:
- Photo tip: Keep the garland asymmetrical. One heavy side gives depth and looks styled in pictures.
- Safety: Tie balloons tight and keep them away from heaters or hot bulbs.
Style notes I swear by:
- Stick to two main colors and one accent. For a glam look, do black and gold with a blush pop.
- Tuck in a few sprigs of faux pine for texture. It reads holiday without adding clutter.
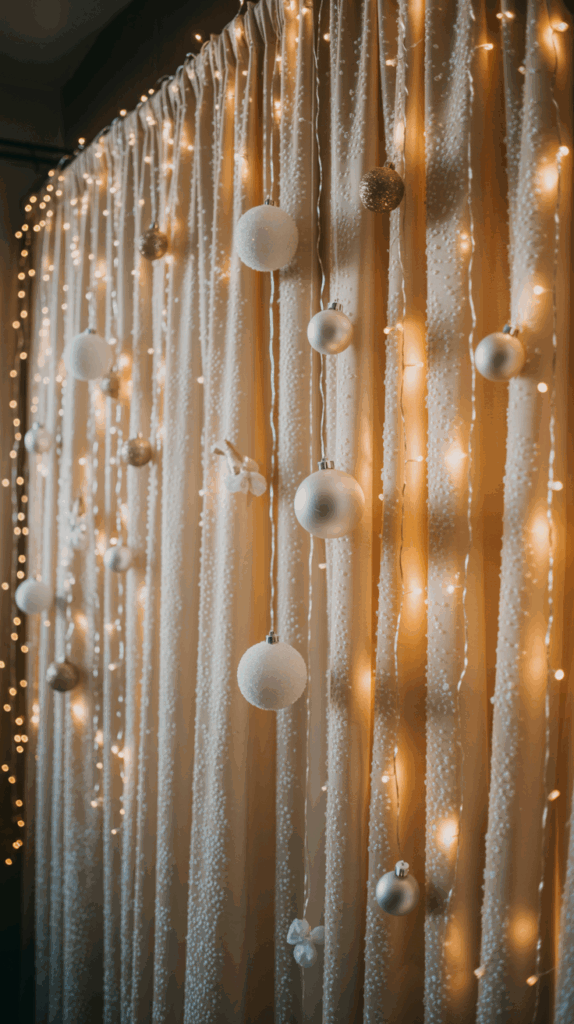
Paper Snowflake Cascade with Fairy Lights
This one is pure magic and almost free. My younger two cut snowflakes while I string, and we all cheer when it lights up.
- Materials: white paper, scissors, clear thread, washi tape, battery fairy lights
- Cost: very low
- Time: 45 to 60 minutes
Simple method:
- Fold paper and cut snowflakes in different sizes.
- Tie snowflakes to clear thread at mixed lengths.
- Hang strings close together with washi tape to create a dense cluster.
- Weave fairy lights through the center and around the edges.
Make it shine:
- Photo tip: Create a thick center so the lights blur softly behind faces. It gives that dreamy glow without filters.
- Kid job: Let kids cut snowflakes with safety scissors. Imperfect edges look more handmade and sweet.
Style ideas:
- Add a few pale blue or silver flakes near the center for contrast.
- Hide battery packs in a small gift box at the base. Easy access, no cords in sight.
Cozy Fabric Curtain on a Tension Rod or Stand
Soft, warm, and renter friendly. It sets up fast and looks like a mini studio in your living room.
- Materials: 2 to 3 fabric panels or twin sheets, tension rod or backdrop stand, clip rings, garland
- Cost: medium
- Time: 20 to 30 minutes
What I do:
- Hang fabric with clip rings on a tension rod or stand.
- Steam, or spritz with water and tug gently to relax wrinkles.
- Add a greenery swag across the top, then let a few pieces drape down.
Camera smart:
- Photo tip: Choose matte fabric. Shiny fabric can glare and show wrinkles more.
- Rental friendly: Use a tension rod in a doorway. No holes, no fuss.
Style that works:
- Layer two fabrics, a solid base and a subtle pattern in front, for depth.
- Clip mini stockings or paper stars across the top for a sweet touch the kids can help hang.
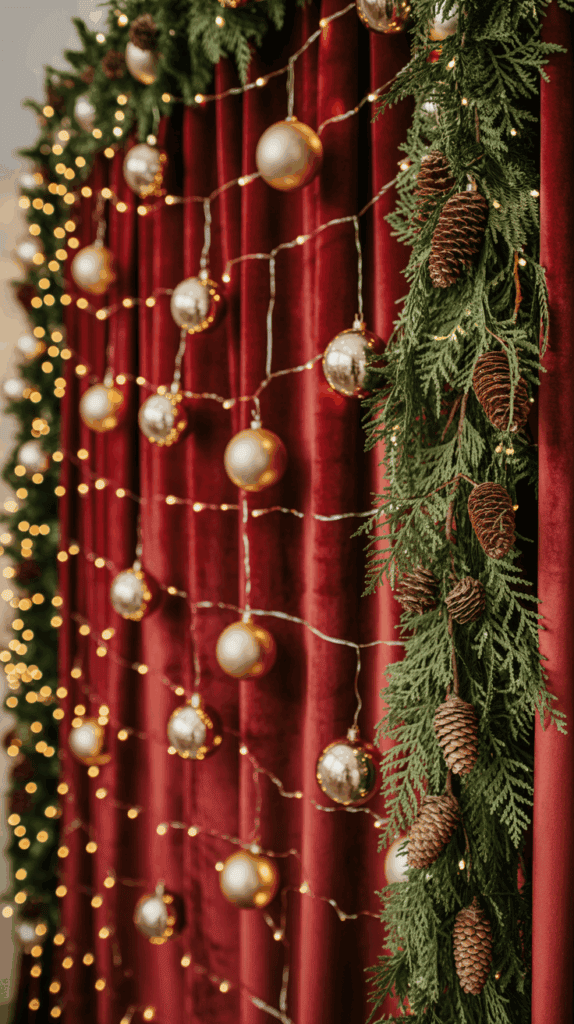
Greenery and Ornament Feature Wall
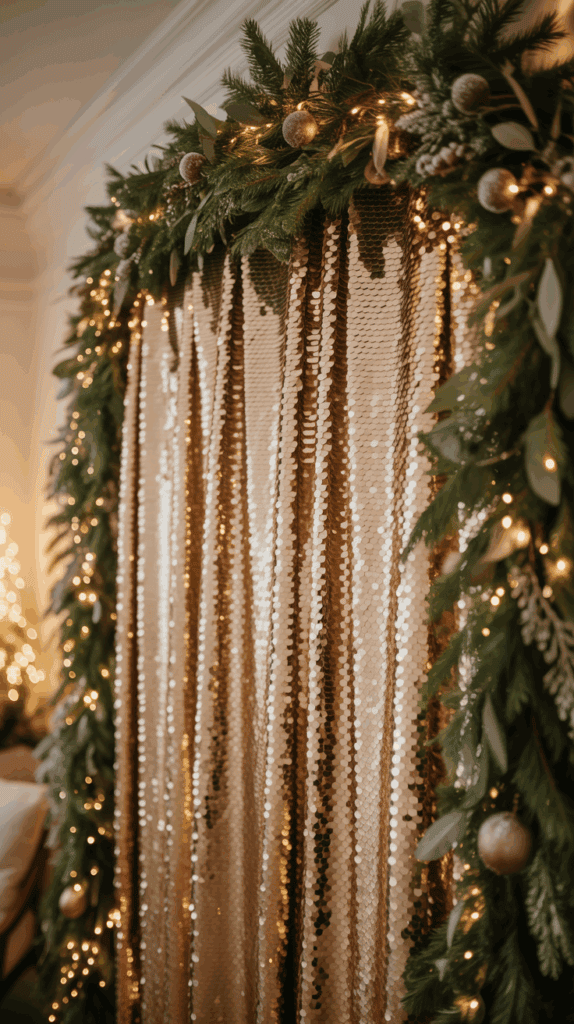
This gives high style without the price of a floral wall. It is sturdy, pretty, and great for group shots.
- Materials: faux garland, Command hooks, zip ties, plastic ornaments, ribbon
- Cost: medium
- Time: 40 to 60 minutes
Step by step:
- Place hooks in a wide grid across the wall.
- Swag garland in soft waves, then secure with zip ties on the hooks.
- Tie ornaments at mixed heights with ribbon.
- Add ribbon tails in clusters for movement.
Picture perfect:
- Photo tip: Place the tallest ornament cluster near eye level. It becomes the focal point and draws faces to the center.
- Safety: Use shatterproof ornaments. Little hands move fast.
Style boosts:
- Stick to one metallic. All gold or all silver keeps the wall clean and luxe.
- Add a soft rug and a couple of wrapped boxes at the base to ground the scene.
Quick mom truth to wrap this up, simple backdrops win on busy nights. Pick one, set a timer, and let your kids join the build. You will get smiles, sweet outtakes, and photos you love!
Interactive Backdrops Kids Love and Guests Remember
I build in little moments that get kids moving and guests smiling. These interactive setups fold right into your photos and keep lines flowing, which saves my sanity. If you want easy, joyful, and kid safe backdrop christmas party decoration ideas, these are my favorites that always deliver.
Hot Cocoa Bar Backdrop with Chalkboard Menu
A cocoa bar works like a magnet for kids and tired parents. I set a small table in front of a big chalkboard, then write a simple menu with cute doodles. Warm string lights across the top, a mini banner, and we are photo ready.
I stock the table with mugs, toppings, scoops, and napkins. Think mini marshmallows, crushed peppermints, and chocolate chips. I keep the hot kettle on a side cart for safety, not on the main table.
How it runs:
- Build your cocoa: Guests pick a mug, add mix, then toppings.
- Snap a pic: I cue a quick photo right at the chalkboard while the steam curls.
- Keep it clean: Swap sticky spoons for disposable tasting spoons every 15 minutes.
Quick tips I use:
- Menu trick: List three house specials, like Peppermint Pop, Snow Day, Cozy Classic.
- Flow: Place mugs first, then toppings, then napkins, then the photo spot.
Countdown or Advent Wall with Mini Envelopes
This one brings out big smiles. I hang twine in a simple grid and clip numbered envelopes with tiny clothespins. My boys love numbering the envelopes, which makes setup fun and fast.
I tuck notes, small candies, or a photo prompt inside each envelope. Guests pick a number, open it, then follow the prompt. Ideas I repeat every year:
- Take a silly snowman photo
- Share your favorite holiday song
- Find someone in red and pose together
Keep a small basket of backup treats for late guests. When an envelope is opened, I add a sticker so we know it is done. It turns into a playful wall of memories by the end of the night.
DIY Ornament Crafting Corner
Ornaments double as a craft and a party favor. I hang a simple backdrop, then place a craft tray with clear ornaments, stickers, ribbon, and faux snow. A big sign with three steps keeps kids focused.
My sign reads:
- Fill with faux snow or confetti.
- Add stickers or a tiny ribbon bow.
- Cap it, then pose with your ornament.
I lay a drop cloth under the table for fast cleanup. Photo tip I love, have kids hold their ornament up to the backdrop at chest height so the sparkle shows. Label a small drying tray with names so nothing gets mixed up.
Photo Booth Props Station with Quick Printables

A prop station creates instant laughs. I mount a small pegboard or basket rail next to the backdrop, then hang printable props on sticks. Santa hats, candy canes, reindeer noses, and big bow ties are always a hit.
I add a simple sign with a QR code that links to a shared album. Guests scan, snap, and upload. If food is nearby, I place a pump bottle and sanitize props between uses.
Smart layout:
- Props at kid height on the left.
- Camera marker on the floor in the center.
- A small bin for used props on the right.
Want easy variety? Rotate a few props every 30 minutes so photos feel fresh. Little change, big energy!
Small Spaces and Rental‑Friendly Backdrops You Can Set Up Fast
Tiny rooms still deserve big holiday energy, and I promise you can get it without drilling holes or buying pricey gear. These quick setups are renter safe, easy to store, and built for fast photos with kids. If you want backdrop christmas party decoration ideas that fit a small home and a busy schedule, this is my go-to list that never fails.
Doorway or Hallway Garland Frame
I love turning a doorway into a mini photo arch. It frames faces, hides clutter in the next room, and looks festive from both sides.
- What you need: two faux garlands, ribbon, a mini sign, removable hooks.
- Time: 20 to 30 minutes.
How I set it up:
- Place removable hooks along the top and sides of the doorway, about every 12 inches.
- Hang the first garland up one side, across the top, and down the other side.
- Layer the second garland over the first for fullness, then fluff the branches.
- Tie ribbon tails at the corners for movement.
- Center a mini sign at the top, right where eyes go.
Smart tips:
- Photo tip: Shoot from the opposite room so you get depth and that soft background blur.
- Keep the doorway clear. Shoes and baskets get moved to a closet for safe walking space.
- Match ribbon to your color palette so the frame reads clean in photos.
Why it works in rentals:
- Removable hooks protect paint, and faux garland is light but sturdy.
- Take it down in minutes, coil garlands, and store with the sign clipped on.
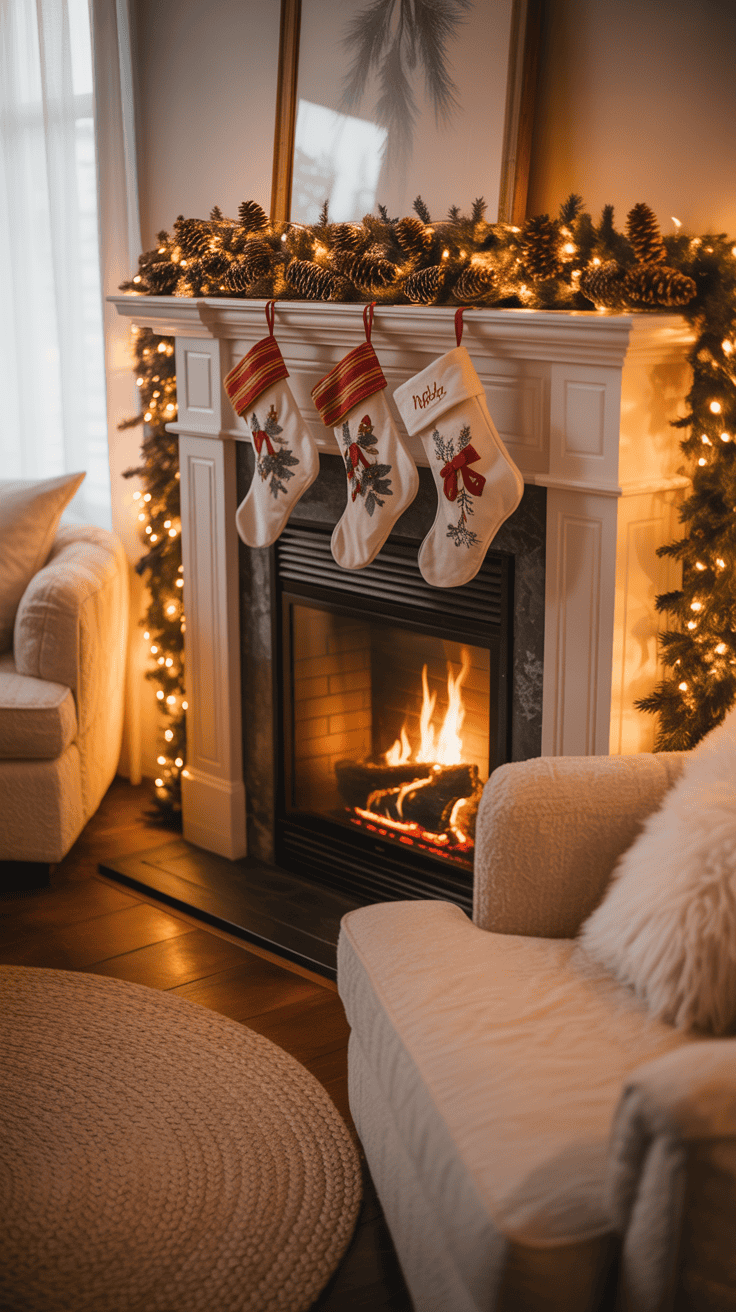
Sofa or Mantel Photo Nook
This is the fastest way to get a cozy shot. I style the sofa or mantel, sit the kids down, and snap ten photos before anyone loses patience.
- What you need: a banner, stockings, two pillows in the same palette, plus a narrow tree or two floor lanterns.
- Time: 15 to 25 minutes.
How I style it:
- Hang a simple banner across the mantel, or on small hooks above the sofa.
- Add stockings or a matching garland right under the banner.
- Place two coordinated pillows on the sofa for color balance.
- Frame the scene with a slim tree or two lanterns so faces land in the center.
Safety and glow:
- Use battery candles inside lanterns. They are safe with kids and still give a warm flicker.
- Keep cords tucked behind furniture or taped to the baseboard.
Photo polish:
- Sit everyone at a slight angle, not flat to the camera. It looks natural and tidy.
- If the mantel is busy, keep pillow patterns simple so the photo does not feel crowded.
Storage tip:
- Pack the banner, stockings, and ribbon in one clear bag labeled “Sofa Nook” so next year is a breeze.
Tabletop Dessert Backdrop with Cake Pedestal
When space is tight, I turn the dessert table into the backdrop. It looks styled, smells amazing, and stops crowding in the kitchen.
- What you need: a folding tri‑fold foam board, kraft paper or fabric, clips or tape, a mini wreath, cake pedestal.
- Time: about 20 minutes.
Quick build:
- Stand the tri‑fold behind the table so it curves slightly for stability.
- Wrap it in kraft paper or smooth fabric, then secure on the back.
- Clip a mini wreath in the center. Add ribbon tails for height.
- Place a cake or cupcake stand center stage, then flank with cookies and candy canes.
Kid helper job:
- My boys place cookies, line up candy canes, and add sprinkles. It keeps little hands busy and proud.
Why it shines in small homes:
- The board is light, folds flat, and hides busy kitchen walls.
- Great for condos, galley kitchens, and apartment dining nooks.
Photo tip:
- Keep treats at mixed heights for dimension. Use overturned bowls under a cloth to lift plates if you need a quick riser.
Clean and safe:
- Leave 3 to 4 inches between lights and the board if you add string lights, just to avoid heat.
Portable Backdrop Stand That Folds Away

A portable stand is my secret for fast, repeatable setups. You can buy a budget stand or build a PVC frame in an afternoon, then use it every season.
- What you need: budget backdrop stand or DIY PVC frame, fabric or a sequin panel, one hero piece like a jumbo bow, clips.
- Time: 30 to 45 minutes.
Set it up:
- Assemble the stand, then pull fabric tight and clip at the top and sides.
- Add one hero piece near the top third, like a jumbo bow or oversized wreath.
- Style the floor with two wrapped boxes or a small bench to anchor the scene.
Make it photo ready:
- Keep fabric matte to avoid glare. Iron or steam for a clean look.
- If you use sequins, angle lamps at 45 degrees so faces stay bright without hot spots.
Storage that saves sanity:
- Break it down, group parts with Velcro ties, and label each piece. I store poles in a long bin and keep clips in a zip bag.
- Tape a card with measurements and last year’s fabric to the inside of the bin, which saves time next season.
Budget note:
- A PVC frame costs less, but add sandbag weights for safety. Kids lean, and stands wiggle.
With these small space setups, you get quick wins, tidy floors, and happy photos. Pick one, set a timer, and let your kids help. Fast, cute, and rental friendly, which is my favorite combo!
Style, Light, and Capture Photos Like a Pro
I want your photos to look amazing without a lot of stress. That is why I style with intention, keep lighting simple, and use phone tricks that work fast with kids. If you want backdrop christmas party decoration ideas that feel polished and family friendly, this is how I do it at home with three busy boys!
Layering and Scale for That Designer Look
I build every backdrop in three simple layers. It keeps the scene tidy and camera ready.
- Flat layer: This is your base. I use seamless paper, a sheet, or fabric pulled tight. Solid colors work best, and matte finishes photograph cleaner than shiny.
- Texture layer: Add depth with greenery, knit, faux fur, or paper stars. I like a garland that drapes, or a soft throw clipped across the top corners for a gentle curve.
- Focal element: Choose one star. A big wreath, marquee letter, balloon cluster, or giant bow. Keep it simple, keep it bold.
I start big, then fill. Large items go up first so I can see the shape. Once the base reads balanced, I tuck in small accents where the camera will catch them, not everywhere.
Keep the focal point near eye level for most guests, about 5 feet from the floor. Faces will land right in the sweet spot of your frame. Avoid clutter at foot level so kids do not trip. I skip tiny floor decor near the standing zone, and I keep presents pushed to the sides.
Three quick styling habits that help:
- Rule of thirds: Place the focal piece slightly off center for depth.
- Odd numbers: Cluster accents in threes. It looks natural in photos.
- Consistent spacing: Keep gaps even between ornaments and bows so the wall feels calm, not busy.
Easy Lighting and Phone Photo Tricks
Good light is everything. I use warm bulbs, simple angles, and a few phone settings that make faces glow.
- Wipe the phone lens: A quick wipe beats any filter. Smudges make photos soft and gray.
- Turn on grid lines: In your camera settings, switch on the grid. Line eyes with the top third for a polished shot.
- Tap to focus on faces: Tap the face, wait for the little sun icon, then hold to lock exposure if kids are wiggly.
- Slide up to brighten: Nudge the exposure just a touch. Stop before whites lose detail.
- Use a cheap tripod with a remote: Set the phone at chest height or a little above. A Bluetooth remote saves you from timer sprints and blurry shots.
Lighting setup that never fails:
- Place two lamps or soft lights at 45 degrees to your backdrop, one on each side, a few feet back. Aim toward faces, not the wall.
- Keep twinkle lights behind people to add glow. They blur into pretty bokeh and do not wash out faces.
- Match color temperature. I use warm white bulbs labeled 2700K to 3000K so skin looks cozy.
Extra mom tip I use at every party:
- Turn off bright overheads that cast harsh shadows under eyes.
- If you have a window, face people toward it, then add one side lamp to fill shadows.
Setup Timeline and Quick Checklist
A simple schedule saves my sanity. I spread tasks over two days so nothing feels rushed.
- Two days before: Gather supplies, measure the wall, test hooks or tape on a small paint patch. Charge your phone remote.
- One day before: Build the base layer. Hang the backdrop, set hooks, fluff garland, and place big pieces.
- Party morning: Add details. Style the focal piece, tuck in ribbon, place safe floor accents, and coil cords neatly.
- 30 minutes before: Test photos with a person in place. Adjust lights and exposure, then set the tripod and remote.
I keep this checklist on the counter:
- Tape or mounting putty
- Extra hooks or clips
- Extension cord
- Fresh batteries for lights and remote
- Scissors
- Trash bag
Pro tip, put small tools in a belt bag or apron. Hands free, no misplaced scissors.
Safety and Kid‑Proofing Musts
Kids move fast, and parties get busy. I set safety rules into the decor so I can enjoy the night.
- Secure cords with tape: Run cords along the wall or baseboard, then tape flat. Keep them outside the photo zone.
- Use shatterproof ornaments: Plastic or foam only on the wall. Glass stays boxed or goes high on the tree.
- Avoid real flames: I use battery candles in lanterns. They photograph beautifully and are safe around little hands.
- Place heavy decor out of reach: Big frames, heavy wreaths, and metal signs sit higher, or go on sturdy hooks I have used before.
Latex balloon note:
- Latex can be risky for toddlers and pets if popped or chewed. Stick with foil balloons near the floor, and toss popped pieces right away.
Final check I always do:
- Tug test: Give garlands and the focal piece a gentle tug before guests arrive. If it wiggles, I add another hook or zip tie.
Clean Up, Store, and Reuse
I want bedtime on time after a party, so I do a fast teardown. Fifteen minutes, then feet up and cocoa.
My 15‑minute plan:
- Unplug lights, pull batteries, and group by length.
- Remove small accents first, then the focal piece, then layers.
- Peel tape slowly at a low angle to protect paint.
Smart storage that saves money:
- Sort by type: Lights, ornaments, ribbon, fabric, tools.
- Label gallon bags for small items like hooks, clips, and spare bulbs.
- Coil lights around cardboard or a paper towel tube. No tangles next year, which feels like a gift.
- Note what to donate: Extra theme items you did not use or will not repeat.
- Note what to keep: Neutral garlands, plain ribbon, shatterproof ornaments in solid colors.
- Add a clearance list: Replacement batteries, extra hooks, one new focal piece for next year.
Final step I never skip:
- Snap a quick photo of the full setup and a close shot of the lights. Save it in a folder titled “Holiday Backdrop” with the year. Next season, you can rebuild the look in minutes, or improve it with one upgraded element.
With a clear plan, safe styling, and simple photo tricks, your backdrop will sparkle, your kids will smile, and your camera roll will be full of keepers. I am cheering you on from my very real living room, toys and cocoa mugs included!

Conclusion
Here is the heart of it, a simple plan, one bold focal point, and warm light are the secrets to backdrops that wow guests. If you keep your colors tight, place a hero piece at eye level, and use cozy 2700K bulbs, your photos will glow. These backdrop christmas party decoration ideas work in small spaces, with kids underfoot, and on real-life timelines. I have done them all with my three boys handing me tape, ribbon, and giggles, which is the best kind of chaos.
Pick one idea and try it this weekend. Start with the base, add texture, then pop in your focal piece. Keep cords safe, stash extra hooks in your pocket, and snap a quick test shot. Done, and you are party ready.
Most of all, make a memory with your kids, even if the ribbon goes a little crooked. That is the photo you will love.
I would love to see what you create, share your pictures or favorite tips in the comments!
This post may contain affiliate links. Read the full disclosure here.