DIY Valentine’s Day Classroom Decor That’s Budget-Friendly
By the time February rolls around, I’m usually juggling soccer practice, spelling lists, and a sink full of dishes, but I still want my boys’ classrooms to feel special for Valentine’s Day! That’s where diy valentine’s day classroom decor saves me. I love that I can pull together sweet, colorful touches without spending half the week or our whole grocery budget. A few smart ideas, a little tape, and some crayons, and suddenly their rooms feel festive and fun.
As a mom of three very active boys, I need projects that are quick, sturdy, and not too precious. If something gets crumpled in a backpack, it shouldn’t be a disaster! So I stick to teacher-friendly ideas that are easy to hang, easy to store, and easy to remove once the holiday is over.
Most of what I use comes from the dollar store, the recycling bin, or the art drawer that never seems to close. Cardboard boxes become hearts, leftover wrapping paper turns into banners, and snack boxes turn into cute little displays. My kids can help with almost everything, which keeps them busy and proud of what they made.
In this post, I’ll share the exact projects we’ve tried, what worked best in real classrooms, and little tricks that keep everything budget-friendly and low-stress. You’ll get quick, cute ideas, simple supply lists, and step-by-step directions so you can pull it all together fast and still feel like the fun, creative mom you are!

Plan Your DIY Valentine’s Day Classroom Decor Without Stress or Overspending

Before I start cutting hearts and hanging banners, I like to have a simple plan for my diy valentine’s day classroom decor so I do not lose my mind or my money. A tiny bit of planning saves me from last-minute panic runs to the store with tired kids in the cart. I treat it like a mini project: pick a budget, pick a time, and then stick with it.
When I give myself clear limits, decorating stays fun instead of stressful. I know what I can spend, I know how long I have, and I can say a happy “nope” to all the extras that try to sneak in.
Set a Realistic Budget and Time Limit Before You Buy Supplies

I always start with two questions in my head:
- How much can I spend for this classroom?
- When am I actually going to do this?
For each classroom, I set a small budget in the 10 to 25 dollar range and a real-life time limit, like one evening after the kids go to bed or one weekend afternoon. That is it. No dragging the project out all week.
Here is how I usually think about it:
- 10 dollar budget:
Perfect for very simple decor. I can usually cover:- A paper banner or garland
- A few accents for the classroom door
- Small table scatter or a tiny centerpiece using things I already own
- 15 dollar budget:
This gives a little more wiggle room. I can often manage:- A banner
- Cute door decor
- A simple table centerpiece or treat display
- 20 dollar budget:
This is my sweet spot for one classroom. With 20 dollars I can usually pull together:- A larger or layered banner
- A fuller door display with hearts and a fun phrase
- One small table setup, like a Valentine card station or a reading corner feature
If I know I only have, for example, one Sunday afternoon, I do not start big projects like hand-cut confetti for 30 kids. I pick fast wins. My rule is simple: if it cannot be finished in the time I gave myself, it is not for this year.
Before I even think about the dollar store, I walk around my house and grab:
- Scrap paper and cardstock
- Leftover ribbon, yarn, or string
- Cardboard from cereal boxes or shipping boxes
- Gift tissue, wrapping paper, and old gift bags
- Markers, crayons, colored pencils, stickers
I spread it all out on the table so I can see what I already have. Then I make a tiny list of what I still need, like tape, a pack of doilies, or one roll of wrapping paper. I try to only buy what fills the gaps. This keeps my cart from exploding and my receipt from making me cringe.
Pick One Color Theme So Everything Looks Cute Without Extra Work

The fastest trick I use to make everything look pulled together is to pick one simple color theme. Even basic crafts look styled when the colors match.
Some of my favorite easy Valentine color ideas are:
- Classic red and pink:
Sweet and bright. It works with almost any store-bought Valentine item. - Red and white with kraft paper:
Looks cozy and a little “Pinterest-y” without any real effort. - Pink and gold:
Great for older kids or a little more sparkle. - Candy colors:
Bright rainbow, like conversation hearts. Fun for younger kids.
Before I decide, I like to peek inside the classroom if I can. I check:
- What color the bulletin board background already is
- What color borders the teacher uses
- Any big posters that will stay up
If the bulletin board is already bright blue, I might skip too much red and instead do pink, white, and light blue so it all blends nicely. If the teacher has a lot of neutral decor, I feel free to go bold with red and pink.
I always snap a quick photo of:
- The classroom door
- The main bulletin board
- Any table or shelf the teacher says I can use
That way, when I sit down at home with my supplies, I can picture where everything will go. It saves me from making a giant banner that does not fit or a centerpiece that is too big for the tiny table.
Choose Two or Three Focus Areas Instead of Decorating the Whole Room
With three boys and a busy week, I do not have the time or energy to cover every inch of a classroom. So I pick two or three focus areas and pour my effort into those.
My favorite spots are:
- The classroom door
- One bulletin board
- A small Valentine table or reading corner
When I only decorate a few areas, I can make them bold and fun without feeling like I need to climb on every chair in the room.
Here are a few combos that have worked really well for us:
- Bold door + simple banner + small table:
A big heart-covered door with a cute phrase, a paper banner across the whiteboard, and a tiny table with a Valentine box or basket for cards. The kids walk in and it feels festive right away. - Bulletin board feature + door sign:
I turn one board into a “Love to Learn” or “Our Kind Hearts” wall and add student names or simple hearts. Then I add a matching sign or mini wreath to the door. Super cute, not a lot of work. - Reading corner glow-up:
If the teacher has a cozy reading spot, I add a small banner, a jar of paper hearts, and a Valentine pillow from home. It looks special and the kids love sitting there.
The magic is in choosing where the kids will actually notice the decor. They see the door every time they walk in. They stare at the bulletin board during lessons. They crowd around the Valentine table on party day. If those spots feel special, the whole room feels festive, even if the rest of the walls stay plain.
Keeping the focus small keeps my budget in check too. Instead of buying 10 packs of stuff to scatter everywhere, I buy a couple of things and make those areas really shine.
Easy DIY Valentine’s Day Door and Wall Decor Kids Can Help Make

When I decorate for Valentine’s Day at school, I want big impact without big effort, and I want my boys to feel proud that they helped. Simple door and wall ideas are perfect for diy valentine’s day classroom decor because they use cheap supplies, fill a lot of space, and are very kid-friendly. A roll of paper, a stack of hearts, and some tape can completely change how a classroom feels.
I also love that door and wall projects double as sweet messages for the kids and teacher. The room looks cute, and at the same time you are filling it with kind words and names that make every child feel seen. That is a win in my book.
Heart Explosion Classroom Door Using Paper and Markers Only

This “heart explosion” door is one of my favorite tricks because it looks like you spent hours on it, but really it is just paper, tape, and markers. My boys love helping with the hearts, and they get so excited when they walk up and see their work right at the classroom door!
Here is how I set it up:
Cover the top half of the door
I usually bring a roll of butcher paper, kraft wrapping paper, or even a few poster boards taped together.- Tape the paper across the top half of the door.
- Wrap it around the edges if you can, so it looks neat.
- Make sure not to cover the door handle, window, or any safety sign.
Make a few heart templates at home
I cut 2 or 3 heart shapes from cardboard or a cereal box in different sizes. This way every heart looks similar, and kids do not stress about drawing a “perfect” heart.Let the kids trace and cut hearts
This is the fun part! I bring a stack of red, pink, white, and even scrap paper.- Kids trace the templates and cut their own hearts.
- For younger classes, I pre-cut some hearts so everyone can join in, even if scissors are tricky.
Add color and kind words
I put out markers, crayons, and colored pencils and give a simple prompt:- Write your name.
- Add a kind word about a classmate or friend.
- Or write a short message like “You are kind”, “You are loved”, or “You are a good friend”.
You can also ask kids to write on a heart for each classmate. It turns the door into a wall of compliments.
Create the “explosion” effect
Once the hearts are ready, start taping them all over the paper-covered part of the door.- Cluster some close together.
- Overlap a few so it looks layered and full.
- Let some “spill” out to the sides and top so it feels like hearts are bursting from the door.
For a little extra, you can draw or add a few hearts right on the paper with markers to fill any small gaps.
Add a simple, bold phrase
I like to keep the phrase big and easy to read from down the hall. Some cute ideas:- “Our Class Is Full of Heart”
- “Spread Kindness Like Confetti”
- “Love Grows Here”
- “Kind Hearts, Happy Class”
I write the phrase on a strip of white paper, cut it into a banner shape, and tape it across the center of the hearts or along the top.
Mom tip: Use painter’s tape or removable adhesive anywhere you stick paper directly on the door. I tape the big background paper to the door with painter’s tape, then I use regular tape only on paper-to-paper. This keeps the actual door safe, which teachers and school staff really appreciate.
The best part is that this door is easy to add to. If new students join or kids want to make more hearts, you can keep taping them on all week.
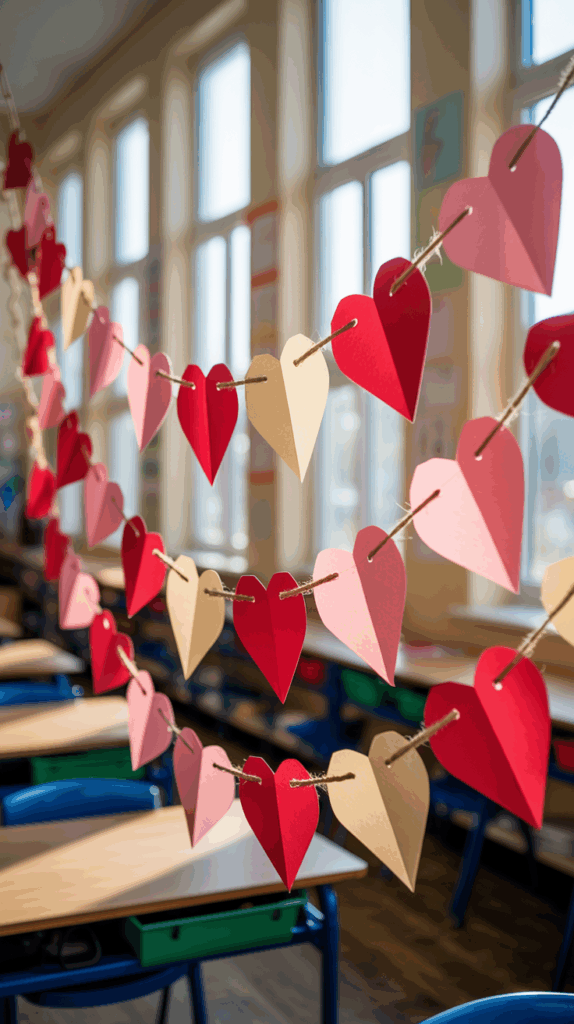
Paper Chain and Heart Garland That Doubles as a Kindness Activity

Paper chains and heart garlands are my favorite way to stretch a tiny budget. You can fill a whole wall or ceiling with just a few sheets of construction paper and some string. When you turn each link or heart into a kindness note, it becomes decor and a sweet social-emotional activity at the same time.
Here is how I turn a basic chain into a kindness challenge.
Cut the paper strips or hearts
- Use construction paper in red, pink, white, and any fun accent color.
- For chains, cut strips about 1 inch by 8 inches.
- For garlands, cut simple hearts or use a heart-shaped cookie cutter as a tracing guide.
Have kids write kind words first
Before any stapling or taping, I pass out a small stack of strips or hearts to each child.
I give them simple prompts like:- Write one kind word that describes a classmate.
- Write a short compliment, like “You share”, “You are funny”, “You are a good reader”.
- Write something they love about their class or school.
I remind them to keep messages positive and kind. You can even make a quick “kind word” list on the board to help kids think of ideas.
Build the paper chain or heart garland
Once the writing is done, it is time to assemble.- For a paper chain, loop the first strip into a circle and staple or tape it. Then slide the next strip through the first loop and connect it. Keep going until you have a long chain.
- For a heart garland, punch a small hole in each heart, then string them on yarn or ribbon. You can alternate colors or sizes to make it look fun.
Pick the perfect hanging spots
These decorations cover a lot of space quickly, which is perfect for a $20 budget. Some great places to hang them:- Across the top of the whiteboard or chalkboard.
- Along the front of the teacher’s desk.
- Over the classroom door or just inside the doorway.
- Around a reading corner or cozy spot.
- Across a bulletin board as a border.
I like to hang the paper chain in a swoop, like a party banner, and let a heart garland hang straight or crisscross a corner of the room.
Use it to spark conversations
Once everything is hung, I love pointing out how the whole room is “held up” by kindness.- Kids can walk along the chain and read each link.
- You can invite them to find a word that describes them.
- You can add a few blank strips and hearts in a basket so kids can keep adding new kind words all week.
Even my wiggly boys get into this one, because staplers and bright paper feel like “real” work, not just a school project. It is low-cost, covers a ton of wall space, and sets such a sweet tone in the classroom.
DIY Bulletin Board: From Plain to Valentine Photo Wall

If the teacher gives you a bulletin board, you can turn it into a simple “photo wall” or display spot for student work without spending much at all. I like this project because it looks polished, but it is really just a backdrop, a title, and some easy paper frames.
Here is how I pull it together.
Start with a cheap backdrop
You do not need fancy bulletin board paper. I usually bring:- Butcher paper, if I already have some.
- A plastic tablecloth from the dollar store.
- Wrapping paper in a solid color or simple pattern.
I cover the board and tuck the edges under the existing border, or I add a simple paper border in a solid color so it all feels neat and finished.
Choose a sweet, bold title
A simple phrase makes the board feel like a “spot” instead of just a wall. Some easy ideas:- “We Love to Learn”
- “Our Class Is Sweet”
- “You Make My Heart Smile”
- “Our Kind Hearts”
- “Love of Learning Lives Here”
I like to cut letters at home using a stencil, a cutting machine, or even print them from my computer and cut them out. Then I just tape or staple them in a curve or straight line across the top.
Add simple paper frames for student work
This is where the magic happens. Instead of just taping papers to the board, I create little “frames.”- Cut strips of colored paper (about 1 inch wide).
- Arrange them in rectangles that fit a half-sheet or full sheet of paper.
- Tape or staple just the corners of the “frame” to the board, so you can slide student work inside.
You can also use washi tape to make quick frames right on the backdrop. Just stick washi tape in a rectangle shape and place the paper in the middle.
Some easy ideas for what to display:
- Valentine drawings or heart-themed art.
- “I love…” lists, where kids finish the sentence “I love…” with anything from pizza to their grandma.
- Short poems about love, friendship, or kindness.
- Photos from the Valentine party, if the teacher is comfortable with that.
Bring pre-cut pieces and pre-written letters
This is my biggest “mom sanity” tip. I try to do almost all the cutting at home while the kids watch a show or do homework. I arrive at school with:- The backdrop already measured and cut.
- Title letters in a baggie, in the right order.
- Frame strips bundled with a paperclip.
That way, setup in the classroom takes 15 to 20 minutes instead of an hour. I can staple the backdrop, stick up the title, and lay out frames. Then kids can help the teacher fill the frames with their work during class time.
Turn it into a mini “photo wall”
If the teacher likes taking class pictures, this board can double as a photo backdrop.- Keep the center area open.
- Add a few oversized hearts or speech bubbles that say things like “Be Kind”, “Best Class Ever”, or “Friends”.
- Kids can stand in front of it for a quick Valentine group picture.
With a bulletin board like this, the classroom gets a sweet, seasonal focal point that still honors learning and student work. It is cute, it is personal, and it does not blow your budget or your schedule.
Tabletop and Desk Decor Ideas That Are Cute, Practical, and Cheap

Table surfaces are my favorite place to play with diy valentine’s day classroom decor, because a few small pieces can make the whole room feel ready for a party without a lot of work or money. I like things that can go up fast, survive sticky little hands, and then either be reused or tossed guilt-free when the party is over.
When I decorate tables and desks, I try to mix cute, practical, and cheap. If something can double as an activity, storage, or a little gift for the teacher, that is a big win in my book.
Dollar Store Tablecloth Hack for an Instant Valentine Party Table

If I only have 5 minutes to set up a Valentine table, I grab a plastic or paper tablecloth from the dollar store and call it a day. A simple red, pink, or white tablecloth turns any boring classroom table into a Valentine station in seconds.
Here is how I usually dress it up without spending much:
- I cover the whole table with one solid tablecloth in red, pink, or white.
- Then I take a second tablecloth in a different color and fold it into a long strip to act like a runner.
- If the table is small, I sometimes cut the second one in half and use one piece down the center and save the other for another table.
That quick layer of color makes the table look like it was planned, not thrown together in a rush before school. My boys always comment on how “fancy” it looks, which makes me laugh, because it is just folded plastic.
For a fast kid-friendly “centerpiece,” I like to use paper hearts or heart doilies:
- Cut or buy a stack of paper hearts in different sizes.
- Tape them down the center of the table, right on top of the runner.
- Leave a little space between them so kids can write or color.
Sometimes I write simple prompts on a few hearts, like:
- “I feel loved when…”
- “I am a good friend because…”
- “I am thankful for…”
The kids can color the hearts or fill in the prompts during the party. It looks like decor at first, then it turns into a sweet activity without any extra setup.
I also like to match the type of tablecloth to what will happen at that table:
- Snack tables: I use a wipeable plastic tablecloth, because my boys and their friends are not neat eaters. When juice spills or frosting smears, I just wipe it down or roll it up and toss it.
- Craft tables: I use a paper tablecloth if I can, especially white or kraft paper. The kids can doodle hearts, write messages, or trace their hands. It becomes a giant community Valentine drawing, which is adorable.
If the tablecloth feels a little flimsy, I use a bit of painter’s tape under the edges so it does not slide every time someone leans on the table. It helps a lot with wiggly kids and crowded classrooms.
Recycled Jar or Can Vases for Simple Heart Centerpieces

My recycling bin is one of my favorite “stores” for Valentine centerpieces. Clean jars and cans turn into the sweetest little vases with just a bit of paint or paper, and they cost almost nothing.
Here is my basic process that my boys can help with:
- Clean and dry the jars or cans
I save pasta sauce jars, jelly jars, and even small soup cans. I peel off the labels, soak any sticky glue, and dry them well. - Cover or paint the outside
There are a few easy options, depending on what I already have:- Paint: We brush on acrylic paint in red, white, or pink. Two thin coats usually look best.
- Tissue paper: We brush a little watered-down glue on the jar, press tissue paper squares on, then add another light coat of glue on top. It gives a soft, stained-glass look.
- Wrapping paper: We wrap the can like a present, cut off the extra, and tape the seam down the back.
- Add a little “Valentine” detail
Once the base is dry or taped on, we dress it up a bit:- Tie ribbon, yarn, or twine around the top and knot it in front.
- Cut a small paper tag in a heart or rectangle shape.
- Write the teacher’s name, the class name, or a simple word like “Love” or “Kind”.
- Punch a hole in the tag and tie it onto the ribbon or yarn.
Now it is time to fill them. I like things that are either reusable or kid-safe:
- Fake flowers from the dollar store in red, pink, or white. I often cut the stems shorter so they sit nicely.
- Paper hearts on craft sticks. We tape or glue hearts to the tops of sticks, then poke them into a bit of tissue paper stuffed in the jar.
- Pencils with Valentine designs. This one is my favorite, because the kids can take them home later, and the “vase” becomes a pen holder.
If I know the teacher likes desk organization, I lean into the practical side:
- Fill one jar with pens and markers.
- Fill another with scissors or highlighters.
- Add a smaller one for paper clips or sticky notes.
The teacher can keep the jars long after the party as a small supply holder, and it still feels like a gift, not just decor.
My boys love helping decorate these. I set them up with paint, stickers, and markers and let each child “design” one jar. It is fun to see their personalities show up, and the jars look extra sweet when you know little hands worked on them.
Sweet but Simple Desk Treats and Name Tags
Desk decor might be my favorite part of Valentine classroom decorating, because it feels so personal. When each child walks in and sees their spot marked, it tells them, “You were thought of.” I try to keep these ideas cheap, fast, and easy to move around, because desks get bumped all day.
Here are a few budget-friendly ways I like to mark each student’s desk:
- Paper hearts with names: I cut medium-size hearts from cardstock or construction paper and write each child’s name in marker. I tape the heart to the corner of their desk or stand it up by leaning it against a pencil box.
- Mini bookmarks: I cut strips of cardstock, round the corners, and add a tiny heart sticker at the top. On each one, I write the child’s name and a short message like “Happy Valentine’s Day” or “Keep reading”. These slip right into their current book.
- Tiny treat bags: I use snack-size bags or mini paper bags. Inside I add a mix of allergy-friendly options and a little candy if the teacher allows it.
To keep things easy on parents and safe for kids, I like to mix treats that are not food. Some great low-cost, allergy-friendly ideas are:
- Heart stickers or small sticker sheets
- Valentine pencils or pens
- Mini erasers
- Temporary tattoos
- Little maze or coloring sheets folded into the bag
If I include candy, I stick to something simple like wrapped chocolates or lollipops and always check with the teacher first.
One of my favorite personal touches is a little heart note on my boys’ desks. I cut a medium heart from pink or red paper and write a short message in marker, like:
- “You are kind.”
- “You are brave.”
- “You are a good friend.”
- “I am proud of you.”
I tape it right to the desk or leave it on top of their pencil box so it is the first thing they see. It takes less than a minute per child, but it sticks with them. My boys have brought those notes home and taped them above their beds, which melts my heart.
If I am doing this for a whole class, I keep the setup simple:
- Cut all the hearts at home.
- Write the names and messages while I watch TV at night.
- Bring a roll of tape and a bag of mini goodies on party day.
- Walk around the room and set one note and one treat at each spot.
The desks look festive in a soft, sweet way, and every child has something small that is just for them. It is a tiny thing, but in a busy school day, that little bit of extra love makes the whole room feel warmer.
Kid-Friendly Valentine Crafts That Double as Classroom Decor
I love when the kids help with diy valentine’s day classroom decor, because then the room feels full of them, not just store-bought signs and plastic hearts. When their art hangs on the walls and dangles from the ceiling, they walk in with this little spark of pride that makes all the prep worth it. These kid-friendly projects pull double duty as decor and keepsakes, and they stay well within a $20 budget if you keep the supplies simple.
Handprint and Thumbprint Heart Art Parents Will Want to Keep
Handprint and thumbprint hearts are a tiny bit messy, but they are also the kind of thing parents tuck away in a memory box. My boys love any excuse to dip their fingers in paint, so this is always a big hit.
Here is a simple way to set it up with cardstock, washable paint, and markers.
For handprint hearts:
- Fold a piece of cardstock in half.
- Help each child place their hand so the thumb and index finger rest along the folded edge, in a half-heart shape.
- Paint the hand with washable paint, press it down, then lift straight up.
- When you open the card, the two handprints meet and form a heart.
You can use pink, red, or even white paint on colored cardstock. Once the paint dries, kids can:
- Trace the heart shape with marker.
- Write “Happy Valentine’s Day” across the top.
- Add their name and the year at the bottom.
For thumbprint hearts:
- Pour a small amount of washable paint onto a paper plate.
- Have kids press one thumb in paint, then stamp a tilted print.
- Stamp a second thumbprint next to it, tilted the other way, to form a tiny heart.
- Repeat to make a border of hearts, a heart balloon bouquet, or a big heart shape made of lots of tiny ones.
They can outline the thumbprint hearts in pen, add short messages like “You are loved”, or turn each heart into a little character with eyes and smiles.
Once everything is dry, these pages make the sweetest display:
- Pin them on a bulletin board in a grid.
- Clip them to yarn with clothespins for a “heart gallery” across one wall.
- Hang them above the cubbies so kids see their own art when they put away backpacks.
On party day, kids can take their art home and surprise their parents. I always add a tiny note that says something like, “Made with love in Mrs. Smith’s class”, because it feels so special.
Quick mom tip: Have a little paint station ready. I keep:
- Baby wipes or damp washcloths at each table.
- A trash bag nearby for used wipes and paper towels.
- A plastic tablecloth or butcher paper over the tables.
It keeps the mess under control and makes cleanup so much easier, even with a room full of excited kids.
Paper Plate Love Monsters, Owls, or Critters to Hang Around the Room

Paper plates are magic for cheap decor. I swear I can hand my boys a stack of plates and a pile of paper scraps, and suddenly the table is full of little creatures. These Valentine critters are perfect for filling blank wall space without spending a lot.
Start with:
- Plain white or colored paper plates
- Scrap construction paper in red, pink, purple, and white
- Glue sticks
- Markers or crayons
- Kid scissors
Then let the kids turn them into fun characters.
Heart-eyed love monster:
- Use the plate as the face.
- Cut two medium hearts from colored paper and glue them on as eyes.
- Draw pupils or glue on small black circles inside the hearts.
- Add a big toothy smile with marker, or glue on rectangles for teeth.
- Cut small hearts for spots, eyebrows, or cheeks and scatter them around the plate.
Layered-heart owl:
- Turn the plate so the top is the “head.”
- Cut one large heart for the body and glue it so the point hangs off the bottom of the plate.
- Cut two medium hearts for wings and glue them on the sides.
- Use two circles for eyes, then add small black dots or stickers for pupils.
- Add a tiny triangle beak and a few little hearts on the chest for feathers.
Kids can add their names on the creatures with marker. I like to encourage them to give the critter a name too, like “Love Bug Liam” or “Owl Always Be Your Friend.”
Once dry, these plates are light and easy to hang. Some fun spots:
- On cabinet doors in a little “monster family” group.
- Along the hallway wall outside the classroom.
- Taped in a row across windows, so they peek in the light.
- Clustered on a blank wall as a “Love Critter Corner.”
I always remind myself that every plate hung on the wall is one less thing I need to buy at the store. It is student art, decor, and a memory all rolled into one simple project.
DIY Valentine Mailboxes and Bags the Class Can Display

Valentine mailboxes are basically decor that kids get to use, which makes them perfect for a budget classroom. Instead of buying new boxes, I like to raid the pantry and use what we already have.
Good low-cost options are:
- Plain paper lunch bags
- Brown grocery bags cut shorter
- Old tissue boxes
- Small cereal boxes
Cover them with paper if needed, or leave the kraft color and add bright hearts.
Here is a simple setup that works well in a real classroom.
1. Prep the “mailboxes”
- For bags, fold the top edge down once, so it feels sturdy.
- For tissue boxes, keep the opening on top, kids can slide cards right in.
- For cereal boxes, tape the top closed and cut a mail slot on the front or top.
2. Add Valentine style
Put out a small set of supplies:
- Construction paper hearts in a few sizes
- Stickers, if your budget allows
- Markers and crayons
- Glue sticks and tape
Kids can:
- Glue hearts all over.
- Draw patterns like stripes, polka dots, or zigzags.
- Add a big heart right in the center with their name written in bold letters.
You can also give a simple theme like “Love Monsters” or “Sweet Treats” if kids want direction, or just let them go wild.
3. Make the names clear
Clear labels make party day easier. I learned that the hard way with three boys hunting for tiny scribbled names.
Some easy ideas:
- Write each name on a white strip of paper and glue it on like a label.
- Use a dark marker that shows up, like black on light paper.
- Place the name at the top front so it is easy to see when bags are lined up.
4. Turn them into instant decor
Once the mailboxes are done, you can turn them into a display before the Valentine exchange even starts.
Try:
- Lining bags or boxes along a shelf or windowsill.
- Setting them across the countertop in a neat row.
- Placing them on student desks in a U-shape or circle for a party look.
They create a sweet border of color around the room and make everything feel like a real “post office.”
5. Do a quick stability check
Before party day, I like to check that everything will actually stand or hang.
- Give each bag or box a gentle tap. If it tips, add a little weight inside, like a few crayons or a folded paper towel.
- If bags flop open, secure the back to the wall or shelf with a small loop of tape.
- For hanging bags, punch two holes near the top and tie yarn handles, then hang them on hooks.
Once the kids start passing out cards, the whole display gets even cuter. All those little envelopes and stickers sticking out of bright bags feel so happy and full. And at the end of the day, each child just carries their mailbox home, so cleanup is almost zero for you and the teacher.
Save Money on Supplies and Stay Organized for Next Year
When I plan diy valentine’s day classroom decor, I always think about how I can stretch my supplies so they work again next year. I do not want to run around every February buying the same things over and over. A little smart shopping, plus some simple storage, saves my budget and my sanity, especially with three busy boys in the house!
Shop Smart: Dollar Stores, Clearance Aisles, and What to Skip
I treat dollar stores and clearance aisles like treasure hunts, but I stay picky. Some things are amazing there, and some things just turn into frustration in the classroom.
Here are the items I almost always buy at dollar stores or on clearance:
- Plastic and paper tablecloths in red, white, or pink
- Plain cardstock and construction paper
- Stickers with hearts and simple shapes
- Ribbon and twine in solid colors
- Paper doilies and small treat bags
Those basics can become banners, garlands, centerpieces, and gift bags without much effort. I like to stock up on plain colors instead of heavily themed prints. A red tablecloth works for Valentine’s Day, but it also works for birthdays, summer parties, and Christmas. That one choice stretches every dollar.
There are also things I usually skip, even if they look cute:
- Flimsy tape that barely sticks to paper
- Glitter that explodes all over the classroom and never leaves
- Cheap glue sticks that dry out in a week
- Very thin plastic decor that rips as soon as a kid touches it
If tape or glue fails halfway through hanging a banner, it is not a bargain. I would rather spend a little more on one roll of good tape than rebuy the cheap stuff three times.
Before I shop, I like to do a quick check with the teacher or peek in the classroom if I can. I ask or look for:
- A stapler and staples
- Bulletin board border that is already up
- Hooks, clips, or command strips on the walls
- Any leftover holiday decor from past years
If the teacher already has a full border around the bulletin board, I do not buy extra. If they have a big stash of pushpins or paper, I can skip those too. I take a quick picture of the main spaces and then make a very short shopping list that fills only the gaps.
I also watch end-of-season sales. Right after Valentine’s Day, I sometimes grab:
- Solid red or pink plates and napkins
- Simple heart stickers
- Ribbon or twine in basic colors
Then I tuck them away for next year. It feels so good to pull out those goodies when February comes back around and know I paid half price.
Reuse, Recycle, and Store Decor So You Do Not Start From Scratch
One of the best money-saving habits I have is keeping a small, labeled bin just for Valentine decor. It is not a giant tub that takes over the closet. It is usually a shoe-box size bin or a large folder, but it keeps everything in one place so I am not starting from zero every single year.
In my Valentine bin, I like to save:
- Sturdy garlands and banners that still look good
- Heart stencils cut from cardboard
- Clothespins I used for hanging art or photos
- Leftover ribbon and twine in red, white, or pink
- Unused paper hearts or templates
Heart stencils are my secret weapon. I cut a few from cereal boxes in different sizes and keep them forever. Each year, my boys can trace perfect hearts on any paper we have. No one stresses about making them even, and I do not have to rebuy heart-shaped anything.
For paper banners, I take a few minutes to flatten and store them the right way:
- Lay the banner flat on the table.
- Gently smooth out any wrinkles with your hands.
- Fold it in large, loose sections, not tiny tight folds.
- Place it in a large envelope or folder so it stays flat.
If there is string or ribbon attached, I wrap it loosely and tuck it in the middle. Then it all goes in the Valentine bin, ready to hang again.
I also save things like:
- Neutral tablecloth clips that hold plastic cloths in place
- Plastic jars or vases I used as centerpieces
- Cute labels or signs with simple words like “Love”, “Kindness”, or “Cards”
The more I reuse, the more my $20 stretches year after year. And if we ever change schools or my boys have younger siblings behind them, I already have a little starter kit ready to go. Keeping things simple now means I am not scrambling later when life gets even busier.
Ask the Teacher and Other Moms for Help So You Are Not Doing It Alone
Decorating a classroom is fun, but it gets heavy if you try to carry it alone. I learned fast that asking for help from the teacher and other moms makes everything easier and cheaper.
First, I always check in with the teacher before I buy a single thing. I keep it short and clear. Something like:
“Is it okay if I add some Valentine decor to the door and one table? Are there any rules about what can go on the walls or doors?”
Some schools do not allow tape on doors. Some teachers do not want anything hanging from the ceiling. Some already have a theme planned and just need a few small touches. When I ask, I can focus on what they actually want instead of guessing.
Then I like to loop in other parents, even if it is just a quick message in the class group chat. A simple note works well:
“I am happy to handle decor for the Valentine party. Does anyone want to share supplies or split the cost of tablecloths and snacks?”
You would be surprised how many parents say, “Tell me what to bring!” It turns into a team effort instead of one mom trying to do it all.
One year we split it like this, and it worked so well:
- One mom handled snacks and drinks. She grabbed juice boxes and simple cookies.
- Another mom brought craft supplies. She had markers, glue sticks, and heart stickers at home already.
- I focused on decor. I did the banner, tablecloths, and a cute door.
Everyone spent a little, used what they already had, and no one felt overwhelmed. The classroom still looked sweet and festive, and I did not have to juggle snacks, crafts, and decor on the same busy morning.
If someone offers to help hang things, I always say yes. A second set of hands can cut setup time in half. One person can tape while the other holds the banner steady. Plus, it is just more fun to laugh and chat while you hang hearts instead of scrambling alone.
When we share the work, the kids still walk into a room that feels magical, but the grown-ups are not exhausted before the party even starts. That is a big win in my book.

Conclusion
When I step back and look at all these ideas, I see how diy valentine’s day classroom decor can be simple, cute, cheap, and still feel really special. With a tiny bit of planning, a short shopping list, and kids who are eager to help, the classroom turns into a happy little Valentine spot without wrecking our week or our budget.
I remind myself that I do not need to use every idea in one year. You do not either. Pick one or two projects that fit your time, your budget, and your energy right now. Maybe it is a heart explosion door and simple desk notes. Maybe it is a paper chain of kind words and easy Valentine mailbags. That is more than enough.
My three boys do not remember perfect lines, flawless banners, or fancy fonts. They remember that I sat with them to cut hearts. They remember their names on the door and the silly love monsters on the wall. Kids notice the love and attention much more than picture-perfect decor.
So grab your scissors, pull out the tape, and choose one small place to start. You absolutely can create a warm, fun classroom that feels full of heart, even on a $20 budget and a busy week!!
This post may contain affiliate links. Read the full disclosure here.