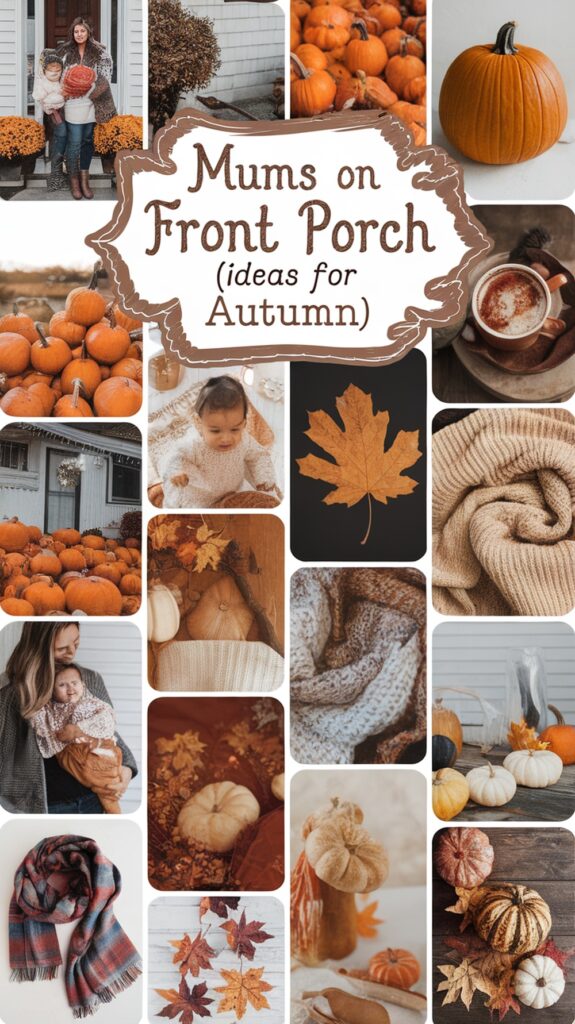
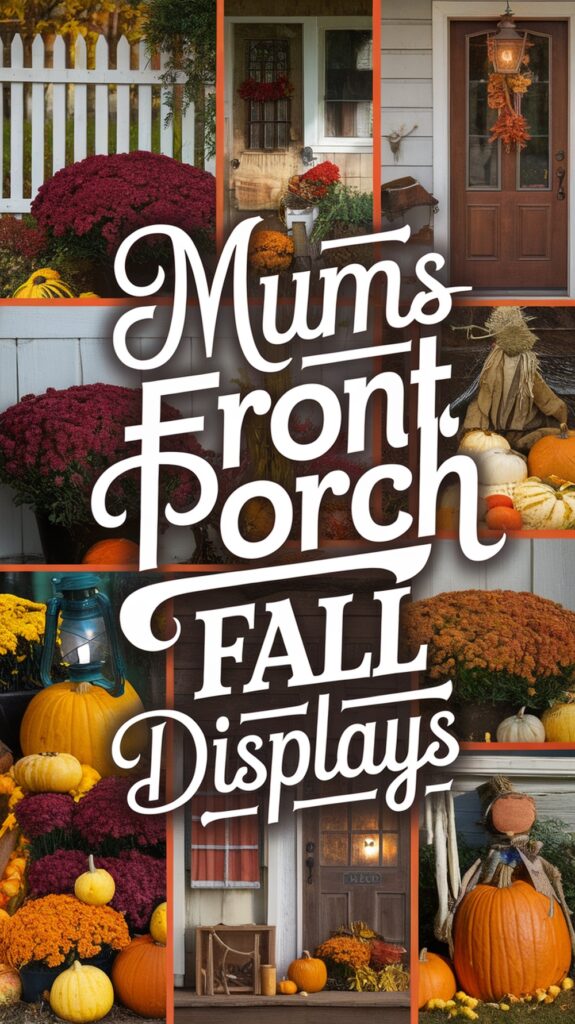
Fall Front Porch Decor With Pumpkins And Mums You’ll Love
Oh my goodness, can we just talk about how excited I get when fall rolls around! There’s something absolutely magical about transforming our front porch into a cozy autumn wonderland, and let me tell you, with three energetic boys constantly running in and out, I’ve learned to keep things simple yet stunning! Fall front porch decor with pumpkins and mums has become my go-to combination because it’s practically foolproof and looks amazing without requiring hours of fussy arrangement.
The best part? Pumpkins and mums are budget-friendly, readily available at just about every grocery store and garden center, and they can withstand the occasional soccer ball that goes rogue (yes, that happens more often than I’d like to admit!). Whether you’re a decorating pro or just starting out, I’m sharing all my favorite tips and tricks that have worked beautifully for our family’s front porch. Trust me, these ideas will have your neighbors stopping by to ask for your secrets!
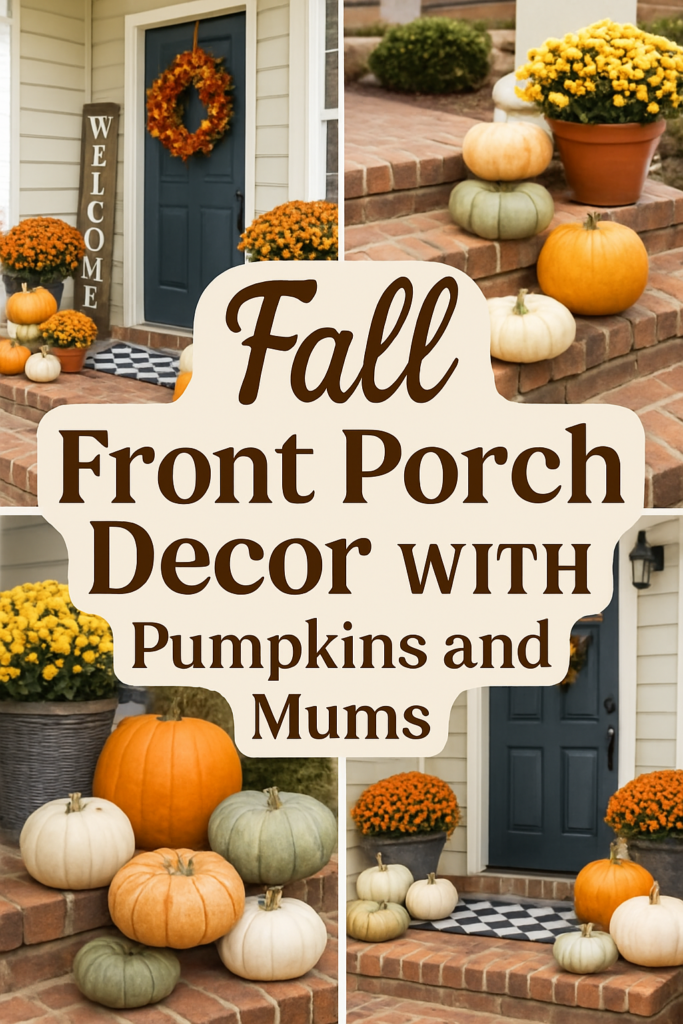
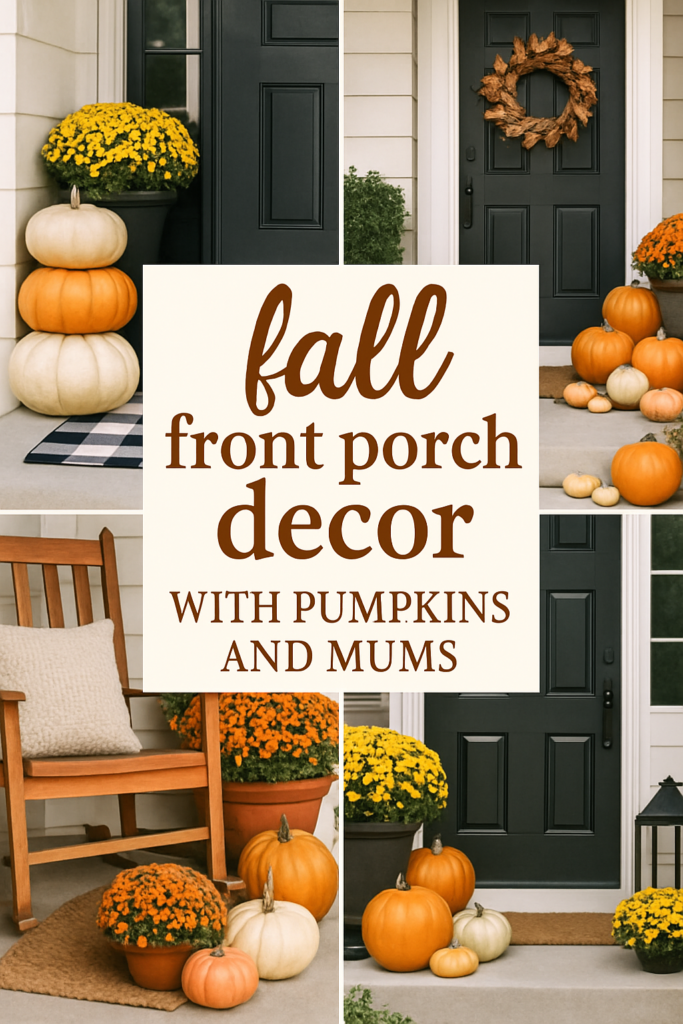
Choosing The Perfect Pumpkins For Your Porch Display
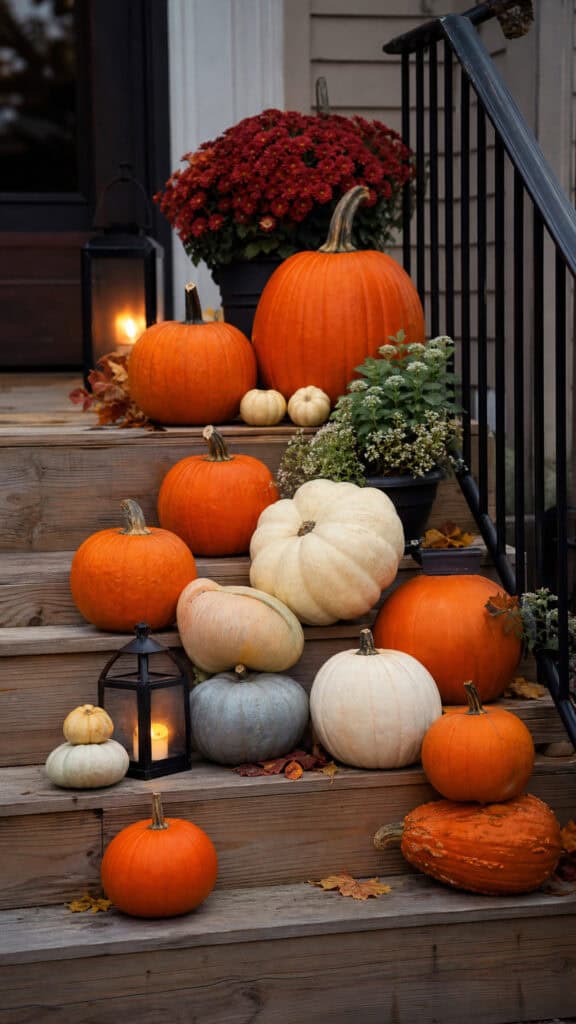
Let me share a little secret I’ve learned after years of pumpkin shopping with three little helpers in tow – variety is absolutely key! I always grab a mix of different sizes, colors, and textures to create visual interest. Those classic orange pumpkins are wonderful, but don’t overlook the gorgeous white, cream, and even blue-gray varieties that add such a sophisticated touch to your fall front porch decor with pumpkins and mums!
When I’m at the pumpkin patch or store, I look for pumpkins with sturdy stems (because the boys love to carry them by the stems, naturally!). I typically pick up at least one large statement pumpkin, several medium-sized ones, and a handful of those adorable mini pumpkins. The mini ones are perfect for filling in gaps and adding layers to your display. Plus, they’re just the right size for little hands to help arrange!
Here’s my practical mom tip: if you want your pumpkins to last longer, choose ones that are firm with no soft spots. I learned this the hard way when a squishy pumpkin turned into a science experiment on our porch! Also, consider getting a few artificial pumpkins to mix in with the real ones. They’re reusable year after year, and honestly, from the street, no one can tell the difference. This saves money in the long run and means less cleanup when the season ends!
- Large pumpkins (10-15 inches) for focal points
- Medium pumpkins (6-10 inches) for layering
- Mini pumpkins (3-5 inches) for filling spaces
- Mix of colors: orange, white, cream, and specialty varieties
- Both real and artificial for longevity and budget-friendliness
Selecting Mums That Will Steal The Show
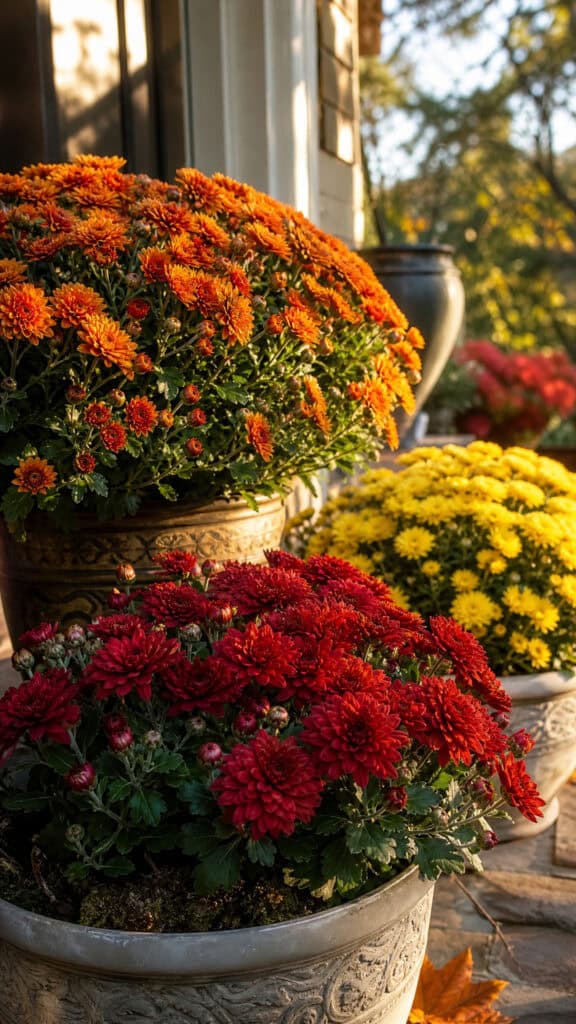
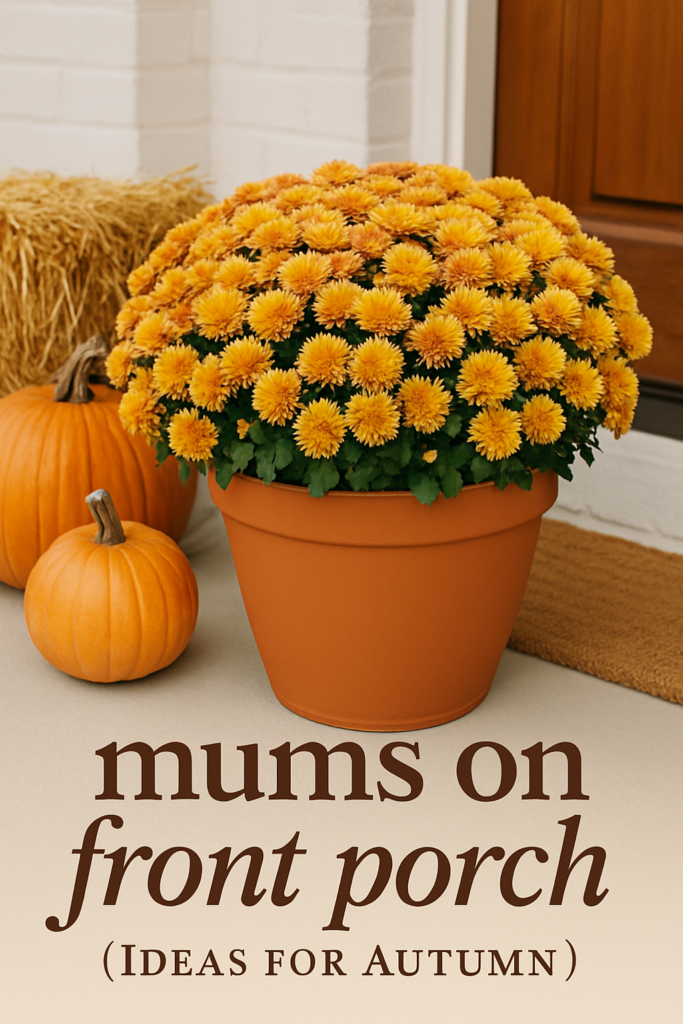
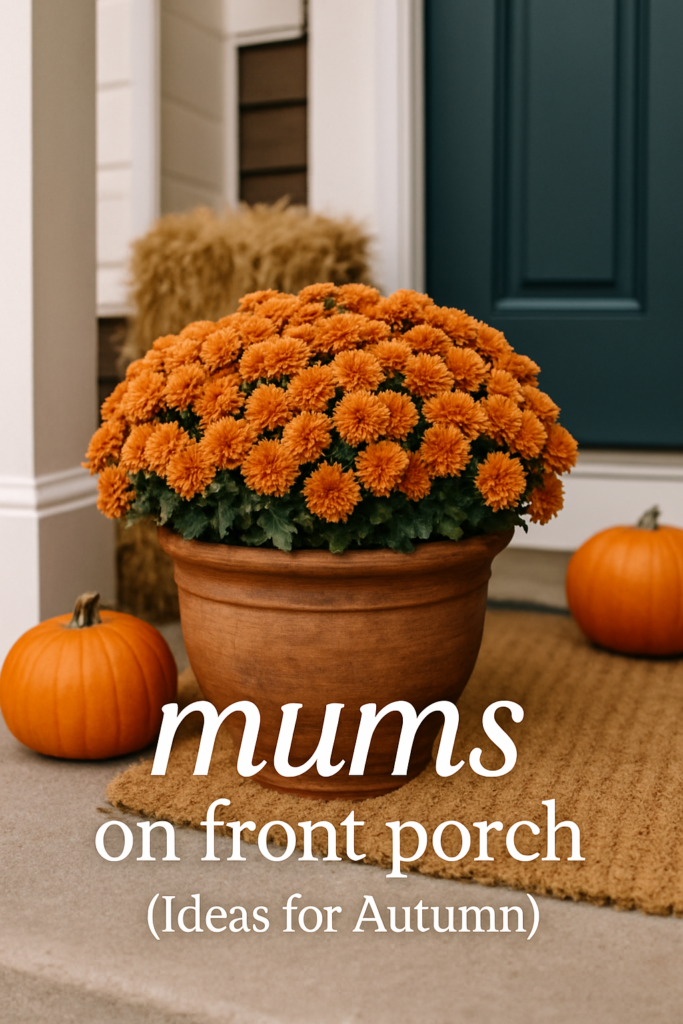
Mums are seriously the workhorses of fall front porch decor with pumpkins and mums, and I absolutely adore them! These beauties come in so many gorgeous colors – from deep burgundy and burnt orange to sunny yellow and pristine white. I usually pick up at least four to six mum plants for our porch, depending on the size of your space. The great thing about mums is they’re incredibly forgiving and can handle a little neglect (which is perfect for busy moms like us!).
When choosing mums, I look for plants that are still mostly in bud form rather than fully bloomed. This might seem counterintuitive, but trust me on this one! Mums with tight buds will bloom over the next few weeks, giving you a longer-lasting display. I’ve made the mistake of buying fully bloomed mums that looked gorgeous in the store but faded within a week. Now I know better!
Color coordination is where you can really have fun! I love creating either a monochromatic look with different shades of the same color family, or going bold with complementary colors. For a classic fall vibe, I’ll pair burgundy and orange mums with traditional orange pumpkins. For something more modern, white pumpkins with deep purple or burgundy mums look absolutely stunning! Don’t be afraid to experiment – that’s half the fun!
- Choose mums with tight buds for longer-lasting blooms
- Select 4-6 plants for a full, abundant look
- Mix colors: burgundy, orange, yellow, white, and purple
- Look for healthy plants with dark green foliage
- Consider pot size – larger pots make bigger statements
Creating Layers And Height For Visual Interest
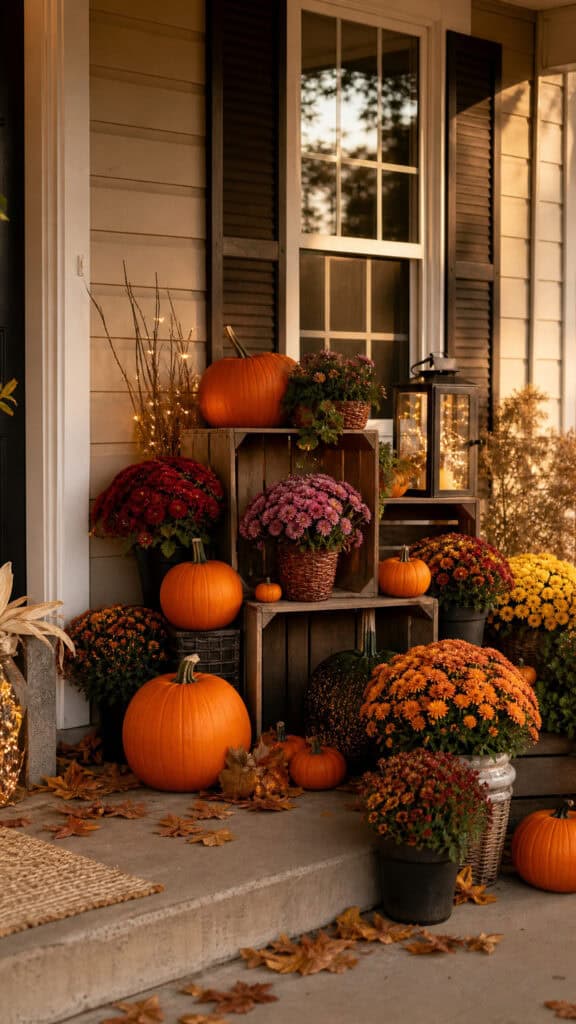
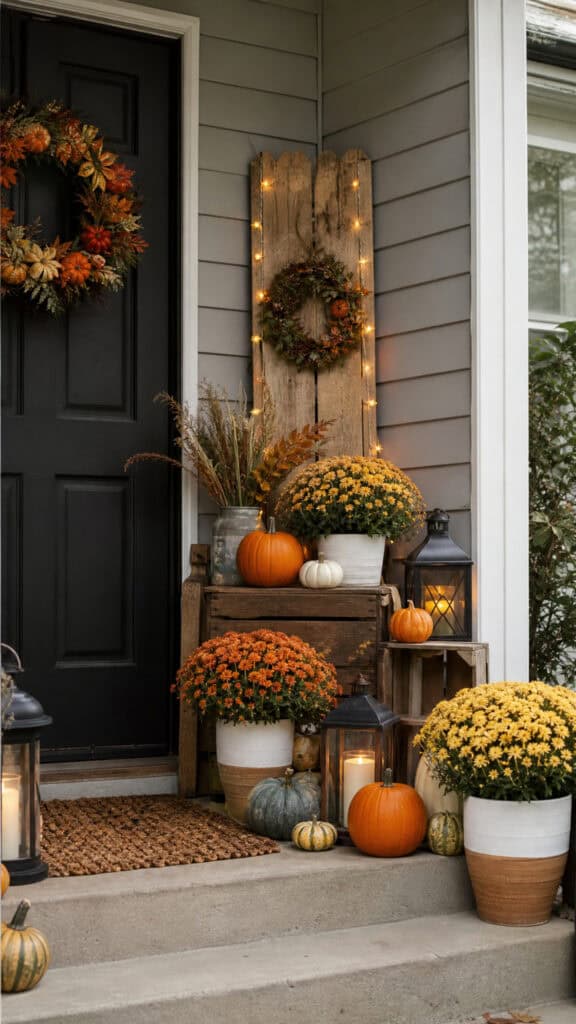
Okay, this is where the magic really happens! One of the biggest mistakes I see (and definitely made myself in the beginning!) is putting everything at the same level. Your fall front porch decor with pumpkins and mums needs different heights to really pop and catch the eye. Think of it like building with blocks – which my boys do constantly – you want some pieces stacked higher than others!
I use all sorts of things to create height variations. Wooden crates are my absolute favorite because they’re rustic, affordable, and you can flip them different ways for various heights. I also use upside-down pots, old wooden boxes, hay bales, and even stacked books wrapped in burlap for elevation. Place your largest pumpkins and mum pots on these risers to create focal points at different levels.
Here’s a trick I love: arrange items in odd numbers (groups of three or five) because it’s more visually pleasing to the eye. I’ll place a large pumpkin on a crate in the back, a medium pumpkin and mum at mid-level, and smaller pumpkins scattered at ground level in the front. This creates depth and makes your display look professionally designed, even though it literally took me about twenty minutes to set up!
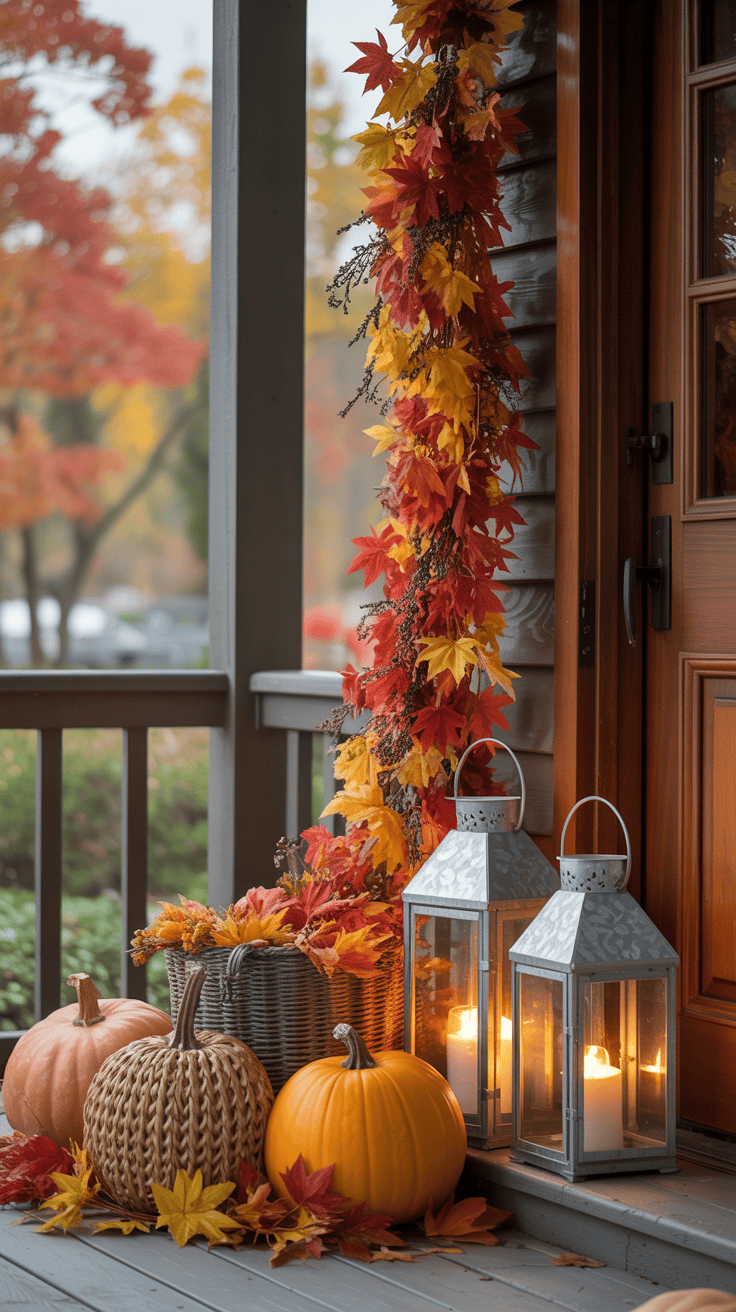
Don’t forget about your porch columns, railings, and door area too! I hang small wreaths, drape garland, or place smaller arrangements on different levels to draw the eye up and around. The goal is to create a cohesive look that flows from top to bottom and side to side. And honestly? There’s no wrong way to do this – if it looks good to you, it IS good!
Adding Complementary Decor Elements
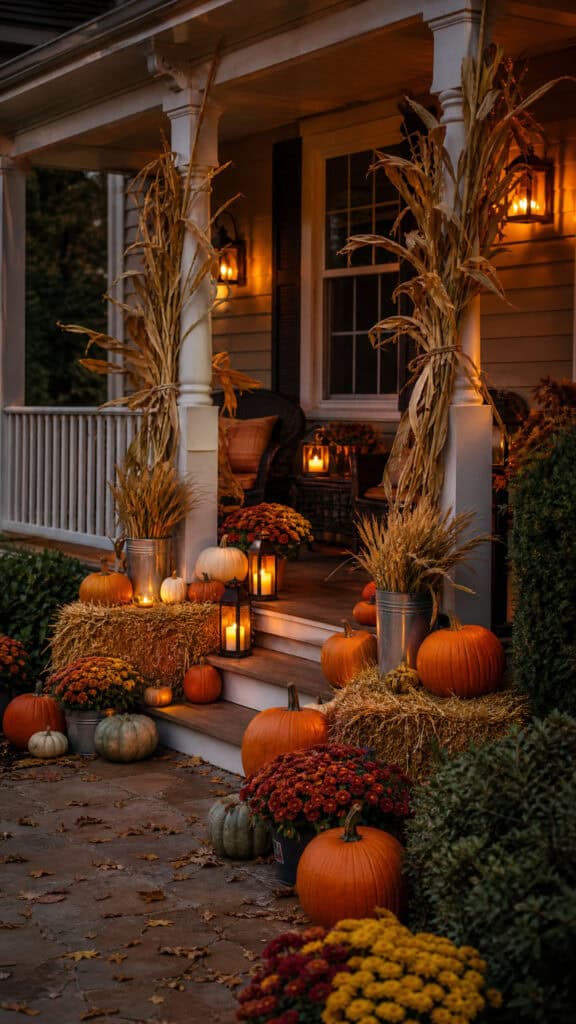
While pumpkins and mums are the stars of the show, adding a few complementary elements really takes your fall front porch decor with pumpkins and mums to the next level! I’m talking about those finishing touches that make everything feel cohesive and intentional. And the best part? Most of these items you might already have around the house or can pick up super inexpensively!
Cornstalks are a classic addition that I absolutely love. I tie them to our porch columns with twine or raffia, and they instantly add that harvest festival vibe. Hay bales are another fantastic option – they’re perfect for creating height (as I mentioned before!) and they’re sturdy enough that the boys can sit on them without me worrying. Plus, they’re pretty affordable and you can often find them at garden centers or even grocery stores in the fall.
I also love incorporating natural elements like gourds, Indian corn, wheat stalks, and branches with colorful fall leaves. These add texture and make everything feel more organic and collected. A simple galvanized bucket or vintage watering can filled with wheat stalks or branches looks so charming nestled among your pumpkins and mums! And here’s a fun idea – let your kids collect pretty leaves, acorns, and pinecones on nature walks and scatter them throughout your display. It’s free decoration and a fun family activity!
- Cornstalks tied to porch columns or railings
- Hay bales for seating and elevation
- Decorative gourds and Indian corn
- Wheat stalks in buckets or containers
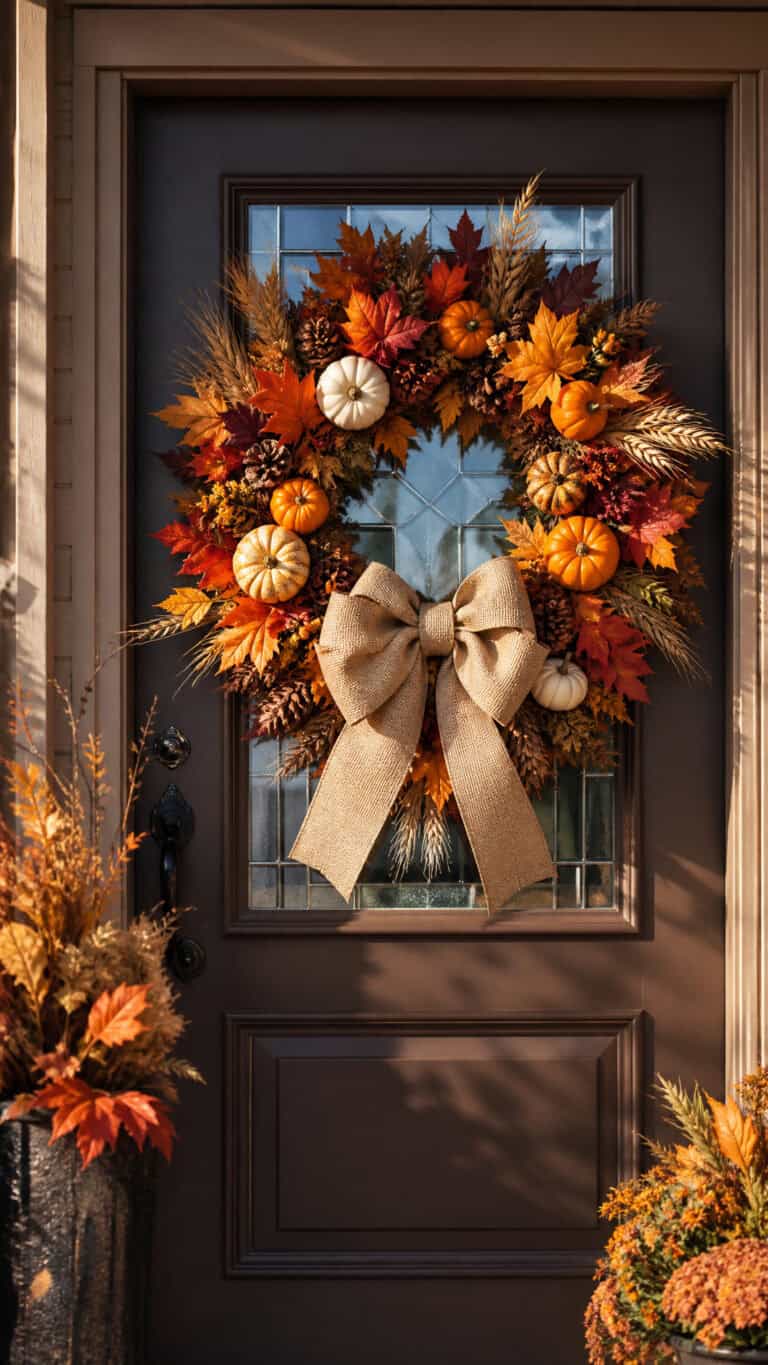
- Fall wreaths on doors or walls
- Lanterns with battery-operated candles
- Burlap ribbons and natural twine
- Wooden signs with fall sayings
- Vintage containers and baskets
Arrangement Tips For A Picture-Perfect Display
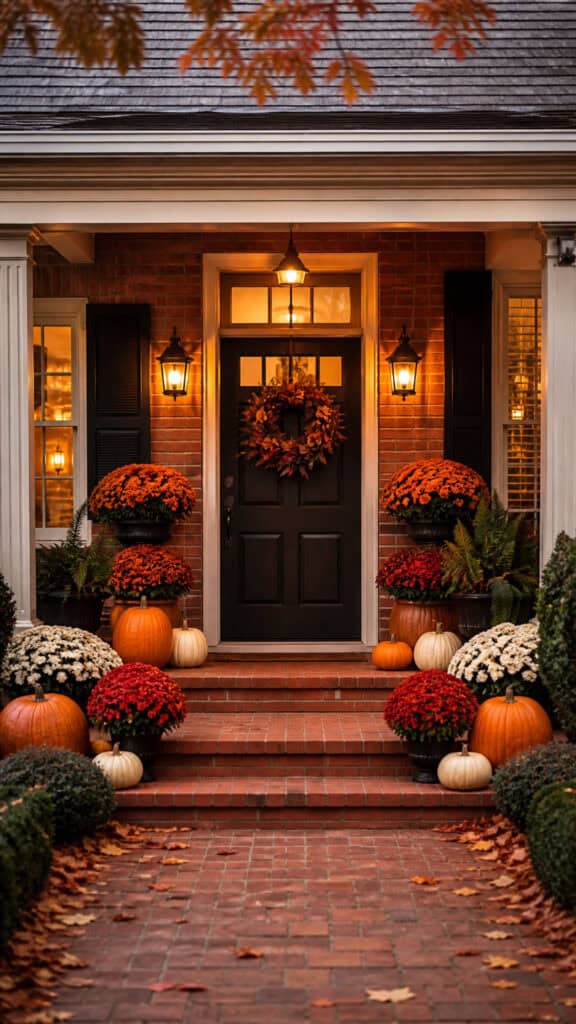
Alright, let’s talk about actually putting everything together! I know it can feel overwhelming when you have all these beautiful items and you’re standing there wondering where to start. But I promise, with a few simple guidelines, you’ll have a gorgeous display in no time. I always start by placing my largest items first – those big pumpkins and mum pots – because they anchor the entire design.
I like to work in triangles, which sounds fancy but really isn’t! Basically, I place three main focal points that form a triangle shape when you look at the overall display. This could be three large mum pots, or a large pumpkin with two mum pots, or any combination that creates that triangular flow. This technique naturally guides the eye around your display and creates balance without looking too symmetrical or boring.
Once my main pieces are in place, I fill in the gaps with medium and small pumpkins, gourds, and those complementary decor items I mentioned. I step back frequently (usually while simultaneously making sure the boys aren’t using the pumpkins as soccer balls!) to see how everything looks from the street or driveway. This perspective really matters because that’s how most people will see your beautiful fall front porch decor with pumpkins and mums!
Don’t be afraid to play around with the arrangement! I usually rearrange things at least three times before I’m happy with it. Sometimes I’ll even take a quick photo on my phone to see how it looks, because the camera often picks up things my eye misses. And remember, this isn’t permanent – if you don’t love something after a day or two, move it around! That’s the beauty of this type of decorating.
Maintenance Tips To Keep Everything Looking Fresh
Let’s be real for a second – with three boys and everything else going on, I need my fall decor to be as low-maintenance as possible! The good news is that fall front porch decor with pumpkins and mums is pretty forgiving, but there are a few simple things I do to keep everything looking fresh throughout the season. These little tricks have saved my displays from looking sad and wilted!
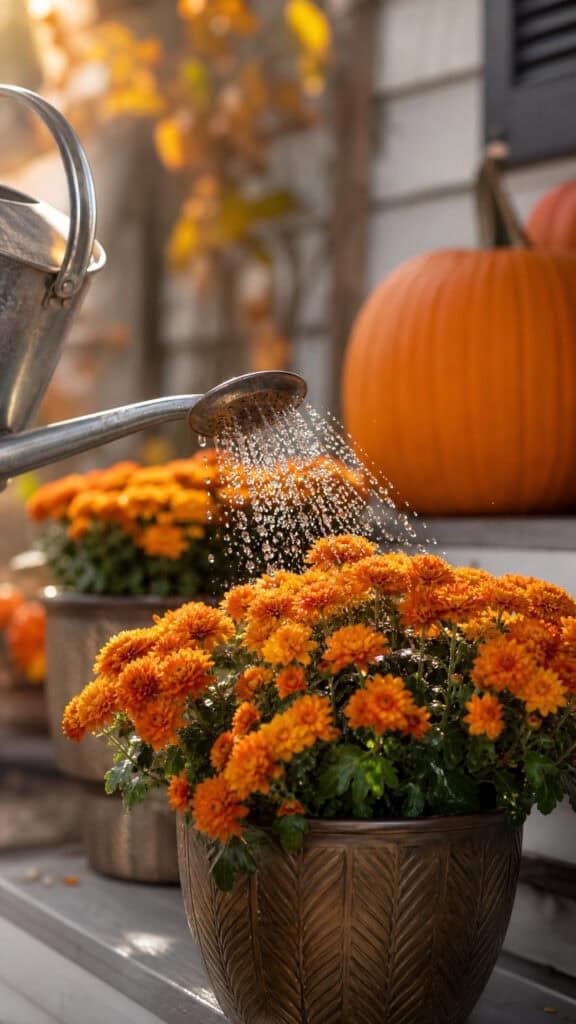
First up, watering those mums! This is super important, especially in early fall when it can still be pretty warm. I check my mums every couple of days and water them when the soil feels dry about an inch down. The key is to water at the base of the plant, not on the flowers or leaves, because wet foliage can lead to disease. I usually do this in the morning, and honestly, it takes maybe five minutes. Sometimes I let the boys help with their little watering cans, which they think is the coolest thing ever!
For the pumpkins, I wipe them down with a damp cloth every week or so to remove dirt and debris. This keeps them looking fresh and also lets me check for any soft spots that might be developing. If you want your pumpkins to last even longer, you can spray them with a mixture of water and a tiny bit of bleach (about one tablespoon per quart of water) to prevent mold. Just make sure to do this when the kids aren’t around!
- Water mums every 2-3 days or when soil is dry
- Water at the base, not on flowers or foliage
- Wipe down pumpkins weekly with damp cloth
- Remove any wilted mum flowers to encourage new blooms
- Check for soft spots on pumpkins regularly
- Bring delicate items inside during harsh weather
- Replace any items that start looking tired
Budget-Friendly Ideas For Stunning Results
Can we talk about budget for a minute? Because I know not everyone wants to spend a fortune on seasonal decor, and honestly, you don’t have to! Some of my favorite fall front porch decor with pumpkins and mums ideas are super budget-friendly. I’ve decorated our porch beautifully for under fifty dollars, and I’m going to share exactly how you can do it too!
First, shop smart! I hit up discount stores, grocery stores, and even big box hardware stores for mums and pumpkins. They’re often significantly cheaper than specialty garden centers. I also watch for sales – many places mark down mums in late September and early October, which is still plenty of time to enjoy them. For pumpkins, consider visiting a local pumpkin patch toward the end of the season when they’re trying to clear inventory. You can get amazing deals!
DIY elements are your best friend! Instead of buying expensive decorative items, I make my own. I’ve spray-painted old pots in fall colors, created signs from scrap wood, and made wreaths from grapevines and leaves we collected. The boys love helping with these projects (supervised, of course!), and it adds such a personal touch to our display. Plus, you can’t beat the price of free or nearly free!
Another money-saving tip is to invest in a few quality artificial elements that you can use year after year. I have some gorgeous faux pumpkins and a couple of nice planters that I’ve been using for three years now. I just supplement them with fresh mums and a few real pumpkins each year, and it looks completely different every time! This approach has saved me so much money over the years while still giving me that fresh, seasonal look I love.
- Shop discount stores and grocery stores for best prices
- Look for end-of-season sales on mums and pumpkins
- DIY decorative elements from items you have
- Invest in reusable artificial pumpkins and quality containers
- Collect natural elements like leaves and pinecones for free
- Repurpose items from inside your home
- Split costs with a neighbor and share decor items
Bringing It All Together
There you have it, friends! Creating beautiful fall front porch decor with pumpkins and mums really doesn’t have to be complicated or expensive. With these tips and tricks I’ve shared, you can transform your entrance into a warm, welcoming space that celebrates everything we love about autumn. The best part is that this style of decorating is so forgiving – there’s really no way to mess it up! Just have fun with it, let your personality shine through, and don’t stress about making it perfect.
I hope these ideas have inspired you to get out there and create your own stunning fall display! Remember, the goal isn’t perfection – it’s creating a space that makes you smile every time you come home and that welcomes your family and friends with cozy autumn vibes. Now if you’ll excuse me, I need to go rescue a pumpkin from becoming a football. Happy decorating, mama!
This post may contain affiliate links. Read the full disclosure here.