Bring Smiles With Minion Pumpkin Carving Ideas This Halloween
Every fall, I look forward to Halloween with my three boys. There’s something special about picking out pumpkins together, then turning the kitchen table into our own little pumpkin patch. For us, minion pumpkin carving ideas add that perfect mix of silly, simple, and just plain fun! The boys love anything with those yellow, goofy smiles, which means our jack-o’-lanterns never fail to get a giggle from the whole neighborhood!
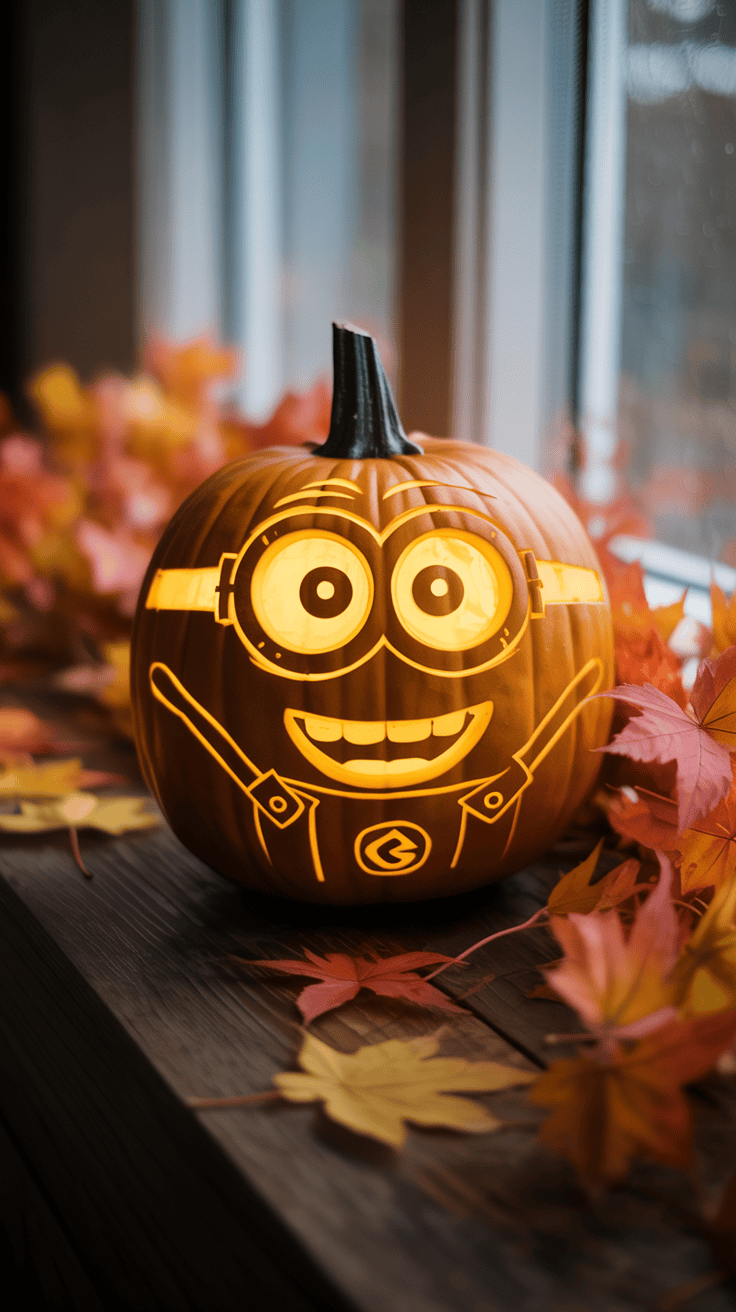
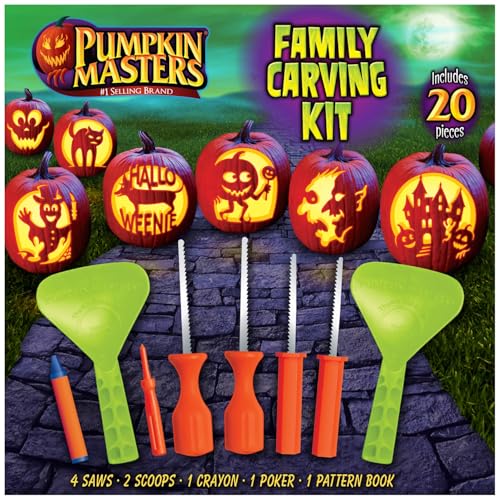
My boys loved using this Minion pumpkin kit — so simple and so funny!
Pumpkin carving with kids doesn’t have to be a mess or a headache. When minions get involved, even the tiniest helpers want to jump right in! If you want an easy way to make your porch pop, these ideas keep things playful and stress-free. I promise, adding minions turns a regular Halloween tradition into a memory-maker your whole family will treasure.

Why Minion Pumpkin Carving is Perfect for Kids

I always look forward to activities that get my boys smiling ear to ear. If you ask me, minion pumpkin carving ideas are almost tailor-made for kids and families. These silly yellow guys just have a way of winning over every age group, which makes our kitchen table the place to be when pumpkins and carving tools come out. There’s a reason I keep coming back to minions for Halloween—let’s look at why they never fail with kids.
Simple Shapes and Easy Faces
One of my favorite things about minion pumpkin carving is how the designs rely on simple lines and bold features. There’s no need for anything fancy.
- Big eyes (sometimes just one!)
- Blocky smiles
- Round heads with little “hair” tufts
This means my youngest can help scoop or draw, and my older kiddo can trace the face himself. You don’t need to be a pro with a carving knife. The hardest part is picking which goofy face to copy!
Recognizable and Friendly Characters
Kids are drawn to what they know and love. And let’s be honest, minions have taken over everything from lunchboxes to birthday parties. Seeing a familiar face on their pumpkin makes the activity way more inviting, especially for little ones who might be nervous about spooky designs.
- No scary faces to worry about scaring younger kids.
- Recognizable yellow and blue make painting and decorating easy.
- Minions’ silly personalities mean you can play up the fun, not the fright.
Encourages Imagination and Creativity

With minion pumpkin carving, there’s no single “right way” to decorate. I love that my boys can mix and match eye shapes, goggle styles and silly hair. Sometimes we give one a toothy grin, another a surprised “O” mouth, or throw in a homemade hat or goggles to make each pumpkin its own little character.
This flexibility means everyone can:
- Pick their favorite minion expression
- Add silly props or accessories (pipe cleaners for hair, bottle caps for goggles)
- Use stickers, paint, or markers if they want alternatives to carving
Safe and Stress-Free for Parents
As a mom, I’m always balancing excitement with safety. Minion designs often use lots of paint, large cutouts, or adhesive features, which means less time with sharp tools. If you have very young helpers, you can skip knives completely and still join the fun.
A few ways to stay safe:
- Let little ones paint the pumpkin yellow with washable paint.
- Use black markers for faces instead of sharp carving tools.
- Try pre-cutting out “goggle” shapes for even small kids to glue.
- Avoid intricate cuts—bigger, chunkier shapes are easier and safer.
Perfect for Group Activities and Parties
Whenever we invite friends over for a Halloween get-together, minion pumpkin carving is a big hit. The theme is universal, the steps are simple and everyone gets a unique result. You can even turn it into a minion parade on the front porch when you’re done.
Some fun group ideas:
- Host a “best minion smile” contest
- Line up different minion pumpkins for photos
- Challenge everyone to create their favorite minion scene
If you’re looking for an activity that brings out laughter and creativity without a huge mess or stress, you really can’t go wrong with these playful yellow faces. Kids feel proud, you get adorable porch decor and everyone leaves with a grin.
Getting Started: Supplies and Safety Tips for Minion Pumpkin Carving

Before the creative part begins, I get everything ready to make our minion pumpkin carving ideas as smooth (and safe!) as possible. A little planning upfront saves tons of mess and keeps everyone happy—especially when little hands want to help. If you have young kids like I do, trust me, organizing your space and picking the right tools makes the whole process feel like a breeze.
Must-Have Supplies for Minion Pumpkin Carving
I like to lay out all our supplies on the kitchen table, so there’s no running around looking for missing scissors or paint. For minion pumpkin carving ideas, you really don’t need fancy equipment. Here’s what we use every single time:
- Pumpkins: Choose smooth, medium to large pumpkins (they’re easier for little ones to draw and carve on).
- Serrated carving knives: Look for pumpkin carving kits made for kids; they have safer, smaller saws that work just fine.
- Spoons or scoopers: Big metal kitchen spoons work, or you can use the pumpkin scoopers from a carving kit.
- Washable yellow and blue paint: Those classic minion colors make it easy for anyone to help paint the pumpkins.
- Paintbrushes or sponges: I find foam brushes help avoid dripping paint everywhere.
- Black permanent markers: Great for outlining faces or adding final details.
- Googly eyes and craft glue: Bigger eyes are fun and easy to attach.
- Black pipe cleaners or yarn: Use these for those little “minion” hair tufts on top.
- Bottle caps or jar lids: Perfect for making the signature minion goggles.
- Paper towels and baby wipes: For messy fingers, paint spills or pumpkin guts that end up everywhere.
If you want almost zero cleanup, line your table with old newspapers or a disposable plastic tablecloth—easy to bundle and toss when you’re done.
Pumpkin Prep: Set Up for Success

Before handing out any tools, I let the boys pick their pumpkins and wipe them down with a damp rag. Clean pumpkins make paint stick better, and dirt-free surfaces are safer for little hands. Then, I cut an opening in the top (or bottom) and help them scoop out the gooey insides. If your kids are sensitive to textures, hand them a big spoon or even an ice cream scoop—they love it!
Here’s my quick prep routine:
- Wipe pumpkins clean.
- Mark the area to be cut with a black marker.
- Cut the lid or bottom (I do this myself for safety).
- Scoop out seeds and pulp.
- Pat the inside dry with paper towels.
Once the pumpkins are empty and dry, we set them up on the table for decorating. That feeling of a clean, hollow pumpkin is the best start for all our minion pumpkin carving ideas!
Top Safety Tips for Little Carvers
I know how tempting it is for kids to grab the “grown up” tools. For safe minion pumpkin carving, I set clear rules and only hand out sharp tools to older kids or adults. Here’s how we keep things safe and still have tons of fun:
- Supervise closely: I never leave my boys alone with sharp tools.
- Use age-appropriate tools: Kids’ carving kits are a lifesaver.
- Pre-cut tricky parts: If my youngest wants to help, I let him trace with a marker, then I cut out the shape.
- Keep paint and glue out of mouths: Remind little ones that these supplies are not snacks!
- Have a first aid kit nearby: Just in case a finger slips or there’s a minor scrape.
For super young helpers, painting or gluing on features is just as fun as carving (and a lot less risky). Everyone gets to join in, and there’s no stress about little fingers getting hurt.
Tips for a Cleaner, Happier Workspace
Kids and pumpkins together equal a mess. It’s just part of the fun! But a little planning helps keep chaos under control. Here’s what works for our family:
- Dress for mess: I put the boys in old T-shirts or aprons.
- Keep a trash bag handy: Toss pumpkin guts, seed strings and dirty wipes as you go.
- Set out supplies within reach: I put everything in a wide basket in the middle of the table so no one’s tipping over paint to reach something.
- Have extra rags or sponges: These help clean up spills on hands, tools or floors fast.
If I’m hosting friends, I set up a carving “station” just for kids with non-sharp tools, washable paints and lots of supervision. Keeping things simple and organized isn’t just easier—it actually makes everyone enjoy the tradition more.
Now that the setup is easy and the kids are safe, we’re all set for the fun part: turning our pumpkins into the most cheerful minions on the block!
Top Minion Pumpkin Carving Ideas to Try This Halloween

If you’re searching for minion pumpkin carving ideas that will have your kids giggling and your neighbors smiling, you’re in the right place! My boys go wild for anything minion, and let me tell you, pumpkins are no exception. This is the section where you’ll find the best ways to turn a plain old pumpkin into the happiest, silliest minion on the block. Whether you want the classic face, a goofy evil minion, or a whole minion family perched on the porch, these ideas are easy, fun, and perfect for little helpers. Grab those paints, scoopers, and craft scraps—it’s time to create some minion magic!
Step-by-Step Guide: Classic Minion Face Pumpkin
Every Halloween, the classic minion face pumpkin is always our family’s favorite! It’s super simple, and the finished pumpkin looks so friendly that even the littlest helpers can join without worry.
Here’s how we make our crowd-pleaser minion:
- Paint the Pumpkin Yellow
After cleaning and drying the pumpkin, have the kids paint it bright yellow. Use washable paint and foam brushes so tiny hands stay clean (well, as clean as possible). - Add Blue for Overalls
Once the yellow dries, paint a thick blue strip at the base for the minion’s overalls. You can even add two blue shoulder straps with a smaller brush for extra detail. - Draw or Attach the Face
- Let your kids draw a big smile and a goofy mouth with a black marker.
- Use a large jar lid, yogurt cup, or even bottle caps for the iconic minion goggles—just glue them at eye level.
- Pop a couple of giant googly eyes inside the goggles, or use white paper and black marker to draw eyes if you’re out of supplies.
- Give Him Some Hair
Stick a few pipe cleaners, toothpicks, or black yarn into the top for hair spikes. My boys love giving their minion a funny “spiky” hairstyle! - Final Touches
Use black marker or paint for the goggle straps, drawing a line from side to side, just above the blue overalls.
Visual Tips for Moms Carving With Kids:
- Let each kid paint their own pumpkin while you handle knife work if carving is needed.
- Use thick, bold strokes with markers so even wobbly hands create a big, silly smile.
- If the pumpkin is heavy, use a paint lid as a guide for tracing the face features—it keeps things the right size for little hands.
You don’t need to be an artist, and the messier the hands, the happier the minion!
Creative Twists: Evil and Costume Minion Pumpkins

If your kids have watched every single minion movie like mine, you know the “evil” purple minions are just as silly. Or maybe your kids dream up wild costumes for everything (mine do). With a few basic supplies, you can turn pumpkins into characters that are truly one-of-a-kind.
Here are some ways to mix it up at home:
- Evil Minion Pumpkin
- Paint the entire pumpkin a deep purple.
- Glue on wild purple yarn or feathery bits for crazy hair.
- Make two mismatched eyes with different-sized lids or bottle tops.
- Go for a crooked, open mouth with jagged “teeth” drawn on in white paint or even stuck-on paper scraps.
- Costume Minion Pumpkin
- Dig into the dress-up drawer! Grab old scarves, tiny hats, or toy glasses.
- Wrap a mini cape, pet bandana, or old T-shirt around your pumpkin minion.
- Tape on bat wings cut from black construction paper for a vampire minion.
- Glue on construction paper “pirate hats” and patches for a pirate minion.
Household Items for Easy Decorations:
- Aluminum foil for shiny goggles
- Buttons, beads, or coins for eye details
- Old fabric scraps for capes or overalls
- Leftover Halloween stickers or googly eyes
Don’t be afraid to let your kiddos raid their own craft boxes and toy bins. Our best minion pumpkins always come from a little trial, error, and silliness. The more unique, the better!
Making a Minion Family Pumpkin Display
One minion pumpkin will make a splash, but a whole crew is the real showstopper! When I want the front porch to really pop, I help my boys create a minion family—each pumpkin with its own funny personality.
Here’s how to pull off an attention-getting display:
- Choose Different Sizes
- Use big pumpkins for the “grown-up” minions, and mini pumpkins or gourds for “baby” minions. Kids love picking their favorites.
- Mix Up the Faces
- Give each pumpkin its own goofy face, eye shape, or expression. You can make a sleepy minion, a laughing minion, or one with a huge grin.
- Change Up the Hairstyles
- Use yarn, pipe cleaners, or even real leaves and twigs for hair.
- Add Props
- One year, my youngest dressed his minion in doll sunglasses. Another time, we taped on construction paper mustaches.
Tips for Arranging Your Minion Family:
- Place the tallest minion in the middle and surround with smaller ones in a “family photo” style.
- Scatter a few toy bananas or yellow balloons around them for that true minion flair!
- Use hay bales, old crates, or even outdoor chairs to create different height levels and make the display pop from the street.
- If you’re lighting them up, tuck battery-operated tea lights inside or behind the pumpkins for a gentle glow—safe and easy for kids to help.
A group of silly, mismatched minion pumpkins draws smiles from every trick-or-treater! Let your kids show off their hard work with pride, and watch how every neighbor slows down to get a closer look at your minion squad.
Decorating and Displaying Your Minion Pumpkins

When all the painting, gluing, and giggling are finished, my favorite part begins—showing off those silly minion pumpkins for everyone to enjoy! Seeing the boys’ faces light up when neighbors, family, and friends stop to smile is a joy that never gets old. If you’re looking to bring a little extra magic to your porch or party, there are some super simple ways to make your minion pumpkin carving ideas pop and really spread the cheer. A good display sets the mood for the whole season!
Porch Displays That Wow
I always say, the porch is where your pumpkins get their big moment. With minion pumpkins, you can go all out or keep it sweet and simple—either way, you’ll catch attention from every trick-or-treater on the block.
Here are easy ways to dress up your porch with minion pumpkins:
- Group Them for a Minion Family Photo
Line up different-sized minion pumpkins to create a fun ‘family.’ Place the biggest pumpkin in the center and surround it with little ones to mimic a group photo. It’s adorable and takes almost no extra effort. - Add Props for Personality
Toss in some toy bananas, a tiny stuffed bear (like Bob’s!), or even a pile of yellow balloons around the pumpkins. Little touches like these bring the minions to life and make the display stand out. - Create Height With Hay Bales, Crates, or Stairs
Elevate some pumpkins by placing them on hay bales, small, sturdy boxes, or porch steps. The varying heights make your minion crew much more eye-catching.
I like to let each of my boys pick their own spot on the porch for their pumpkin. Everyone gets ownership, and it feels much more special when they find “their” pumpkin out front.
Brightening Up With Lights
Minion pumpkins really shine after dark, and lighting doesn’t have to be scary or tricky.
Here’s how I keep it safe, bright, and oh-so-inviting:
- Battery-powered Tea Lights
Pop these inside hollowed pumpkins for a soft yellow glow. They’re safe for little hands to help with, and no open flames to stress over. - String Lights
Wrap white or yellow string lights around the porch railing, weaving them between your pumpkins for a magical effect. - Glow Sticks
Toss a few glow sticks inside smaller pumpkins for bright, playful colors the kids will love.
Lighting can turn your minion pumpkins into nighttime stars. Just avoid candles if you’re tying on fabric hats or using paper props—no scorch marks on those googly eyes!
Decorating Inside the House
Our minion pumpkin fun usually doesn’t stop at the front door! If the weather turns chilly or you want indoor Halloween cheer, it’s easy to bring those pumpkins inside.
Some favorite indoor spots:
- On the Dining Table:
A row of mini minion gourds makes a perfect centerpiece. Scatter yellow or blue confetti around them for even more fun. - By the Entryway:
Greet visitors with a single giant minion pumpkin perched on a bench or side table. Add a painted sign saying “Bello!” for extra smiles. - Along Window Sills:
Space mini minion pumpkins along wide windowsills for a pop of color that’s visible from outside at night.
Just line surfaces with a towel or runner to catch any stray pumpkin guts or paint flakes. My boys love seeing their handiwork every time they walk by.
Party-Ready Pumpkin Decorations
If you’re hosting a Halloween playdate or family party, minion pumpkin displays double as the cutest decor and conversation starter.
Try these crowd-pleasing ideas:
- Minion Pumpkin “Workshop” Table
Set up a low table with blank pumpkins, paint, markers, and accessories. Kids can decorate them during the party and take them home as party favors. - Photo Spot
Arrange a backdrop with blue and yellow streamers and a big line-up of carved and painted minion pumpkins. Everyone will want a turn posing next to the minion crew. - Voting Station
Place small jars or cups in front of each pumpkin (labeled with “Silliest Face,” “Best Hair,” or “Funniest Goggles”). Let party guests drop in coins or beans to vote for their favorites.
I find these little touches bring out even more laughter and excitement. The kids feel like their pumpkins are stars at the party!
Quick Fixes for Windy or Rainy Weather
Pumpkins look great outdoors, but weather can cause problems, especially with paint and paper hats.
Here’s how I keep minion pumpkin displays looking fresh no matter what:
- Choose sheltered spots near the door or under an overhang.
- Attach light props (like hats or goggles) with extra-strong glue dots or tape.
- If heavy rain is coming, bring painted pumpkins inside for a night or two to dry out.
- Give everything a quick once-over every day or two, fixing loose hair or accessories before guests arrive.
Even a few simple fixes keep your display adorable through Halloween night!
Making the Most of Your Minion Creations
The real fun of minion pumpkin carving ideas is seeing everyone’s personality shine through. A sweet display turns a basic pumpkin into a seasonal highlight and brings a sense of joy to everyone who spots it, from mail carriers to trick-or-treaters. Whether you go big or keep it simple, your porch will soon be the talk of the neighborhood. And nothing beats those proud grins from your kids when they see their hard work celebrated for all to see!
Tips to Keep the Fun Going: Pumpkin Preservation and Minion-Themed Activities

Halloween comes and goes in a flash, but there’s no reason the fun has to stop once your minion pumpkin carving ideas are displayed on the porch! As a mom juggling three busy boys, I’ve picked up some simple tricks to help those cheerful pumpkin faces last longer and fill even more fall days with laughter. Below, you’ll find my best tips for keeping your pumpkins looking fresh and ways to keep the minion theme rolling with playful activities the kids will love.
Easy Pumpkin Preservation Tricks
Those happy minion pumpkins always get a lot of attention, which is why I want them to last right up until Halloween night (and maybe a few days after, if I’m lucky). Here’s how I give our carved and painted pumpkins the best shot at staying perky and colorful:
- Clean the Pumpkin Inside and Out
Before we even start carving, I clean the outside with a mix of water and a splash of white vinegar. This helps knock out mold and slows down any spots that want to rot early. - Scoop Out All the Guts
I make sure my boys get every bit of stringy pumpkin out from the inside. Fewer seeds and pulp means less mess, but it also helps the pumpkin dry faster and keeps mold away. - Seal the Cut Edges
Here’s a trick not enough people use: after carving, dab a little petroleum jelly or vegetable oil onto the edges of every cut. This blocks air and stops those spots from getting shriveled or moldy so fast. - Try a Freshness Spray
You can mix one tablespoon of bleach with a quart of water and spray the inside of the pumpkin and all cut surfaces. I like to wipe off any excess after a few minutes. It’s quick and really helps the pumpkin last longer. - Keep Pumpkins Cool and Dry
Minion pumpkins look adorable outside, but heat and sunlight zap their energy (and colors) quickly. I move them to a shaded spot during the warmest part of the day or bring them inside if a hot spell hits. - Hydrate Overnight (if Needed)
If a pumpkin starts to shrivel, I soak it (gently) in cool water for an hour or two. This plumps it back up and gives a few extra days of life. - Avoid Open Flame
Battery-powered lights not only keep things safer for kids, but they also help your pumpkin faces last longer. Heat from candles speeds up soft spots. - Display on a Plate or Tray
Painted or carved pumpkins sometimes leave behind orange rings or start to leak. I set ours on old plates, plastic trays, or even cardboard to keep the porch and table clean.
In our house, a few minutes of TLC keep those goofy minion grins shining, all the way to Halloween and sometimes beyond!
Minion-Themed Activities to Keep Kids Smiling
Once our pumpkins have their happy minion faces, my boys never want the fun to end. I totally get it! That’s why I plan a few minion-themed activities for the days before and after carving. Family time, laughter, and just a little bit of chaos—what’s not to love?
Here are some simple, mom-approved ways to keep the minion magic rolling:
Minion Scavenger Hunt
Kids love a good search, and you don’t need much prep! I hide tiny minion toys or yellow and blue treats around the house or yard. Whoever finds the most gets a silly prize, like picking the first pumpkin slice, wearing a minion hat, or leading the “minion parade” on the porch.
Color and Design Your Own Minion
If your crew still has pumpkin fever but can’t carve anymore, I print out blank minion coloring sheets and bring out markers, stickers, and glue. The kids decorate wild minion faces or dream up new costumes. It’s simple and keeps hands busy on chilly afternoons.
Minion Movie Night
What could be better than cuddling up together with cozy blankets, a popcorn bowl, and every minion movie? We vote on our favorite minion moment and sometimes pause to point out which pumpkin matches the minions on the screen.
Banana Toss Game
Minions love bananas, and so do my boys! I set up a silly “banana toss” using yellow bean bags (or even rolled-up yellow socks). We try hitting a bucket or target, and whoever scores the most gets an extra helping of banana chips or chocolate chip “minion” cookies.
DIY Minion Goggles
No need to buy new supplies—just use what’s in your recycling bin! Gather bottle caps, pieces of string, black tape, and let each child make their own pair of minion goggles. Bonus points for goofy runway walks around the living room.
Minion Relay Race
Burn off those candy calories with an outdoor minion relay! Mark start and finish lines, hand each kid a plastic pumpkin, and have them run (or waddle, minion-style) across the yard and back. Winner gets to draw the next minion face or choose the next activity.
Minion Story Time
End the night with a cozy story session. We either read a minion book or make up our own silly adventures for our pumpkin minions. Everyone adds their own twist, and sometimes our stories get pretty wacky!
Keeping Minion Pumpkins Safe from Little Hands and Pets
With three boys and a curious dog, keeping pumpkin displays in one piece is always a challenge. I learned a few tricks along the way:
- Set Displays Out of Direct Reach
I try to keep minion pumpkins on higher steps, porch tables, or sturdy crates so little hands can’t tip them over during wild play-times. - Use Kid- and Pet-Safe Decorating Materials
No real candles or breakable props near the pumpkins. I stick with soft craft supplies, battery lights, and non-toxic glue. - Check for Loose Parts Daily
Googly eyes, pipe cleaner arms, or hats have a knack for wandering away. Each morning, I do a “minion check-up” and glue or tape pieces back on if they’re missing.
I’ve found that a bit of planning makes the minion magic last. Plus, everyone feels proud seeing their work looking fresh and happy every day!
Fun Minion Snacks to Match Your Pumpkins
Sometimes the best way to end a carving session is with a treat. We make simple snacks that tie in perfectly with our minion pumpkin theme.
- Banana Pops: Dip peeled bananas in melted chocolate, add candy eyes, and freeze. They look just like minions and taste amazing!
- “Minion Eyes” Sandwiches: Use round crackers, peanut butter, and a slice of banana or a yogurt-covered raisin in the center for an edible goggle.
- Yellow and Blue Jello Cups: Layer yellow and blue gelatin in clear cups for a dessert that looks just like a minion outfit.
- Minion Punch: Mix lemonade with a splash of blue sports drink. Top with a silly straw for extra fun.
It doesn’t have to be complicated. Even a bowl of bananas with a few goofy minion stickers is enough to keep everyone in the spirit!
Quick Ways to Refresh Faded Minion Pumpkins
Even with the best care, sometimes painted pumpkins get a little dull or chipped. Instead of tossing them, I do a speedy refresh.
- Touch up paint with another layer of yellow, blue, or black.
- Add a new prop, like a scarf or “new” goggles made from foil.
- Spritz the pumpkin lightly with water to perk up the color.
- Swap out missing or broken parts with something from the craft bin.
It’s surprising how a five-minute fix can make the pumpkins look brand new. The kids feel like their creations are still the stars of the season.
Pumpkin memories don’t have to end after carving night. With a little smart preservation and loads of minion-themed activities, your family fun can last right along with those bright yellow smiles!
Conclusion
Trying minion pumpkin carving ideas with my boys has filled our Halloween with the happiest memories year after year. I love seeing their faces light up when we turn a plain pumpkin into a goofy minion and then line them up for all our neighbors to enjoy. The giggles, the messy hands, and those crazy, crooked smiles really do bring so much joy to our home.
I’m cheering you on to give these minion pumpkins a try with your own kids! Don’t stress about making each one perfect—every little smudge or silly face just adds to the fun. Trust me, the best part is sharing the smiles together.
I’d love to see your family’s minion creations! Share your pumpkin masterpieces in the comments or tag me if you post them. Let’s spread even more smiles this Halloween!
This post may contain affiliate links. Read the full disclosure here.