Pumpkin Face Ideas Easy Enough for Beginners
I’m a mom of three busy boys, so every fall, our house pretty much turns into a pumpkin patch. Carving together is always one of our favorite things to do, but let’s be honest—those pumpkin face ideas can look easy online and end up a real mess in real life. Trust me, I’ve been there, knife in hand, wondering why my pumpkin doesn’t look anything like the one on Pinterest. Even if you’re brand new to carving, you’re in the right place for pumpkin face ideas easy enough for anyone to try!
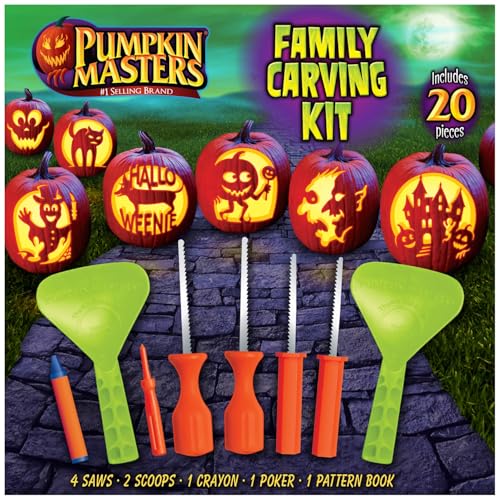
These pumpkin face sticker kits are a total lifesaver — no mess, just fun.
With a few simple tips and playful patterns, you’ll be amazed at how cute and fun your pumpkins can turn out. I love watching my boys pick out silly eyes or big toothy grins, and I promise, you don’t need fancy tools or hours of free time to join in. If you’re looking to skip the stress and amp up the fun, I’m here to help you make this fall memory bright, messy, and full of smiles!
The Basics: Prepping for Easy Pumpkin Carving


Before trying out any pumpkin face ideas easy enough for the whole family, I always like to do a little prep first. Getting things set up has saved me from endless messes, random kitchen tools disappearing, and even a few finger scrapes. With the right start, you’ll keep everyone happy, safe, and ready to show off those goofy grins or spooky faces by the doorstep!
Picking the Perfect Pumpkin
Believe it or not, the pumpkin you pick makes a huge difference! For easy carving, I look for:
- Smooth skin: Bumpy or extra-ridged pumpkins can make tracing faces tricky, especially for kids.
- Medium size: Too small, and you’ll be squishing your hands inside. Too big, and young arms have trouble reaching the bottom.
- Sturdy stem: It’s the pumpkin’s handle when little hands carry it. Avoid loose stems that break off fast.
- Flat bottom: Nothing ruins the fun faster than a pumpkin that rolls right off the table!
Let the kids help out. Part of the fun is watching them tap and knock, hunting for “the one” like it’s treasure.
Gathering Your Tools and Supplies
Pumpkin carving is much smoother when you set out everything ahead of time. I keep things simple and safe with a basic list:
- Large spoon or scoop: For scraping out seeds (an ice cream scoop works even better than a big spoon!).
- Small, serrated knives: Those pumpkin carving kits at the store are perfect and not too sharp for little helpers.
- Old newspapers or garbage bags: To cover your table and catch every last slimy string.
- Bowls: For separating pumpkin seeds if you want to roast a snack later.
- Marker or pen: For drawing face designs before making the first cut.
- Paper towels: Handy for wiping sticky hands and slippery pumpkin pieces.
- Tape: Sometimes a little tape helps hold a stencil in place for more detailed faces.
Nothing fancy needed, just simple home supplies. My boys love laying everything out like they’re prepping for a science experiment!
Cleaning Out the Pumpkin
Scoop day might be the messiest, stickiest part, but it’s always the kids’ favorite. I set our pumpkin on some thick newspaper, cut off the top (about the size of a cereal bowl), then let my boys take turns grabbing handfuls of seeds and guts.
A few tips:
- Scrape out every last string near the walls. Cleaner pumpkins make carving faces so much easier.
- Don’t rush—give the kids lots of praise for each handful they pull out. They love getting gooey!
- Save the top lid, but slice a tiny bit off the underside so it sits flat when you put it back.
If the inside is left damp, I’ll take a paper towel and give it a quick dry to help it last a day or two longer before it gets soft.
Drawing Your Pumpkin Face Design
This is where the pumpkin face ideas easy come to life! Before carving, I always draw the face right on the pumpkin with a marker. That way, if little hands slip, it’s no big deal—just wipe it and try again.
Here’s what works for us:
- Simple shapes: Triangles and circles for eyes and noses are easy wins.
- Big mouths: Wider smiles or silly frowns are easier for beginners and show up great at night.
- Templates: There are tons online you can print or cut out together, then trace onto your pumpkin.
Let everyone join in and add their touches. Even if it’s not perfect, each pumpkin feels totally original.
Safety Tips for Carving with Kids

Nothing sends the fun south faster than a scraped knuckle or poked finger. Here’s my go-to list for a stress-free pumpkin night with kids:
- Always use tools meant for pumpkins—they’re safer and designed for small hands.
- Keep sharp kitchen knives away from curious fingers.
- Stick with carving on a flat, steady surface.
- Let little ones help scoop or draw, but leave harder cutting to the grown-ups.
- Keep wipes nearby for cleanup and chilly, sticky fingers.
Carving pumpkins together feels almost like a fall version of family pizza night—messy, a little chaotic, but always a memory maker! With some prep and simple tips, you can focus on the laughs, not the mess.
Classic and Cute: Starter Pumpkin Face Ideas
Nothing gets my boys as excited for fall as picking out the perfect pumpkin and dreaming up those first silly faces. If you’re looking for pumpkin face ideas easy enough to tackle as a family (with smiles all around), this is where to start! There’s a special kind of joy in seeing a friendly jack-o’-lantern glowing on the porch, and you honestly don’t need fancy tools or artist skills to make it happen. Here are my favorite beginner-friendly pumpkin face ideas that are just as cute as they are simple.
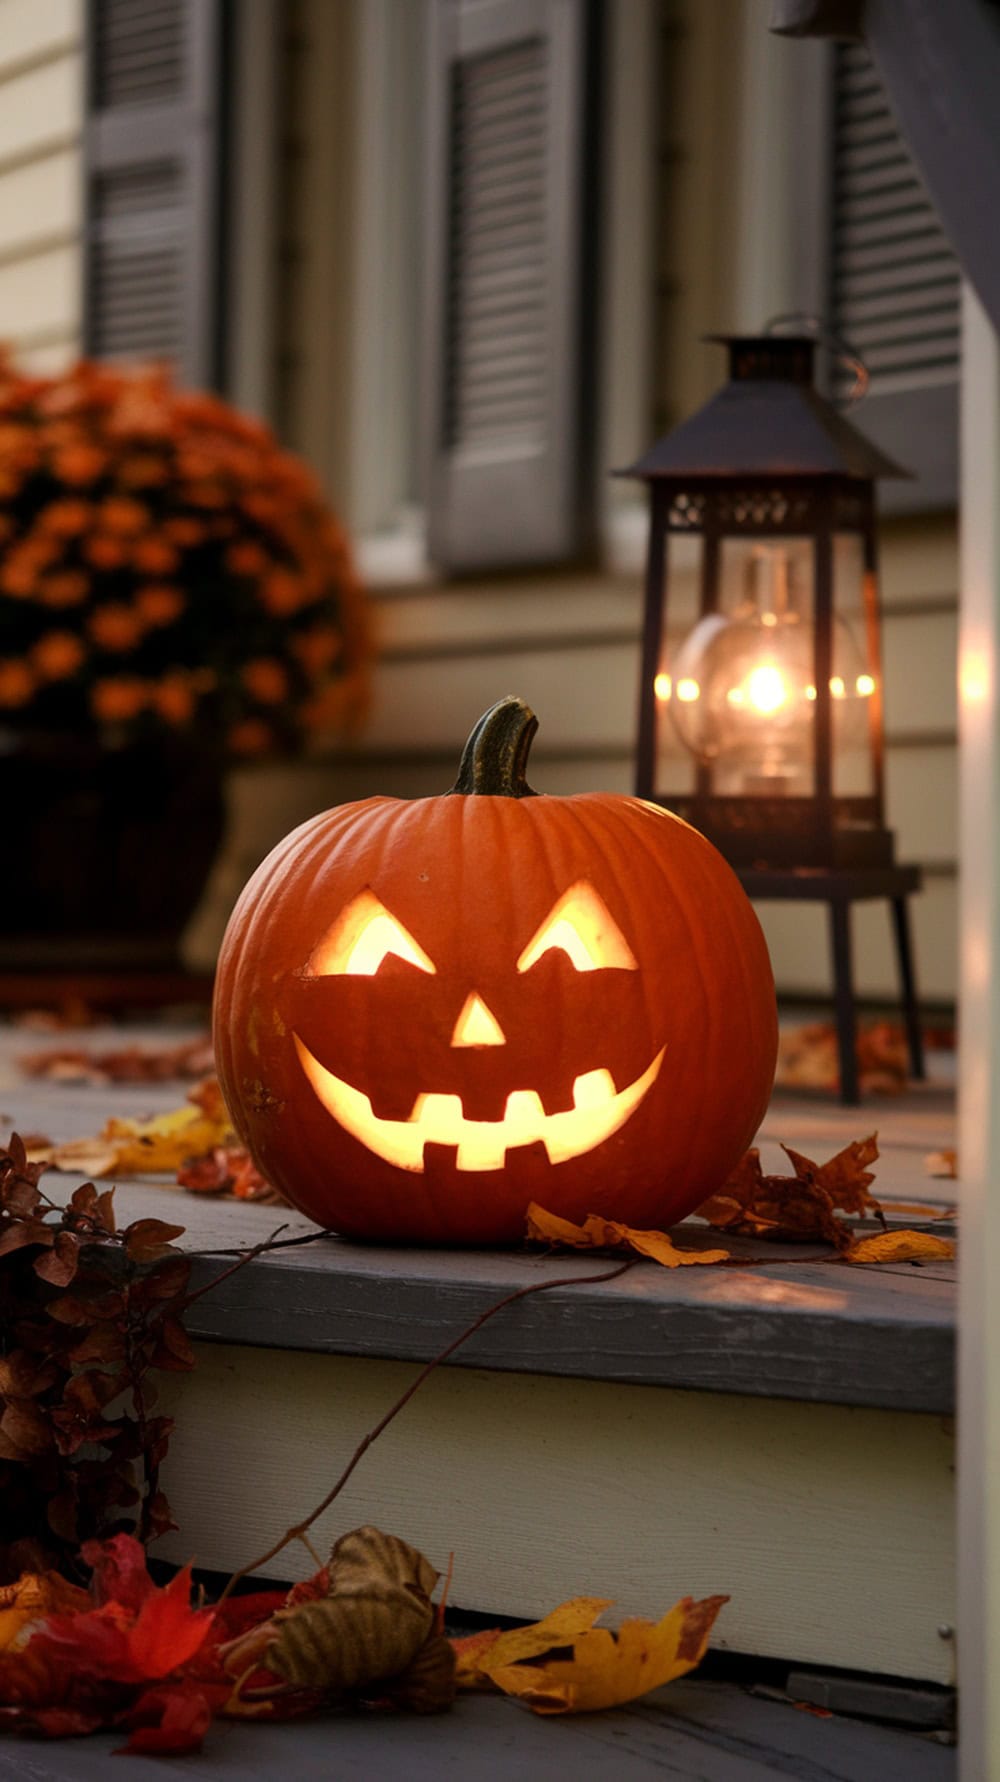
The Basic Jack-O’-Lantern
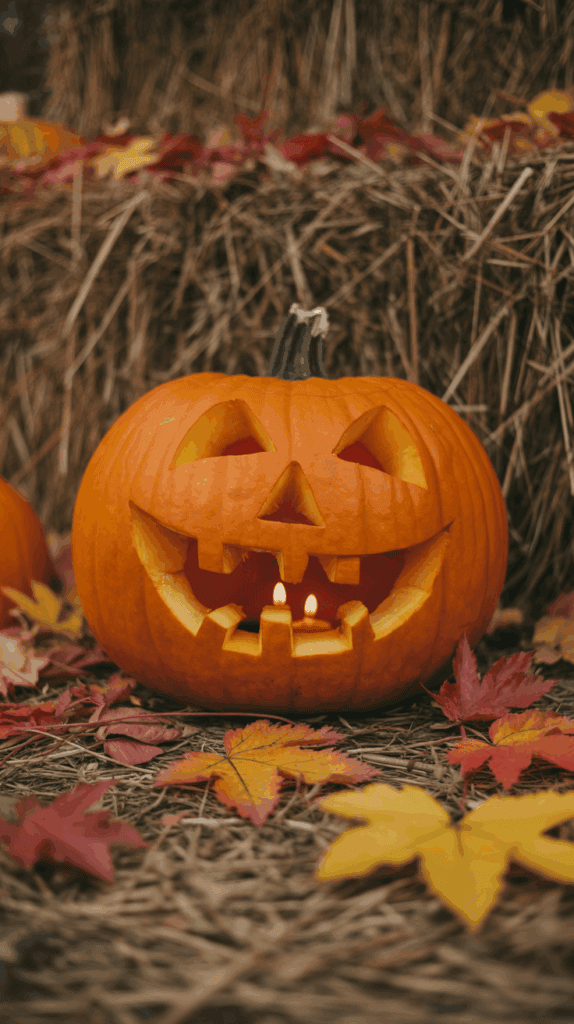
This is the pumpkin that probably pops into your mind first: triangle eyes, triangle nose, and a toothy grin. The best part is, it’s simple and always a hit for both kids and grown-ups.
How to Make a Classic Jack-O’-Lantern:
- Draw the Face
- Use a washable marker to sketch two triangles for the eyes, and one smaller triangle for the nose. Space them out evenly to make carving safer for kids.
- Under the nose, draw a big crescent mouth. Add one or two squares inside the mouth if you want “teeth”—this keeps it playful.
- Start Carving
- With a small, serrated pumpkin saw (those kid-safe ones work perfectly), slowly cut around each triangle. Steady hands make it easy, but don’t stress if lines aren’t perfectly straight.
- For the mouth, trace your big curved line, taking your time as the curve can be trickier than a straight edge.
- Finishing Touches
- Wipe off leftover marker with a damp paper towel.
- Add a battery tea light or glow stick inside and pop the lid back on!
Mom Tip: If the edges look a bit jagged, I just smooth them gently with a spoon or my thumb. Nobody at my house has ever complained about a “messy” grin! These classic faces are fast to make but look adorable in photos.
Friendly Smiley Pumpkin
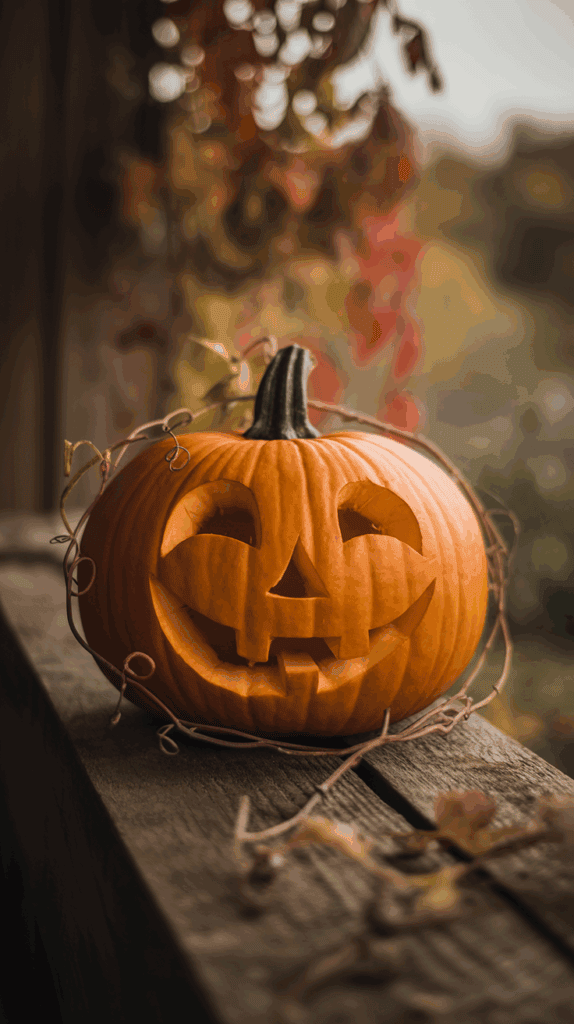
If your kids are just starting out, a cheerful pumpkin face is the way to go. I like this style because it’s easy, almost mess-free, and each child can add their own twist.
Creating a Friendly Smiley Pumpkin:
- Draw the Design
- Use a marker to make two wide circles or big ovals for the eyes. Let the kids add eyelashes or eyebrows if they want.
- Instead of sharp angles, sketch a soft, curvy mouth with upturned corners. You can add a little “tongue” or make an open-mouthed laugh. There are no rules!
- Noses can be a heart, a circle, or even a star. Let the kids choose.
- Simple Carving
- These faces are best with thick outlines, which means less careful cutting.
- Keep pieces large to lower the risk of cracking.
- Let your child help poke out the shapes as you finish each cut, which is always a giggle factory at my house.
- Personalize
- Hand over stickers, googly eyes, or even felt scraps. More sparkle means more fun.
- If you want to skip the knife altogether, you can even just draw or stick the pieces on and leave the pumpkin whole.
I love that each pumpkin turns out a little different. One year, my youngest made a pumpkin with “freckles” using a permanent marker, and it was a total hit with the neighbors!
Winking Pumpkin Face
If you want to make a pumpkin that’s cute and a little sassy, go for the winking face! This design is super easy to do, and it helps kids practice expression with just a few tweaks.
How to Make a Winking Pumpkin:
- Sketch It Out
- Draw one large circle or oval for the “open” eye.
- Next to it, make a smaller sideways “U” or a thin line—this is the wink!
- Add a playful half-moon mouth, maybe slightly tilted to one side for extra personality. You can give it tiny “blush” marks with marker for even more charm.
- Carve Carefully
- Cut out the open eye just like before.
- For the wink, carve a very shallow groove or simply scrape off the outer skin to make the shape stand out. You don’t have to cut all the way through, which keeps the pumpkin strong.
- Carefully carve the mouth, making sure it connects to the wink for the most expressive look.
- Finishing Flair
- Encourage the kids to add eye lashes, a silly eyebrow, or even a mustache with marker.
- Nestle a glow stick inside or use a battery-powered candle to really make that wink light up the night.
My kids always laugh when the winking pumpkin gets put on our porch. It somehow makes the whole bunch of jack-o’-lanterns feel like they’re having a conversation with everyone on the street! These easy ideas bring out so much character with very little work—perfect for busy moms, happy kids, and miles of fall memories.
Creative and Minimal-Carve Pumpkin Face Options

I know plenty of moms out there want pumpkin face ideas easy enough for little hands and less mess. After years of helping my boys bring their wild pumpkin visions to life, I’ve discovered so many ways to make those spooky or silly faces without picking up a knife. If your kiddos are after fun monsters, clever animals, or superheroes, there are options that skip the sharp tools while leaving loads of room for creativity. Minimal-carve and no-carve ideas keep things safe, stress-free, and perfect for kids of almost any age.
No-Carve Painted Faces
Painting pumpkins has totally changed the game at my house! You get all the color and character without any gooey mess or risk of slips. For families with younger kids (or moms who just want to save their sanity), paints and markers make pumpkin face decorating a total breeze.
Acrylic paint works great because it’s bright and dries quickly. Permanent or washable markers are also a win if you want less cleanup after. Here are a few of our favorite painted pumpkin face ideas:
- Silly Monsters: Big round eyes, jagged teeth, and goofy tongues. Let the boys choose wild colors for hair or polka dots—think purple, green, or neon yellow!
- Favorite Animals: Simple black and white for a panda, a few orange dots for a fox, or even big pink cheeks for a pig. Add felt or paper ears in a snap with a little glue.
- Superheroes: Classic masks, capes, or even a lightning bolt on the forehead. Last year, my middle son painted a pumpkin to look like Spider-Man and it was the talk of the neighborhood!
Tips for painting:
- Wash and dry pumpkins before starting. Wipe any dirt away so paint sticks.
- Set up outside or cover your table to catch drips.
- Sketch face ideas with a chalk pencil first. It wipes off easily if kids change their minds.
- Let each color dry before painting the next to avoid a smeared mess.
- Stick on googly eyes, gems, or pom-poms after the paint is dry for even more fun.
Watching my boys paint faces is my favorite part—they always make up silly stories for their pumpkin creatures and giggle the whole way through! You get lasting pumpkins (no moldy faces in two days), and best of all, everyone gets to be creative without worrying about sharp knives.
Sticker and Stencil Fun
Stickers and stencils are my saving grace on those nights when everyone wants a pumpkin but time is tight or everyone’s little hands are tired from sports or school. With a stack of stickers or a simple stencil, we turn ordinary pumpkins into little works of art almost instantly. No knives, no mess—just pure fun.
You can find pumpkin face sticker sheets at almost any grocery or craft store in the fall. They usually have big, bold features—eyes, noses, mouths, and sometimes even eyebrows or scars! For homemade fun, you can cut shapes out of masking tape, paper, or even foam sheets. Let the kids peel and stick, and you’ll be amazed how creative they get.
Easy steps for sticker pumpkins:
- Wipe down the pumpkin to help stickers stick better.
- Let the kids pick and place eyes, noses, and mouths. It’s super quick and easy to swap out or adjust features until everyone’s happy!
- Add extra details with markers or stick-on gems.
If your bunch loves crisp lines or wants to try a simple painted look, stencils are perfect. Store-bought stencils work well, but we make our own with paper or card stock. Here’s how I do it:
- Cut out simple shapes for eyes and mouths. Think circles, triangles, or half-moons.
- Tape the stencil onto the pumpkin.
- Use a sponge or foam dabber with acrylic paint (or a big marker) to fill in the shapes.
- Peel away the stencil to reveal a perfectly crisp face!
DIY stencil tips:
- For quick shapes, use cookie cutters as guides.
- Let older kids draw a face on paper, then cut out the pieces for their own stencil.
- Don’t fuss about perfection—part of the charm is the handmade look.
Stickers and stencils keep things so simple. There are no worries about sharp tools or sore hands. Plus, the kids can deck out a whole pumpkin patch in less time than it takes to finish an after-school snack. Watching their pride as they line up their easy, mess-free pumpkin faces by the door is a little fall magic every time!
Tips to Make Pumpkin Carving with Kids Easy and Fun
When it comes to pumpkin face ideas easy enough for moms and kids, I’ve learned that the real secret is to keep things light and fun. After plenty of sticky nights gathered around the kitchen table with my three boys, I have found a few tricks that save my sanity and keep everyone smiling. Making pumpkin carving easy (and safe) turns what could be a tedious chore into one of the best memories of fall.
Set Up for Success Before You Start
Getting ready is half the battle. I always pull out everything we need before anyone starts poking holes or grabbing “the best pumpkin.” It makes a real difference in how things go.
- Cover the table: I use an old plastic tablecloth or layers of newspapers. Clean-up is far easier and you won’t stress about pumpkin guts on your good table.
- Have tools handy: Grab your spoons, small kid-friendly saws, markers, and wipes. I love lining up bowls for seeds and trash, so everyone has a job.
- Dress for mess: Pajamas or old play clothes make the evening a lot more relaxed. You can even hand out aprons if you want an official “team pumpkin” feel.
I like to keep it simple at the start. A prepared table means we can get right to the fun part and nobody is running around asking where the markers went.
Let Kids Help at Every Step
Part of the magic is letting my boys get their hands (and sometimes their faces) messy. Even the youngest help out and I swear the excitement is contagious.
- Let them pick the pumpkin: Every child gets to choose their pumpkin. Big, small, round, or oddly shaped—doesn’t matter. They love having a say.
- Drawing comes first: Kids use washable markers or crayons to sketch their own faces. Triangles and circles work great for beginners, and there’s no pressure to be perfect.
- Scoop and separate: Everyone takes a turn pulling out the seeds. The ooey-gooey feeling always leads to giggles. Even picky kids light up when they get to “dig in.”
With everyone involved, there’s less sibling drama and more of that cozy family feeling.
Pick Designs That Match Your Kids’ Skill Levels
I stay away from designs that are way too hard. For first timers or little ones, success means keeping it simple.
- Big features like wide smiles or round eyes are easier to cut and less likely to collapse.
- Thick lines are best for kids’ carving tools. Thin or fancy lines tend to break right through.
- Remember: even silly or lopsided faces get the kids grinning and proud!
If you want to make it even simpler, just draw faces with markers or stick on big googly eyes for a totally safe, zero-carve pumpkin. The look of joy on your kids’ faces? Worth every shortcut.
Turn the Process Into a Family Event
The best pumpkin memories happen when everyone joins in, no matter their age. Here are a few ideas to keep things rolling and fun:
- Turn on music: Throw on a Halloween playlist or your family’s favorite tunes. It keeps things light, and nobody notices if there’s a mess on the floor.
- Give everyone a job: Someone can be in charge of scooping, another drawing, another cleaning. It prevents fights and keeps those little hands busy.
- Take plenty of photos: Even the “oops” moments make for fun photos and stories later. I love looking back at all the creative faces my boys made each year.
By making pumpkin carving a group activity with lots of laughter and teamwork, the job feels less like a messy project and more like a mini party.
Keep Safety Front and Center

Pumpkin carving with kids only works if everyone comes out with all their fingers! I never let my boys use sharp knives. Instead, I trust (and love) the kid-friendly pumpkin saws you get in most carving kits.
- Use only the tools meant for kids. Regular kitchen knives just aren’t safe when little hands are helping.
- Grown-ups do the main carving, but younger kids can poke out pieces and clean up inside the pumpkin.
- Always carve on a sturdy surface, never on your lap or something tippy.
Teach kids that pumpkin carving is not a race. Everyone gets a turn, and patience is key!
Make Cleanup Fast and Easy
Let’s be honest, the sticky cleanup can take the wind out of your sails, especially after a late night. A few tricks help us wrap things up quickly:
- Roll up the newspaper or tablecloth with all the scraps inside and toss it right out.
- Wipe hands with baby wipes before moving to the sink to avoid leaving pumpkin slime all over the house.
- Keep a trash bag handy. Encourage the kids to toss in seeds and goopy bits as they work.
A quick cleanup means you can relax and enjoy your finished pumpkins without dreading what comes next.
Add Extra Fun with Simple Touches
To keep spirits high, I like sneaking in a few fun twists each year.
- Hold a mini “pumpkin face contest” (everyone wins something!).
- Let the kids name their pumpkins and give them silly personalities. Last year, our pumpkins had backstories and even “voices.”
- Toast the seeds after carving. Nothing beats the smell of roasting pumpkin seeds filling the house.
With these easy tips and a bit of patience, pumpkin face ideas easy enough for beginners turn into happy, giggly memories. Every messy, silly, grinning pumpkin on our porch is proof the simple approach always wins!
Inspiration Gallery: Real Pumpkin Faces from Our Family
Sometimes, finding pumpkin face ideas easy enough for a busy house feels like a search for buried treasure! Every year, I snap dozens of photos of my boys with their pumpkins, all lined up on the porch. Some are crooked, some have wild smiles, some are missing teeth, and a few look pretty questionable once the sun sets! But you know what? Those are the pumpkins that get the biggest grins, and they’re the faces our friends talk about all season long.
To help spark some ideas and show you what’s possible (even with wiggly kids and last-minute carving sessions), I pulled together a little “family inspiration gallery.” These are real pumpkin faces, made in our kitchen, sticky hands and all! Trust me, every single pumpkin brings a new story and lots of proud little faces.
Goofy Grins That Make Us Laugh
Every fall, goofy pumpkins become the star of our porch. My boys never get tired of wild eyes and giant, uneven mouths. Here are a few fun ideas that show just how easy and personal these faces can be:
- Big-toothed Smiles: We cut huge crescent smiles and leave “blocks” for teeth. If a tooth breaks out, we call it a “hockey pumpkin”—boys think it’s hilarious!
- One-Eyed Wonders: When one of the triangle eyes doesn’t quite match the other, we say our pumpkin is “winking.” Imperfection is charm!
- Tongue-Out Pumpkins: Last year, my youngest drew a big, silly tongue sticking out. We painted the tongue red, and it turned out to be everyone’s favorite.
Sometimes, the best pumpkins are the ones the kids design themselves. I give them a marker, and we just roll with whatever silly face they come up with!
Silly and Spooky Combos
Kids love mixing up scary and silly! Our pumpkins aren’t just spooky—they’re downright goofy. Here’s how we blend the two:
- Triangle Eyes and Zig-Zag Mouths: A classic look, but we make the mouth wavy instead of straight. It instantly looks like our pumpkin is giggling or up to mischief.
- Raised Eyebrows: With a simple sweep of the marker above the eyes before carving, even the most basic pumpkin face gets loads of personality.
- Fake Scars: The boys love drawing little lines or stitches on the faces using black marker or by “carving” shallow lines. It turns a regular pumpkin into “Frankenstein’s cousin”—at least in our house!
Don’t worry about perfection. A lumpy line or extra big nose just means your pumpkin stands out. These playful, spooky combinations get the most comments from neighbors and friends.
Sweet Faces for Little Ones
Not every pumpkin on our porch looks like it’s plotting Halloween tricks. Sometimes, you just want a cute, friendly face that glows soft and sweet at night. These are perfect for the youngest helpers:
- Wide, Cheerful Eyes: Big, round circles instead of triangles make for a soft, happy pumpkin face.
- Heart-Shaped Noses: Use a cookie cutter or freehand a little heart—kids think it’s adorable!
- Small Smiles: Instead of big grins, simple curved lines make the face look gentle and welcoming. My middle son loves adding freckle dots with a marker for “extra sweetness.”
Young kids can help draw these on, and the carving stays simple. These faces are easy for small hands but look charming on your steps.
Painted and Sticker Faces for No-Carve Nights
Some evenings, we skip the knives and go wild with paint, markers, or stickers. These pumpkins last longer and are the fastest to finish (great for a weeknight treat).
- Sticker Eyes and Foam Mouths: We find silly face sticker packs at the craft store, or make our own using colored paper and tape.
- Painted Mustaches and Eyelashes: My boys love painting mustaches, rosy cheeks, or big eyelashes. Every pumpkin gets a different personality.
- Glitter and Googly Eyes: For a super silly twist, we stick on some googly eyes and toss on a dash of glitter for “fancy pumpkins.”
No carving also means the kids get to do most of the work themselves! I just help with cleanup and make sure nothing spills (paint water cups are always a risk with boys).
Family Pumpkin Parade: Each Kid’s Signature Style
One of my favorite things every year is lining up our pumpkins and seeing how each boy’s style comes out. You can spot my oldest’s pumpkin right away—he likes creepy teeth and wild eyebrows. My youngest picks the friendliest face, usually with a sticker tongue or crazy painted eyes. My middle child always asks for a “pumpkin with glasses” or adds a silly hat.
Here are a few of their special touches that can work in any house:
- “Glasses” Frames: Use pipe cleaners or draw with marker around the eyes. My son thinks every pumpkin should look “smart.”
- Hats and Scarves: A simple ball cap or a bit of old fabric makes any pumpkin one of a kind.
- Funny Names: We name each pumpkin and write it under the chin with a Sharpie. Names like Captain Silliness and Princess Pumpkin Pie stick around all season.
Seeing each pumpkin’s unique face reminds me just how special these simple family crafts can be. Whether your little ones love wild and goofy, sweet and gentle, or something totally their own, letting them take charge fills your porch with pride and personality.
This gallery is proof that pumpkin face ideas easy enough for beginners can turn into the most memorable decorations on the block. It really doesn’t take perfect carving or fancy designs to make your porch smile, just a bit of imagination and a lot of laughter!
Conclusion
Pumpkin face ideas easy enough for beginners truly turn into something special when you add family, laughter, and zero pressure to be perfect. I promise, you don’t need to be an artist or supermom to make a porch full of pumpkins shine! These moments spent scooping, painting, or sticking on goofy eyes become family stories your kids will love for years.
If you’ve never tried it, just jump in—grab a pumpkin, let your kids pick their wildest ideas, and enjoy every messy minute. These simple faces aren’t just decorations, they’re secret ingredients to the sweetest fall memories.
Thanks for being here! I’d love to hear how your pumpkins turn out or read your own funny stories and tips. Drop a comment below and let’s cheer each other on in this sticky, silly, pumpkin-filled adventure!
This post may contain affiliate links. Read the full disclosure here.