Halloween Door Decor Ideas for Spooky Curb Appeal
Every year, I get just as excited as my three boys about Halloween—maybe even more! One of my favorite ways to kick off the season is by creating fun and spooky curb appeal!
The front door is the very first thing trick-or-treaters see, so I know how important it is to make it inviting and festive!
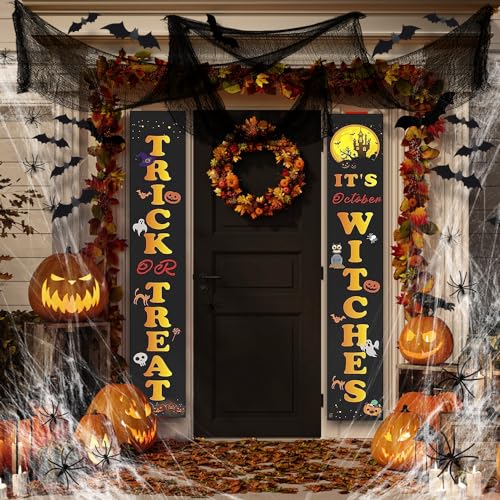
This Halloween door decoration kit takes five minutes to hang and looks amazing from the street.
That’s why I love gathering fresh halloween door decor ideas that are playful, charming, and easy to put together with the kids.
Whether you want something simple or a little more dramatic, I’ve got you covered!

Choosing the Perfect Halloween Door Decor Theme
Picking the right theme for your Halloween door decor sets the tone for all the spooky fun ahead. It’s the first thing trick-or-treaters notice when they come up your walkway, so I always want something that’s festive and fun—and that reflects a little bit of my kids’ personalities too. Whether you lean toward a classic vibe, love spotting pop culture nods, or prefer the hands-on joy of DIY, there’s a theme out there that will fit your style and make your doorstep the neighborhood star.
Classic Spooky Themes

You can’t go wrong with the timeless Halloween favorites that have been delighting kids for generations. Think witches, ghosts, skeletons, and of course, pumpkins. These options work perfectly if you want to keep things familiar and fun for the little ones running up to your door.
For example:
- Witches with black hats, brooms, and maybe a bubbling cauldron make for playful and lively decorations.
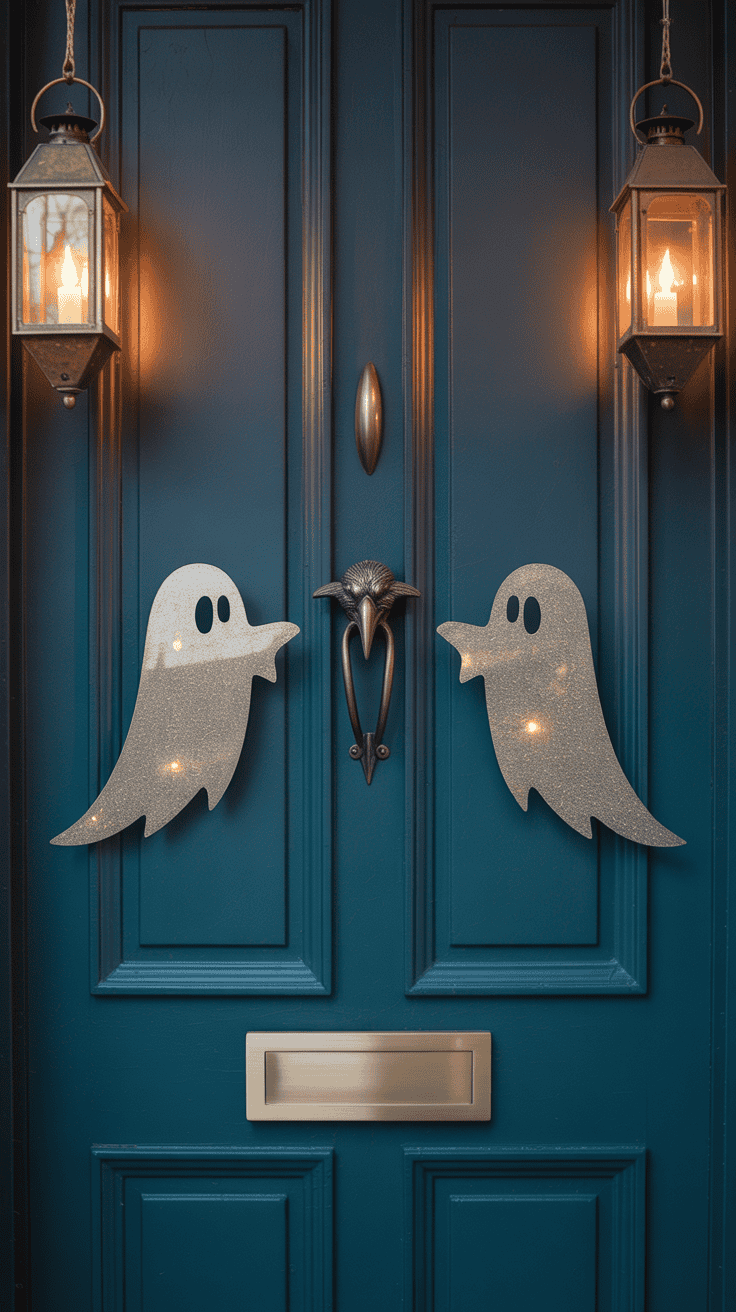
- Ghosts made of simple white sheets or fabric add a touch of whimsy that isn’t scary but definitely seasonal.
- Skeletons can be posed in silly or spooky ways, from a dancing skeleton to one holding a trick-or-treat bag.
- Pumpkins, carved or painted, always bring that fall charm—and the pumpkin spice vibes!
These themes are easy to mix and match. The best part is they’re usually budget-friendly and easy to find at any store or craft section—and my boys love helping me put these up year after year. It’s like a little tradition right on our front porch.
Pop Culture and Movie-Inspired Themes
If your kids love a specific Halloween movie or character, why not turn your front door into a mini homage? Holiday classics or kid-friendly spooky movies offer a treasure trove of ideas that instantly catch children’s eyes and bring smiles.
Some favorites I’ve tried or seen work great:
- “Hocus Pocus” themed decorations with miniature Sanderson sisters or spell books.
- Characters from “The Nightmare Before Christmas” like Jack Skellington can create a charmingly eerie effect.
- Monsters University or friendly ghosts and creatures from animated films keep things lighthearted and bright.
These themes add a unique personality to your home and can be great conversation starters when parents walk up with their kids. Plus, when your kiddos see their favorite characters, it’s like the magic of Halloween really comes alive. Just remember to keep your decorations friendly and age-appropriate so everyone feels comfortable and excited.
DIY versus Store-Bought Decorations


As a mom juggling a busy household, I often wonder if I have the time (and energy) to make my own decorations or if I should buy ready-made ones. Both options have their perks, and I’ve learned it’s all about what works best for your family.
DIY Decor:
- Makes for a fun activity to do with your kids—it’s quality time and creative outlet rolled into one.
- Keeps costs low. Many decorations can be made from simple household items or inexpensive craft supplies.
- Adds a personal touch that guests can’t buy in a store.
On the downside, DIY can be time-consuming and sometimes frustrating if you’re short on patience or crafting skills. But if you pick a few simple projects, it’s manageable and really rewarding!
Store-Bought Decor:
- Saves a ton of time and effort, which is a lifesaver when your calendar is packed.
- Offers polished, consistent looks with durable materials you can reuse year after year.
- Wide variety means you can easily find decorations that fit your theme perfectly.
For me, a mix of both usually hits the sweet spot. I like to grab a few standout store-bought pieces and then sprinkle in some easy DIY touches that my boys can help with. It keeps things fun, personal, and not too stressful, which is exactly what I aim for in holiday decorating!
Choosing the right theme and approach to your Halloween door decor ideas sets the stage for all the festivities. With classic spooky favorites, fun pop culture nods, or a balanced blend of do-it-yourself and store purchases, you can create a front door that excites everyone who comes knocking.
Creative and Kid-Friendly Halloween Door Decor Ideas
When it comes to Halloween door decor ideas that the whole family will enjoy, especially the kids, I’ve found that mixing creativity with a touch of fun keeps everyone excited. Decorating the front door is not just about looks; it’s a chance to bring smiles and create little moments of magic right before the big night. Here are some ideas I love to try with my boys that are easy, playful, and add that perfect Halloween vibe.
Spooky Wreaths and Garlands
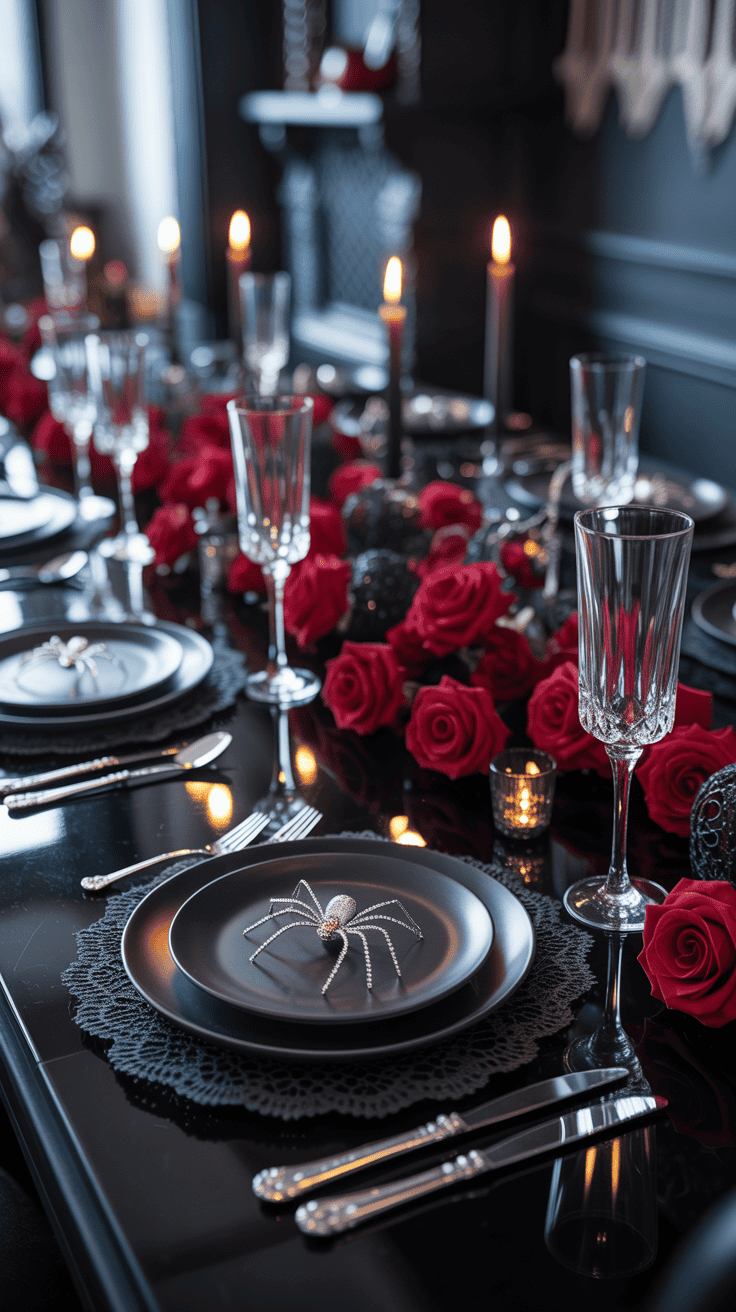
Wreaths and garlands are such a simple way to add texture and a pop of color to your door, and they set the mood right away. For Halloween, I like to choose or make wreaths with natural and spooky touches—think twisted vines, faux black roses, tiny pumpkins, and wispy spider webs. You don’t have to purchase anything fancy. You can start with a plain grapevine wreath and add craft store finds or even things you collect outside, like dry leaves or pinecones.
Try stacking a few garlands along the doorframe for a layered look. I often use:
- Orange and black tinsel garlands mixed with miniature spiders or bats
- Fake autumn leaves garlands, which add warm color and soften the look
- Stringed plastic pumpkins or skull beads as a quirky accent
If you want to involve the kids, let them glue mini plastic bugs or paint little wood cutouts, then attach those to the wreath or garlands. The best part is you get a charming and tactile element that’s totally unique—and your kids will be proud seeing their work greeting visitors.
Interactive Door Decor


I love when the door becomes a part of the Halloween fun, not just a pretty backdrop. Adding interactive elements lets kids and visitors engage with the decor while waiting for candy! Here are some ideas we’ve tried:
- Magnetic doors: Cover your door with a magnetic sheet or spray adhesive and use magnets shaped like spooky characters or Halloween symbols. Kids can move bats, ghosts, or pumpkins around to create their own scene each day.
- Chalkboard paint: Paint a section of the door with chalkboard paint and let the kids draw spooky faces, write “trick or treat,” or leave messages for visitors. It’s easy to change, so the creativity never stops.
- Hanging elements: Use soft, lightweight hanging decorations (like felt ghosts or foam spiders) that kids can reach and touch. They can gently spin or flutter, which adds movement and invites interaction.
These interactive touches make decorating a process, not just a one-time setup. Plus, my boys get so excited to show off their handiwork to friends and neighbors.
Using Lighting to Enhance Spookiness
Lighting is my secret weapon for turning simple Halloween door decor into something extra special when the sun goes down. Safety is always top of mind, especially with little ones around, so I stick with battery-powered options that look great without any fire hazard.
Here are my favorite safe lighting ideas that create a cozy yet spooky glow:
- LED candles: These flicker like real candles without any risk. I place them in lanterns or behind pumpkin carvings for a warm effect.
- String lights: Orange or purple string lights are perfect for outlining the door or weaving through wreaths and garlands. They add that magical twinkle kids love.
- Glow-in-the-dark features: I like to add glow-in-the-dark paint or decals on the door or nearby decorations. At night, these subtle glows give a fun, eerie touch kids can’t resist.
Sometimes, I even mix colors or layer lights at different heights so the whole doorway feels alive when darkness settles in. It’s amazing how a little lighting can turn simple decor into a showstopper.
Putting together kid-friendly and creative Halloween door decor ideas like these keeps the front of the house inviting, festive, and full of personality. It gives my boys a chance to take part and lets our neighbors know we’re ready for some spooky fun!
Tips for Setting Up Your Halloween Door Decor for Maximum Impact

When it comes to making your front door the star of the block, setting up your halloween door decor ideas in the right way makes a huge difference. I’ve learned that a little planning goes a long way—not just for looks but for safety and lasting charm throughout the season. Here are some practical tips that have helped me and my boys get our doorstep ready and spooky without any stress.
Placement Strategies for Visibility and Safety
Your decorations should invite visitors in, not trip them up! I always think about where my decorations sit so they stand out but don’t block the path or the door itself. Here’s what I keep in mind:
- Keep walkways clear. Kids are excited and sometimes rush, so I make sure no decorations are sticking out where they might get tangled or knocked down.
- Position decor at eye level or higher. Hanging spooky elements like wreaths or garlands on the door or frame catches attention without taking up floor space.
- Use corners or edges for big items. Pumpkins or statues look great sitting off to the side rather than right in front of the door. This keeps the entrance open for easy access.
- Mind the door swing. If your door opens inward or outward, don’t place anything where it will get smushed or block the door from opening fully.
With these placement ideas, your decorations will have that wow factor and keep everyone safe and happy.
Weatherproofing Your Door Decorations
Rain, wind, and chilly nights are just part of October’s charm, but they can be tough on your decorations. I’ve had my share of soggy wreaths and toppled pumpkins! To keep your door decor looking sharp all night, I follow a few tricks:
- Choose durable materials like plastic, metal, or weather-treated fabrics instead of paper or delicate crafts.
- Use waterproof sprays or sealants. A quick spray on pumpkins, wreaths, and hanging decor adds a protective coating that repels moisture.
- Secure lightweight decorations. Wind can blow things away, so I use strong hooks, screws, or heavy-duty adhesive strips for stability.
- Bring sensitive items inside if rain is due. If you have any DIY pieces that don’t hold up well, it’s okay to swap them inside or porch area when the weather looks rough.
With a few of these steps, your decorations will stand tall no matter what the weather throws at them!
Incorporating Personalized Touches

Nothing makes a Halloween door decor feel warmer and more inviting than a personal touch. My boys love seeing their names or artwork featured, and neighbors always appreciate the friendly vibe. Here’s how I add that unique charm:
- Add family names on wooden signs or pumpkin decals near the door. It’s a small detail that says “welcome” with personality.
- Display kid-made art like spooky drawings or little paper bats they colored. You can tape these in clear pockets on the door or hang them from garlands.
- Create a themed welcome mat with initials or fun Halloween phrases hand-painted by the kids.
- Use chalkboard paint on the door for messages, countdowns, or silly greetings your kids change each day.
Personalizing your decorations turns your porch into a warm and memorable spot. It’s simple, heartfelt, and makes the halloween door decor ideas really yours!
Budget-Friendly Halloween Door Decor Ideas

Creating a spooky welcome doesn’t have to drain your wallet. When I think about halloween door decor ideas, I like to keep things fun, affordable, and eco-friendly. With a bit of creativity, you can make your doorstep look festive without buying expensive stuff. Here are some easy ways I turn simple things around the house (and a few smart shopping tips) into a Halloween scene that feels just right for my family.
Upcycling Household Items into Decorations
I love turning everyday things into Halloween magic because it saves money and gives new life to stuff we’d otherwise toss. You’d be surprised how many ordinary items can become eerie or playful with just a little tweak!
Try these at home:
- Old sheets or pillowcases become perfect ghosts just by cutting eye holes and loosely tying bottoms with string. You can hang them on the door or porch ceiling.
- Empty jars can hold tealights or colored water for glowing lanterns. Add some spider web made from cotton balls to finish the look.
- Cardboard boxes or cereal boxes can be painted and cut into spooky signs or tombstones. Kids find painting these fun (and messy!).
- Broken jewelry, spare buttons, or bits of fabric can be glued to paper or wood cutouts for creepy creatures or decorative accents.
- Unused kitchen tools like colanders make great witch hats when sprayed black and decked with fake spiders.
- Old clothes or scarves can be stuffed to make little creatures or draped as ragged shrouds.
This kind of recycling is satisfying for me, and my boys feel proud knowing we didn’t waste anything. Plus, it’s always a good conversation starter when neighbors spot something unique and ask how we made it.
Affordable Craft Supplies and Dollar Store Finds
If you’re on the hunt for stuff that looks good but won’t ruin your budget, the dollar store is my go-to place. It’s a treasure trove of simple items that you can tweak or use right away. I like to combine these finds with basic craft supplies to keep costs low but style high.
Here’s what usually ends up in my basket:
- Plastic spiders, bats, and skulls add instant spooky vibes and can be scattered or attached anywhere.
- Black and orange paper lanterns or banners for hanging around the doorframe.
- Foam pumpkins or skeletons that are lightweight and reusable.
- Fake cobweb rolls to drape over bushes, doorknobs, or wreaths—perfect for texture.
- Pipe cleaners and foam sheets to create easy-to-make spider webs or little critters.
- Inexpensive paint sets (especially black, white, and orange) to alter or personalize store-bought pieces or household finds.
I mix and match these dollar finds with some glue and paint, and the results look way more expensive than they are. Also, craft stores often have clearance sections or coupons—if you keep an eye out, you can grab fancy-looking stuff for just a few dollars.
Involving Kids in Budget Decor Projects

One of my favorite parts about halloween door decor ideas is turning decorating into a family event. My boys love to help, and keeping projects easy and wallet-friendly means everyone stays excited and stress-free. When kids join in, the whole thing feels more special and personal.
Some simple projects that have been a hit with my little helpers:
- Paper plate monsters: Grab some paper plates, markers, and scraps of paper, then let the kids go wild with big eyes, goofy teeth, and silly faces. Tape or string these up around the door.
- Pumpkin painting: Instead of carving, painting pumpkins saves time and doesn’t get messy. Kids get creative, and you avoid any sharp tools.
- Spider webs with pipe cleaners: Kids can twist black pipe cleaners into spiders and webs to hang on wreaths or from porch rails. It’s easy and fun.
- Handprint ghosts: Use white paint to press their tiny hands on black construction paper, then add eyes and a mouth with markers. These little ghosts are sweet hanging decorations or door signs.
- Homemade buntings: Cut simple triangles from old fabric or paper, decorate with Halloween designs, and string them up for instant festivity.
Being involved in the process gives my boys a real sense of ownership and pride when the door looks all set for Halloween. It’s also a great way to sneak in some craft time without us feeling overwhelmed or spending big. Kids love to see their work on display!
Budget-friendly decorating doesn’t mean you have to skip impact. Upcycling household items, snagging great finds at the dollar store, and making decorating a fun family affair means you get creative, save money, and build memories all at once. That’s my favorite kind of Halloween prep!
Keeping Your Halloween Door Decor Fresh for Next Year

After the Halloween fun winds down, I always take some time to care for our decorations. It’s one of those simple things that makes decorating easier and more enjoyable year after year. If you want your spooky door decor to look good season after season, a little upkeep and smart storage go a long way. Plus, planning ahead can save a lot of headaches when you’re ready to deck out the door again!
Cleaning and Repairing Decor After Halloween
Once the last trick-or-treater has come and gone, it’s tempting to just toss everything in a box and forget about it. But taking a few minutes to clean your decorations really pays off. Dirt, dust, and wear can sneak in, making things look tired fast.
Here’s what I do:
- Dusting off fake cobwebs and leaves: A gentle brush or vacuum works well to lift off stubborn debris without tearing delicate spots.
- Wiping down plastic, metal, or glass pieces: Damp cloths with mild soap clean up grime and keep surfaces shiny. Avoid soaking anything to prevent damage.
- Checking for tears or broken parts: I patch small holes in fabric or repaint chipped spots on signs. Loose glue or hooks get a quick fix before packing away.
- Sorting through lights: Test battery-powered string lights and replace dead batteries. Bulbs that don’t work can be swapped out for next year.
Doing this maintenance feels like giving your decorations a little TLC, and I swear it makes them last longer and look better when you bring them back out.
Storage Tips to Save Space and Avoid Damage
Storing Halloween decor can be tricky when space is tight. I’ve found a few tricks to save room and keep everything in one piece until next year.
Start by grouping decorations by type or fragility, then pick containers that fit slot in your storage spots easily. Here’s what I keep in mind:
- Use clear plastic bins with lids so you can see what’s inside without digging through everything later.
- Wrap fragile items like glass pumpkins or delicate wreaths with bubble wrap or old towels to cushion them.
- Keep smaller or loose pieces in sealable bags—think tiny spiders, extra batteries, or hooks—so they don’t get lost.
- Label every box clearly for quick retrieval. I even jot down what door or area the decorations belong to, which saves time next fall.
- Store lights loosely coiled to avoid tangles and keep wires from bending awkwardly.
If you don’t have basement or garage space, consider using closet shelves or under-bed storage. Owning a few stackable bins really helps maximize every inch. The goal is to keep decorations safe and ready to go, so they don’t become a hassle next autumn.
Planning Ahead for Next Year

I’ve learned that the best way to make decorating less stressful is to keep track of what worked—and what didn’t. After we pack decorations away, I take notes and snap photos. It might sound over-the-top, but trust me, it saves so much time and guesswork when Halloween rolls back around.
Here’s my simple planning routine:
- Take photos of your decorated door from different angles. This keeps your favorite setups fresh in your mind.
- Write down what items you used and where they were placed. I also note any decorations that didn’t hold up well or that I’d like to swap out.
- Keep a “wish list” for new ideas or things to replace next year. My boys love helping with this part and suggesting fun additions.
- Store your notes and photos in a folder or app you check before you start decorating.
This habit makes future decorating feel more like building on a fun tradition than starting from zero every year. With a little effort now, you’ll be ready to create even better halloween door decor ideas next time—with less hassle and more smiles from the kids and neighbors!
Conclusion
Bringing these halloween door decor ideas to life has been such a joyful part of preparing for the season with my boys. It’s all about mixing simple touches with a bit of creativity to make our front porch feel fun, festive, and a little spooky. Seeing their smiles and excitement when they spot their own handiwork is always a highlight.
I encourage you to have fun with your decorations, involve your little ones, and create a welcoming vibe that neighbors and trick-or-treaters will remember year after year. Your doorstep is the first glimpse into the Halloween spirit, so make it count!
Thanks for joining me in sharing these ideas. I’d love to hear how you decorate your doors or any special traditions you have—after all, the best decorations are the ones filled with family love and laughter!
This post may contain affiliate links. Read the full disclosure here.