Jack O Lantern Carving Ideas That Glow Bright
Carving pumpkins with my three boys is one of our favorite fall traditions. It’s simple and fun, and the best part is watching their faces light up when the jack o lanterns glow bright in the evening. If you’re looking for jack o lantern carving ideas that bring that magical glow to your porch, you’re in the right place!
We used this pumpkin carving tool set — safe for kids, durable, and creates that perfect glowing grin.
I love sharing easy designs that kids can help with and a few tricks to make your pumpkins shine even on chilly, dark nights. Whether you want classic spooky faces or playful patterns, these ideas will make your carving experience more memorable and joyful for the whole family.

Choosing the Perfect Pumpkin for Carving


Picking the right pumpkin sets the stage for all the fun that comes with jack o lantern carving ideas. I always find that the pumpkin itself can make a big difference in how the final look turns out. Whether you’re heading out with the kids or planning a solo pumpkin hunt, this part is just as exciting as the carving. Here’s how I pick pumpkins that will shine bright and bring joy to our fall tradition.
Picking Pumpkins with Kids: Making it a Fun Family Activity
Taking my boys to pick pumpkins is always a highlight of the season. It’s not just about the pumpkin—it’s about the laughter, the little debates over which one is the “best,” and those proud moments when they carry their perfect pumpkin back to the car. Here’s how I keep it fun and engaging for the whole family:
- Let the kids lead the way. I give my boys the freedom to choose their favorite pumpkins, even if it means a few funny shapes or tiny bruises. It makes them feel involved and excited to carve later.
- Turn it into a pumpkin scavenger hunt. We look for pumpkins with certain features: a bright orange color, a flat bottom, or a sturdy stem. This little game keeps everyone entertained and focused.
- Talk about the pumpkin’s “personality.” I ask my kids what each pumpkin reminds them of—sometimes it’s a funny face, other times a character from their favorite story. This sparks creativity early on.
- Bring snacks and take breaks. The pumpkin patch or farmer’s market can get busy, so a quick snack break keeps spirits high and makes it feel like a real outing.
Making pumpkin picking a family event means the joy starts before the carving tools come out. It’s a chance to create memories that will glow just as bright as our jack o lanterns at night.
Understanding Pumpkin Shapes and Sizes for Different Carving Designs


When it comes to choosing pumpkins with carving in mind, size and shape really matter. You want a pumpkin that will fit your design perfectly. Over the years, I’ve learned a few tricks that save time and improve the final look.
- Round and smooth pumpkins are the best for classic faces with big eyes and wide smiles. Their even surface makes it easy to carve clean lines.
- Tall pumpkins work well if you’re aiming for complicated vertical designs, like witches or spooky trees. They give you more space to play with height and detail.
- Flat or squat pumpkins are charming for whimsical designs or funny faces—the kind my youngest loves to make. Their size works well for simple, bold carvings that stand out in dim light.
- Look for a solid stem. This not only makes your pumpkin easier to carry, but a sturdy stem helps it last longer, so your artwork doesn’t wilt too fast.
- Avoid pumpkins with bruises or soft spots. These can rot quickly once carved, which means your glowing masterpiece won’t last as long as you want.
Before you even pick up that knife, visualize your design on the pumpkin’s surface. For example, a big grin suits a wide pumpkin, while small, detailed patterns shine on a tall one. Planning your jack o lantern carving ideas with the pumpkin’s shape in mind means less frustration later and more “wow” moments when your lantern glows.
Picking the perfect pumpkin is half the fun. Once you’ve got it home, the rest—lighting it up and sharing smiles—feels like pure magic!
Creative Jack O Lantern Carving Ideas That Glow Bright

When it comes to jack o lantern carving ideas, making your pumpkins glow bright is part of the fun, especially when you’re carving with kids. I love how a simple pumpkin can turn into a glowing masterpiece that lights up our porch and brings smiles all around. Whether you’re aiming for easy designs for little hands or trying something a bit more creative, there are plenty of ways to make your jack o lantern stand out. Let me share some of my favorite carving ideas and tips that bring extra glow and fun to the whole process.
Classic Friendly Faces: Easy and Fun for Kids

Getting the kids involved means picking simple, friendly faces they can help carve safely. I look for designs with big shapes and clear lines — it makes the whole process a lot less frustrating for them and way more fun. Here are a few favorites that my boys love:
- Wide smiles with round eyes. The eyes can just be two big circles, and the mouth a simple crescent. It’s perfect for little hands and guarantees a bright grin.
- Triangle noses and teeth. Simple triangles and rectangles are easy to cut out and give the pumpkin a cheerful look.
- Cute surprise faces. Think round eyes and a surprised “O” mouth. It’s charming and easy for kids to help poke or cut.
- Eyebrows for extra character. Adding thick, simple eyebrows with a slight tilt turns the face playful without any tricky details.
When the kids can help by poking starter holes or scraping out the pumpkin’s pumpkin guts (which they think is the coolest part), it turns into a real team project. It’s safe, enjoyable, and those glowing faces at night make it all worth it.
Glow-in-the-Dark Paints and Accessories to Enhance Your Jack O Lantern
Carving is just the start. Adding glow-in-the-dark paints or LED accessories can take your jack o lantern to the next level. After trying a few options, here’s what works great to make your pumpkins shine bright, safely:
- Glow-in-the-dark paint: Applying a few coats on the pumpkin’s surface or around the carved areas creates a soft, magical glow that lasts through the night.
- Battery-operated LED candles: They’re safer than real candles and come in different colors. I always keep these on hand, especially with little ones around.
- Fairy lights inside the pumpkin: Wrapping a small string of fairy lights inside adds twinkly brightness and lasts longer than a candle.
- Glow sticks: For a quick and budget-friendly glow, simply crack a glow stick and tuck it inside. It’s fun, and the colors pop against the pumpkin’s orange.
Using these accessories means no worries about open flames, and your jack o lanterns will be the brightest on the block.
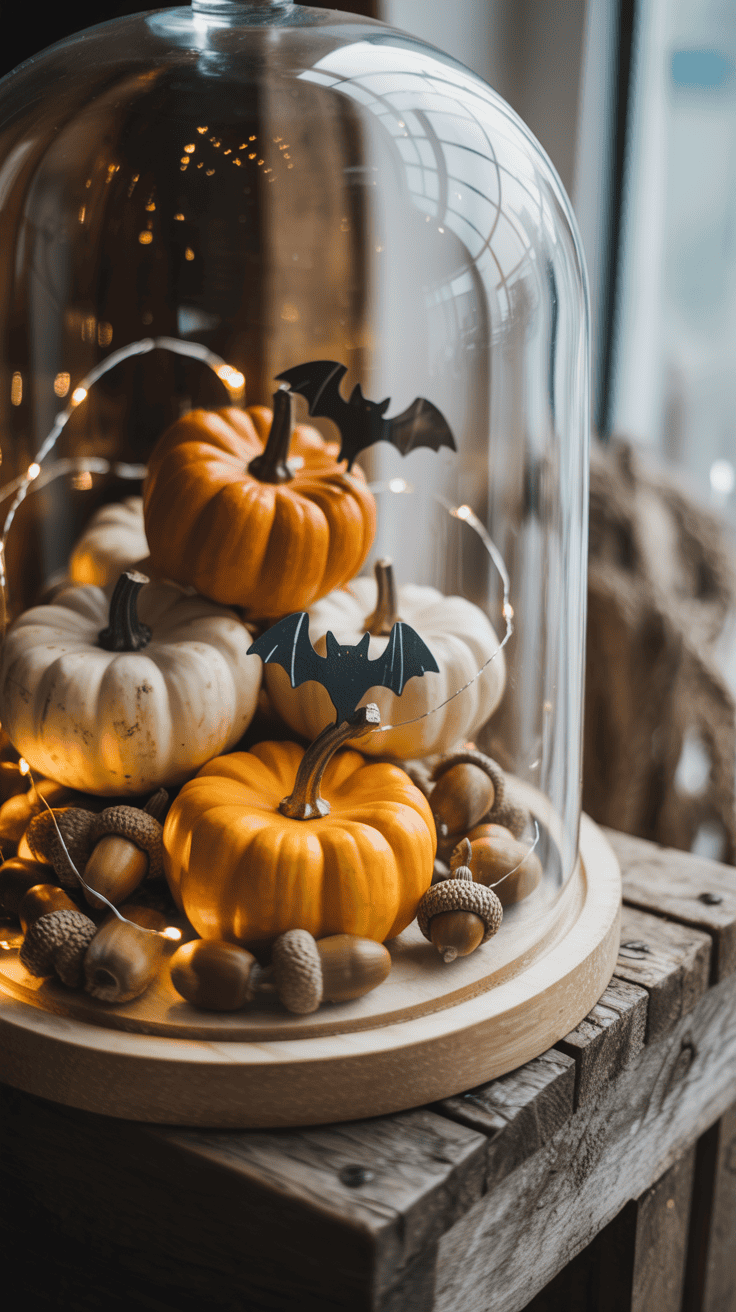
Nature-Inspired Carvings: Leaves, Stars, and Moon Designs

I love adding a touch of nature to our pumpkins. It’s perfect for families who enjoy the outdoors and want something different but still glowing warmly. These designs keep things simple and beautiful:
- Leaf silhouettes: Carve or scrape out leaf shapes like maple or oak leaves on your pumpkin’s surface. When lit, they cast delicate shadows that are just stunning.
- Star patterns: Dot the pumpkin with little star shapes or carve a constellation. The tiny cut-outs shine like hundreds of tiny fireflies.
- Moon phases: Carve simple crescents and circles representing the different moon phases. This creates a glowing story right on your pumpkin.
- Tree branches: Lightly etch tree branches crossing over the pumpkin. It’s subtle but brings a cool natural vibe when lit from inside.
These designs are still easy enough for older kids to help with but add an artistic twist that makes your jack o lantern truly special.
Spooky Yet Fun Designs: Not Too Scary for Young Kids

If your little ones like a little spook but nothing too intense, I’ve found that balancing spooky with playful is the key. Here are some fun ideas that deliver just enough creepiness without nightmares:
- Goofy ghosts: Large round eyes and a wobbly mouth, carved in uneven shapes, give ghosts a silly, friendly vibe.
- Happy monsters: Big teeth and one or two eyes, with mismatched shapes, make monsters less scary and more hilarious.
- Pumpkin with stitches: Simple straight lines crossing the pumpkin give the impression of stitches, like a Frankenstein pumpkin that’s more cute than scary.
- Friendly bats: Carve big, round eyes and wide wings. Add some tiny holes to mimic stars for a night sky effect.
These designs keep Halloween lighthearted and enjoyable, so kids look forward to carving, not running away. It’s all about mixing the thrill with a little bit of charm!
With these jack o lantern carving ideas, you can get your kids happily involved and create glowing pumpkins that brighten up dark fall nights and family memories. Each glowing face or pattern tells a story, and watching our porch light up never gets old!
Step-by-Step Carving Guide for Moms with Young Kids

Carving pumpkins with young kids can feel like a big task if you’re not prepared, but it’s also an amazing way to bring everyone together for some hands-on fun. I’ve found that having a clear plan makes the whole process smoother and more enjoyable. Whether you’re new to jack o lantern carving ideas or want some tips to make things easier, the steps below keep things safe, fun, and just the right level of challenge for little hands.
Preparing Your Workspace and Tools
Setting up a workspace that’s both organized and kid-friendly is my top tip for a smooth pumpkin carving session. I lay down newspaper or a washable plastic tablecloth to catch pumpkin guts and seeds—trust me, it saves a lot of cleanup time later. Having everything in reach means fewer distractions and less stress when small hands get impatient.
As for tools, here’s what I keep handy to make carving easier and safer with kids:
- Pumpkin carving kits with small serrated saws. These are gentler than big kitchen knives and easier for kids to handle (with supervision, of course).
- Scooping tools with wide mouths to make cleaning quicker and less messy.
- Safety gloves for me or older kids to prevent slips and cuts.
- Cookie cutters or stencil templates to trace fun shapes on the pumpkin before cutting.
- Markers to draw faces or designs right on the pumpkin surface.
- A small handheld flashlight or headlamp for extra light when carving.
I set up the tools in a neat row and show my boys each one before we start. This small routine helps everyone feel ready and know what to expect. Plus, it turns out that just letting my kids pick what tools they want to use helps them feel more involved from the get-go!
Scooping and Cleaning the Pumpkin: Getting Kids Involved
One of the best parts of carving pumpkins with kids is letting them jump in with the slimy, squishy scooping. My boys love getting their hands inside the pumpkin, and watching them giggle as they pull out seeds and stringy bits is priceless.
To make it safe and fun, I usually hand them the big scooping spoon and set some ground rules:
- Only scoop inside the pumpkin—no poking or cutting.
- Take turns so everyone gets a chance and no one gets overwhelmed.
- Encourage them to save the seeds for roasting or another craft project.
I let my youngest go slow and just enjoy the sensory experience while the older boys help scrape the insides cleaner. We even talk about how the pumpkin is like a big orange bowl for our candle later. This creates a little story around it that makes the task more interesting.
When the pumpkin is clean, I wipe off the outside and inside with a damp cloth to prevent sliminess and help the carving last longer. This cleanup step actually keeps your jack o lantern looking fresh, and the kids love seeing the inside glow once it’s lit.
Carving Techniques for Different Skill Levels
Carving pumpkins with kids means adjusting the difficulty to their skill and comfort level. I like to offer a few carving options so everyone can join in, whether they want to try a basic cut or something a little trickier.
- Beginner (Toddlers and Preschool): Let them make simple holes by poking with a toothpick or small plastic knife. They can create a “dotted” face or outline shapes—they feel proud without the frustration of cutting.
- Intermediate (Early Elementary): Using kid-safe carving saws, they can follow big, simple shapes like triangles or circles and cut out a classic face. I often draw the shapes for them and practice patience while they cut slowly.
- Advanced (Older Kids): If they’re comfortable and careful, let them carve more detailed patterns like stars or teeth. I guide their hands with the saw to keep things safe but still let them shape the design.
Starting with easy tasks and moving to harder ones helps boost confidence and keeps the activity fun. Plus, it means the whole family gets involved at every level. I always remind my boys: it’s not about perfection, but the glow and laughs we share after we’re done.
By breaking carving into these simple steps and matching tools and designs to your kids’ ages and skills, you’ll find jack o lantern carving ideas turn into a joyful family tradition every year. The smiles we get from those bright faces on our porch make all the prepping worth it!
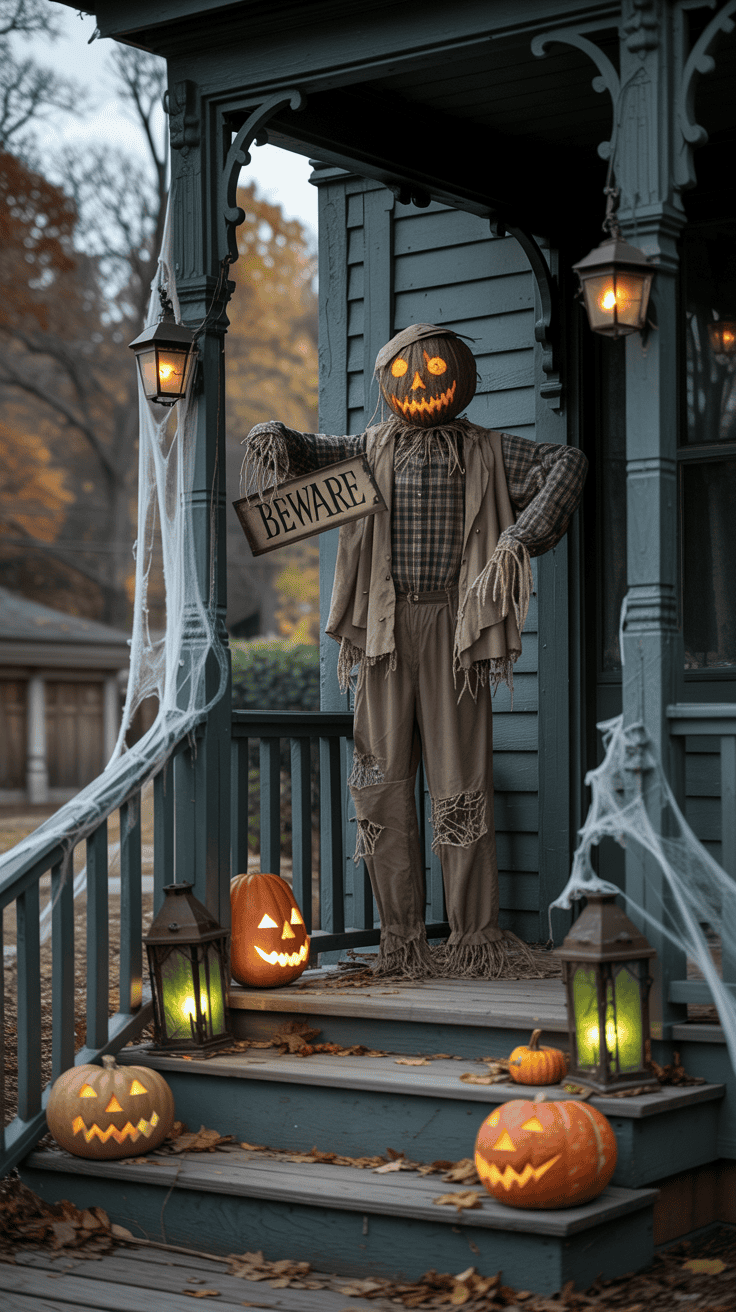
Displaying and Preserving Your Glowing Jack O Lanterns

There’s something magical about pumpkins glowing on a crisp October evening. When you’re working on jack o lantern carving ideas, it’s just as important to think about how to show off those glowing faces with style and care. After all, the way you place your pumpkins can turn your front yard into a Halloween wonderland or your porch into a cozy, flickering retreat. Plus, knowing how to preserve them means your glowing creations stick around longer, giving you more nights of magic. Let me share some of my best tips for displaying and preserving your jack o lanterns, and which lighting works best for safety and brightness—especially if your house is full of little ones like mine!
Creative Display Ideas for Maximum Glow and Impact
Setting pumpkins just anywhere doesn’t do justice to your hard work and the glowing charm they bring. Here are some creative ways I like to arrange pumpkins around the home and yard to get that wow factor everyone notices on Halloween night:
- Vary the height. Use crates, old stools, or sturdy boxes to place pumpkins at different levels. A cluster of lanterns at eye level mixed with some down by the porch steps adds depth and makes your display pop.
- Group by size and shape. I like to put large pumpkins at the back and smaller or oddly shaped ones in front. This way, each one gets enough light and attention.
- Add reflective surfaces. Placing pumpkins near windows or mirror-like surfaces bounces the light and makes the glow even brighter.
- Line walkways and driveways. A path dotted with glowing jack o lanterns invites trick-or-treaters right up to your door, lighting the way in a fun and festive style.
- Use natural elements. Surround your pumpkins with hay bales, autumn leaves, or pine cones to complement the warm glow and keep a cozy, seasonal vibe.
- Create a theme corner. Design a little “spooky spot” or a “friendly fall nook” by grouping pumpkins with themed decorations or matching colors. It adds personality and makes the glowing faces stand out.
These simple changes turn your pumpkins from ordinary to enchanting. It’s about playing with light, shadow, and perspective to highlight your jack o lantern carving ideas perfectly.
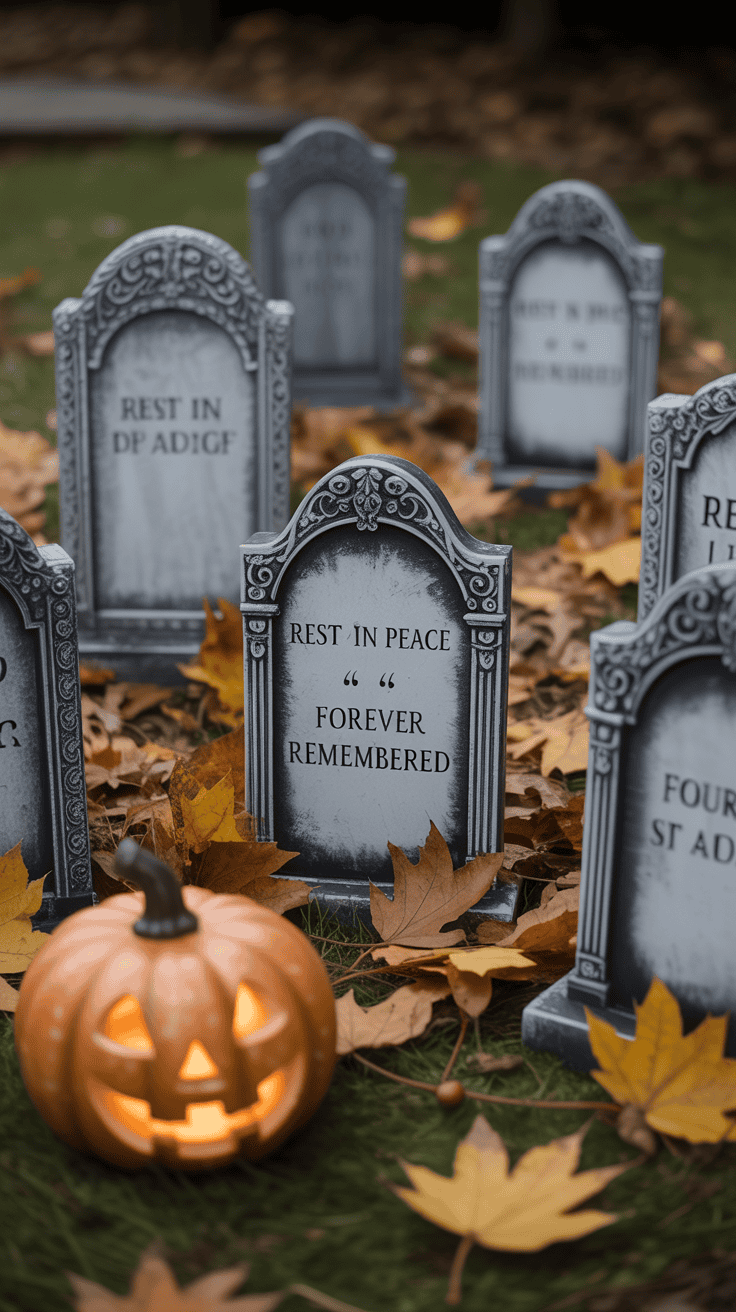
How to Preserve Your Jack O Lantern So It Lasts Longer
Nothing’s more disappointing than spending time carving your pumpkins only to see them wither or mold in a day or two. Over the years, I’ve found a few natural, safe ways to keep my jack o lanterns looking fresh and bright longer, so they keep glowing through the whole Halloween week.
- Keep them cool. Heat speeds up rotting, so bring pumpkins inside at night if it’s warm, or place them in the shade during the day.
- Use a bleach soak. A quick soak in a water-bleach mix (one tablespoon bleach per quart of water) for about 20 minutes helps kill mold and bacteria on the surface. After soaking, dry them thoroughly before carving.
- Apply petroleum jelly. Smearing a thin layer on the carved edges seals in moisture and slows drying out. It’s a trick I rely on to keep the cuts from shriveling.
- Spray with a homemade preservative. Mix water with a little lemon juice or vinegar and a few drops of essential oils (like cinnamon or clove). Spraying pumpkins daily helps prevent mold and keeps them fresh.
- Keep the pumpkin hydrated. Lightly mist pumpkins with water every day if your climate is dry. Just don’t soak them, or they’ll get mushy.
- Avoid picking bruised or damaged pumpkins. Pumpkins with even minor soft spots don’t last as long once carved, so start with the healthiest pumpkin you can find.
These steps have made a big difference in how long my pumpkins stay glowing. Plus, everything I use is kid- and pet-safe, which is a must in my house!
Using LED Lights vs. Traditional Candles for Safety and Brightness
Lighting inside your jack o lantern is what brings your carving ideas to life, but safety is key, especially with little ones running around. I’ve learned LED lights and candles each have their pros and cons, so here’s how I decide what to use.
LED Lights
- Safer for kids and pets. No flame means no risk of burns or setting anything on fire. I can’t overstate how peaceful it is to know the pumpkin is safe, especially when my boys are excitedly circling the porch.
- Longer-lasting. Batteries can last for hours or even days, so there’s no need to keep relighting.
- No smoke or wax mess. The LED stays clean and cool, which keeps the pumpkin looking nice for longer.
- Multiple colors and effects available. You can find flickering, color-changing, or steady lights to match your mood and design.
Traditional Candles
- Classic flickering glow. Candles give that cozy, warm amber light that feels like a true autumn evening.
- Limitations on safety. Open flames require constant supervision. Young kids and pets should stay far away, and you need to be extra careful about placement.
- Shorter burn time. Candles burn out quickly, so you have to relight them often to keep that glow bright.
For my family, LED lights are the best choice. They allow me to set up the display and not worry about accidents. That said, if you choose candles and follow safety rules like placing pumpkins on sturdy, non-flammable surfaces away from curtains or dry leaves, you get that classic look without too much risk.
Whichever option you pick, always think about your family’s needs and how your jack o lantern carving ideas can shine safely all season long!
Conclusion
Trying these jack o lantern carving ideas with your kids turns pumpkin carving into a fun, hands-on family event. It’s a chance to laugh, create, and make memories that light up your porch long after the sun goes down.
Getting the kids involved in simple designs and adding a little glow with paints or LEDs makes everything feel special and keeps them excited. Watching their faces beam with pride as their pumpkins shine bright is priceless.
So grab those pumpkins and carving tools, gather the kids, and make your own glowing jack o lanterns this year. You’ll love the smiles, the stories, and the warm fall nights filled with light and laughter!
This post may contain affiliate links. Read the full disclosure here.