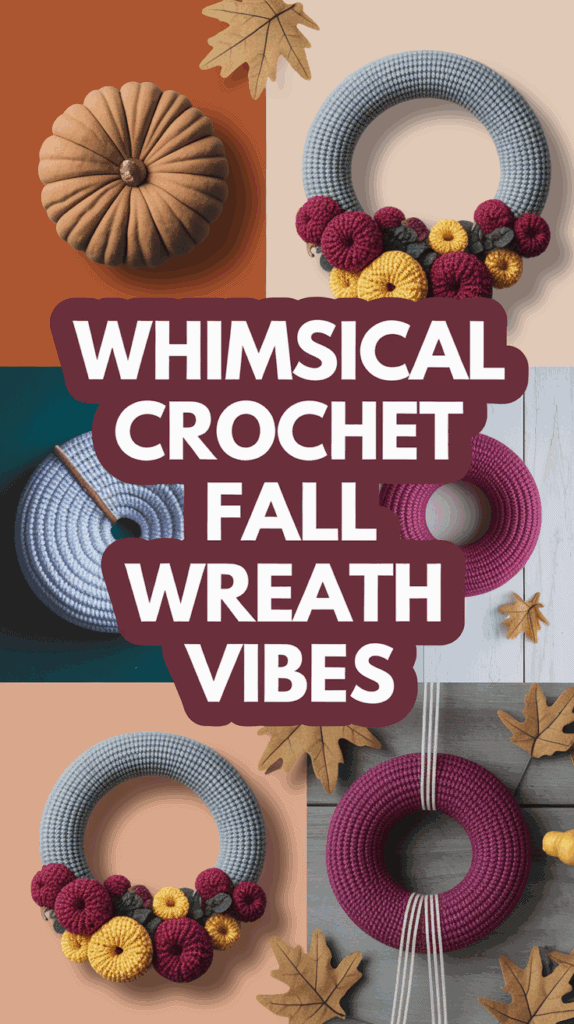
Crochet Fall Wreath Ideas That Add Handmade Charm
Leaf piles, hot cocoa, and a Crochet fall wreath on the door is my happy spot. I make these with my three boys between school drop-off and soccer practice, which is hard to believe, but it works. We keep it simple, fast, and playful, and the results look cozy and handmade.
In this guide, I show you how to pick outdoor-safe yarn and bases that hold up, build a wreath form in minutes, and use beginner patterns that still look polished. Most projects fit in 45 to 90 minutes, with a budget of about $10 to $25, depending on what you already have. Skill level is true beginner, just single crochet, slip stitch, and chain.
You’ll get clear steps, printable style tips, and easy swaps to shift a neutral fall look to Halloween or Thanksgiving without remaking the whole wreath. I share the exact ribbons, hooks, and fillers my boys and I reach for, plus quick fixes for windy porches. If you’re short on time, you’re in the right place!
Why a fall crochet wreath is the easiest cozy door upgrade for busy moms

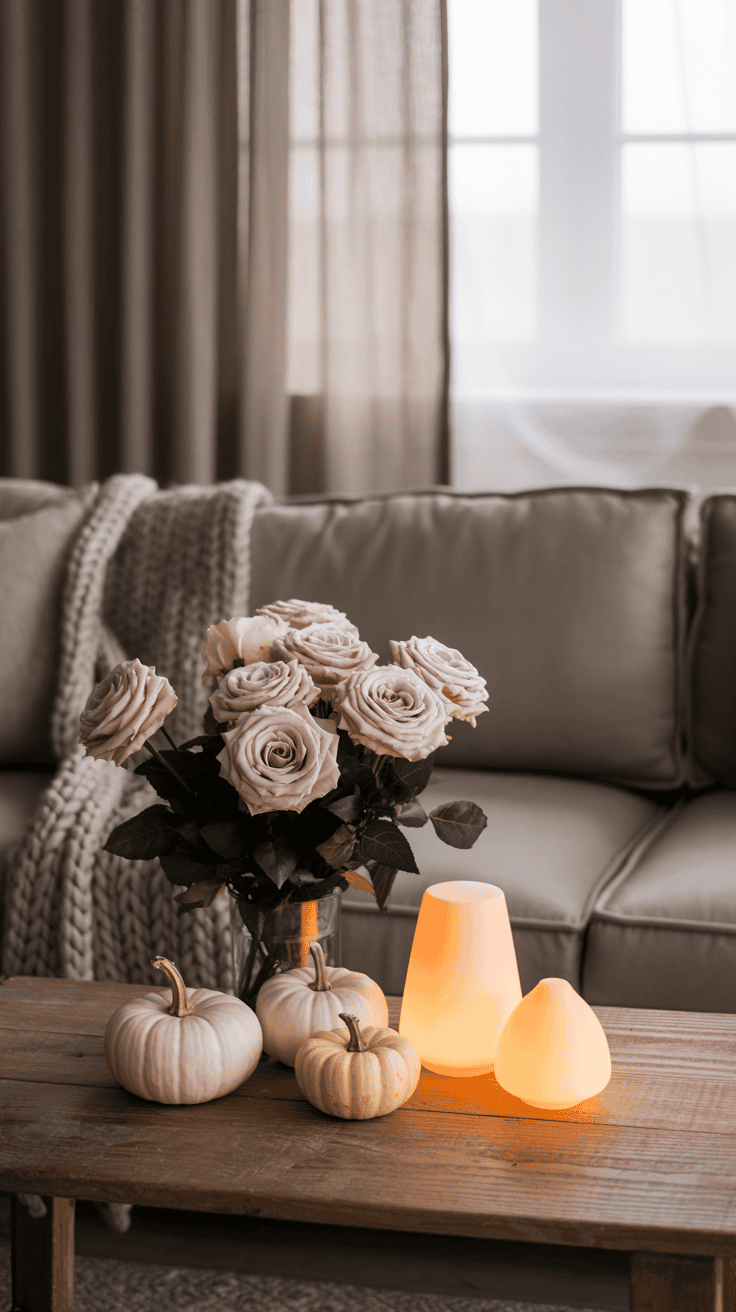
I love a fast win on a busy week, and a Crochet fall wreath checks every box. It is small, portable, and easy to pause when someone needs a snack. My boys help pick colors, I work the simple stitches, and we end up with a warm, homey door that makes the whole porch feel ready for fall.
Cozy color palettes kids can help choose

Color sets the mood, so I keep it playful and simple. I pull yarn from my bin, lay it out on the floor, and let the boys compare. You can use a color wheel to pair warm shades with a cool anchor, or borrow hues right from a favorite plaid scarf.
Here are a few kid-approved palette ideas by color family:
- Harvest Classic: pumpkin orange, mustard, rust, cream, chocolate
- Forest Walk: olive, pine green, bark brown, wheat, charcoal
- Apple Cider: cinnamon, copper, goldenrod, ivory, moss
- Pumpkin Patch: pumpkin orange, sage, taupe, cream, black
- Moody Neutrals: oatmeal, camel, slate, charcoal, ivory
- Soft Sunset: blush, terracotta, sand, warm gray, latte
Quick tips that keep everything balanced:
- Limit to 3 main colors plus 1 accent. It looks intentional and calm.
- Use a plaid as a guide. Match yarn to four colors from the pattern.
- Let the kids vote on the bow color. Instant buy-in and big smiles!
- Test in natural light. Step to the porch, check that colors pop, then commit.
If you want a simple rule, pick two warm shades (like pumpkin orange and mustard), one cool or neutral (like olive or cream), then add a bold accent (like charcoal or black) for depth.
Budget and time plan for a stress free weekend project

I keep this project easy on time and money, which takes the pressure off. Use what you have first, then fill in gaps with one or two new skeins or a ribbon.
A quick glance at cost and time:
| Item or Stage | Range or Estimate |
|---|---|
| Total Cost | $10 to $35 |
| Base Wrap | 1 to 2 hours |
| Motifs (leaves, etc.) | 1 to 3 hours |
| Assembly | About 20 minutes |
What affects cost:
- Size of wreath base, 10 to 14 inches stays budget friendly.
- Yarn from your stash, free is best.
- Extras like ribbon, felt, or floral wire, usually just a few dollars.
Mini weekend plan that works with family life:
- Friday night prep: Pull yarn, choose colors, print or save patterns, and wrap a foam or wire base if you like a tidy start. Ten to twenty minutes, done.
- Saturday crochet: Make leaves, mini pumpkins, or simple flowers while the kids play. I set a timer for short bursts, 30 minutes at a time.
- Sunday assembly: Lay everything out on the table, pin pieces, and glue or tie them down. Let the kids place the bow and one hero piece. Snap a picture, you did it!
Money saving ideas:
- Shop your home first. Old scarves, ribbon scraps, or leftover yarn work great.
- Reuse a base. Slip off last year’s elements and refresh with new colors.
- Mix yarn weights. One chunky strand with two medium strands adds texture without extra cost.
Beginner skills you need and how to practice fast
You only need a few basics to make a wreath that looks polished. If you can tie your shoes, you can learn these in an afternoon.
Core stitches and techniques:
- Chain (ch): Builds the starting length or loops.
- Slip stitch (sl st): Joins rounds and adds clean edges.
- Single crochet (sc): Dense and sturdy, great for leaves and wraps.
- Double crochet (dc): Taller stitch for petals and ruffles.
- Magic ring: Starts circles for flowers or mini pumpkins without a hole.
A quick warm-up makes a big difference. I do this before the kids wake up:
- 10-minute swatch: Chain 12, work two short rows of single crochet. Check that your loops look even. Adjust hook size if it feels too tight or too loose.
How to read a simple motif pattern without stress:
- Start with the materials and hook size. Match your hook to your yarn.
- Find the stitch list. Scan the abbreviations and keep them nearby.
- Read Round 1 out loud. Example: “Magic ring, 6 sc, join.” Say it, stitch it, check it.
- Look for repeat markers like asterisks. Stitch from the asterisk to the next comma, then repeat the count given.
- Count at the end of each round. If it says 12 stitches, touch each stitch as you count to 12.
Easy counting tricks I use with the boys around:
- Place a locking stitch marker in the first stitch of every round.
- Count in sets of five out loud, it keeps me focused.
- If I lose track, I stop, breathe, and re-count from the marker. No shame.
Encouragement for real life progress:
- Progress over perfection. Leaves can be mix sized. It looks natural, like a real pile of leaves.
- Texture wins. A few wonky stitches hide once the wreath is full and fluffed.
- Finish small pieces first. One leaf done feels great and keeps you going.
With these basics and a little weekend plan, you will have a cozy door that greets every guest. Your kids will point and say, we made that, and you will smile every time you pull into the driveway.
Must-have supplies for a durable front door wreath

I want supplies that can handle kid hands, porch weather, and busy weeks. For a Crochet fall wreath that lasts, I stick to sturdy yarn, the right base, and a few smart tools. This combo keeps the wreath crisp, color true, and easy to refresh later.
Yarn that holds up outside without drama

I use yarns that look good on day one and still look good after a rainy week. My top picks are simple and practical.
- Acrylic: Best all-around for outdoor use. It is easy care and holds color well. Great for leaves, pumpkins, and bows. I reach for worsted weight 4 for motifs because it keeps shapes neat without getting floppy.
- Cotton: Perfect for crisp motifs and clean lines. It dries fast and looks tidy, so I love it for flowers, leaves, and letters. Use worsted weight 4 for most pieces. Mix in cotton when you want sharp edges that pop.
- Skip untreated wool if your porch runs damp. It can felt or sag, and that is not fun with little helpers nearby.
Weight tips that keep everything balanced:
- Worsted weight 4: Reliable for leaves, flowers, mini pumpkins, and letter appliqués.
- Bulky 5 or Super Bulky 6: Ideal for base sleeves and big bows that fill space fast.
Color tips for the porch:
- Darker shades fade less in the sun, especially deep greens, rust, and chocolate.
- If rain hits your door, hang the wreath deeper under the porch. Protection helps color and shape last longer.
Simple care that helps:
- Shake off dust when you walk in.
- Spot clean with a damp cloth and let it dry flat.
Wreath forms compared, foam, wire, and grapevine

The base sets the tone. I choose the form based on the method and the look I want. Most doors look best with 12 to 18 inches. I use 12 or 14 inches for narrow doors and 16 to 18 inches for larger doors or if I plan a big bow.
Quick guide to match base and method:
| Base Type | Best Size Range | Best For | Look | Budget Notes |
|---|---|---|---|---|
| Foam | 12 to 18 in | Crochet sleeves, pin-in motifs | Clean and full | Mid-price, reusable |
| Wire | 12 to 18 in | Yarn wraps, bows, tied clusters | Slim, modern | Often the cheapest |
| Grapevine | 12 to 18 in | Tie-on pieces, minimal glue | Rustic and textured | Mid to low, easy to reuse |
How I pick:
- Foam: If I plan a crochet sleeve or want to pin pieces first, foam is a win. It holds T pins and floral picks well. It gives a smooth, full shape under wraps.
- Wire: If I want a slim profile with a yarn wrap or a big bow, wire works. It is lightweight and great for renters since it hangs flat.
- Grapevine: If I want instant texture and easy tie-on points, grapevine is perfect. I weave stems and wire right through the vines. It looks cozy even half-filled.
Budget and look tips:
- On a tight budget, start with wire, wrap with yarn, then add a bow and a few leaves.
- For a fuller door moment, choose foam and add a crochet sleeve in bulky yarn.
- For farmhouse style, use grapevine and cluster motifs at the lower corner.
Tools and extras that make assembly faster

I keep a small basket of tools ready. It saves time and makes assembly smooth with kids at the table.
Essentials for stitching and finishing:
- Hooks H 5 mm to J 6 mm: H for neat motifs, I or J for wraps and bows.
- Yarn needle: For clean joins and secure ends.
- Stitch markers: Locking style so nothing slips out.
- Sharp scissors: Clean cuts, less fray.
Assembly helpers that hold through busy weather:
- Floral wire: Secures motifs to wire or grapevine without bulk.
- Pipe cleaners: Soft, bendy ties for kids to help safely.
- T pins: Great for foam forms. Pin first, glue later if needed.
- Low-temp glue gun: Quick bonds without melting acrylic. I glue only after I am happy with layout.
- Velcro dots: Smart for removable bows and seasonal swaps.
- Command hooks: Door-safe hanging and easy to move.
Safety with kids at the table:
- Supervise the glue gun, always. I use a low-temp stick and keep a wet cloth nearby.
- Finger protectors help both me and curious hands.
- Keep needles and pins in a magnetic dish. I do a quick sweep before anyone gets up.
- Pre-cut wire and pipe cleaners so kids can help tie pieces without handling scissors.
Fast layout routine that never fails:
- Lay the base on the table and place the bow first.
- Cluster three focal pieces on one side, then fill with leaves.
- Pin or tie everything. Step back, adjust, then glue or tighten ties.
With the right yarn, a smart base, and simple tools, your wreath will handle weather and busy family life. It is quick, cute, and sturdy enough for little hands to help.
How to make the wreath base, three beginner friendly methods

Before I add leaves and pumpkins, I set up a base that looks tidy and holds up. A solid base keeps everything secure, even when my boys poke and spin the wreath like a steering wheel. Pick one of these three methods and you are halfway to a cozy Crochet fall wreath that makes the porch feel warm and happy.
Crochet a snug sleeve for a foam ring
I love this for a clean, full look. It hides the base, adds texture, and gives you a soft surface for pins or ties.
Step by step:
- Measure your ring. Use a tape measure to get the outer circumference. A 12 to 16 inch foam ring works best.
- Chain a starting length for the width. I aim for a strip that is the thickness of the ring, usually 3 to 4 inches for a standard foam.
- Work rows of single crochet. Keep it even and a bit tight. Make the rectangle slightly smaller than the ring’s circumference so it stretches snug.
- Wrap the strip around the foam to check the fit. If it overlaps too much, pull back a row. If it gaps, add a row.
- Seam the long edges. Hold the strip around the ring, wrong side facing in, and seam the edges together along the back with a slip stitch or a whip stitch using a yarn needle.
- Rotate the seam to the back. Tug gently so the front looks smooth, then steam lightly if needed.
Smart tips:
- Avoid twisting by lining up the first row with a stitch marker at the top. Keep that marker at 12 o’clock as you seam.
- Hide the seam on the back. If it slides, secure it with a dot of hot glue or two T pins along the back only.
- Use bulky yarn for speed. It fills space fast and hides small tension changes.
Time estimate:
- About 60 to 90 minutes, even with kid help. I pause for snacks and keep going.
Yarn notes:
- Single crochet keeps it dense and sturdy. If your yarn is thin, hold two strands together for a cushier sleeve.
Quick yarn wrap over wire or foam, no sew
When I want a base fast, I wrap. No seaming, no counting, just calm, even winding. It is perfect for last minute decorating and it eats up stash yarns like magic.
How I do it:
- Hold two strands together for texture and speed. I like one solid and one heathered.
- Tie the starting end on the back of the ring. A square knot works. Snip the short tail and secure it with a dot of hot glue if you want extra hold.
- Wrap with consistent tension. Keep the yarn close with no gaps, crossing over the tie to hide it.
- Add a stripe by switching colors at the back. Tie off, start a new color, and keep wrapping.
- Finish at the back. Tie a tight knot, tuck the tails under the wrap with a yarn needle, and add a tiny glue dot to lock it.
Helpful pointers:
- Go tight but not stretched to the point of squeaking. Smooth and firm gives the best finish.
- Spin the base as you wrap. It keeps your hands relaxed and the wrap even.
- Wire forms give a slim, modern profile. Foam forms look fuller and grip the yarn well.
Time estimate:
- About 30 to 45 minutes. My boys like to count spins while I wrap, which makes it go fast.
Style ideas:
- Make a bold band at the bottom third for a color-block look.
- Wrap half the ring and leave the other half bare for a minimal style.
Grapevine base with tie-on points for easy swaps
This one is my set-and-swap favorite. The vines give you built-in anchor points, so you can tie motifs on, remove them for washing, or switch seasons without redoing the base. Hello, fall today and Thanksgiving tomorrow!
How to set it up:
- Spot sturdy intersections. Look for places where two or three vines cross. Those are strong anchor points.
- Pre-cut ties. Snip short lengths of floral wire, twine, or yarn, about 6 to 8 inches each. I keep a small pile ready.
- Place your motifs. Tuck leaf stems or the corners of your crochet pieces into the vines, then tie them down with your pre-cut wire or yarn. Twist snug, then tuck the ends into the vines so nothing pokes.
- Add a light yarn wrap if you want a softer base. Do a loose spiral with a neutral yarn, spacing wraps every inch or so. Tie off on the back.
- Test the hang. Lift the wreath and give it a gentle shake. Tighten any wobbly pieces.
Why it works:
- Removable ties let you wash or switch pieces without damage.
- Natural gaps in the vines hold wire, pipe cleaners, and yarn without glue.
- Rustic texture looks charming even with fewer motifs, which saves time.
Quick checks:
- If a vine cracks, wrap that spot with floral tape for support.
- Keep the heaviest cluster at the lower left or lower right for balance. It sits well and looks classic.
Time estimate:
- Base prep in 10 minutes, then add-ons in 20 to 30 minutes. So quick!
Reuse plan:
- Keep the grapevine base year round. Tie on pumpkins for fall, snowflakes for winter, then flowers for spring. It is budget friendly and so fun for kids to help swap pieces.
Fall wreath patterns you can crochet this weekend

If you want fast, pretty, and kid friendly, these mini projects fit the bill. I make them with my boys after school, and we finish before bedtime. Pick one style or mix a few for a custom look that feels warm and welcoming. Each idea works on foam, wire, or grapevine, and every one plays nicely with a Crochet fall wreath base you already have.
Pumpkin patch wreath with squishy minis
Nothing says fall like a cluster of plump pumpkins. These minis are soft and quick, and my boys love stuffing them and picking stems.
How I make them:
- Crochet a flat rectangle in half double crochet. Keep the width about 8 to 12 stitches, length 14 to 24 rows.
- Seam the short sides to form a tube.
- Weave around one open end, pull to gather, and knot.
- Stuff lightly. Weave around the other end, pull tight, and knot.
- Add a stem, either a small cinnamon stick or a short crocheted tube. Secure with a glue dot or a few stitches.
Easy size changes:
- Use a smaller hook and fewer rows for tiny pumpkins.
- Go up a hook size and add rows for chubby ones.
- Mix two yarn weights for fun texture.
Assembly tips:
- Cluster 3 to 7 pumpkins on the lower third of the wreath.
- Add 1 or 2 simple leaves for movement. A single crochet leaf with a chain stem looks sweet.
- Tuck a few raffia strands or twine between pumpkins for a farmhouse touch.
Time guide:
- Base wrap, about 1 hour.
- Each pumpkin, 15 to 20 minutes.
Favorite colors:
- Classic orange, rust, goldenrod, cream.
- Moody set, clay, sage, charcoal, wheat.
Kid jobs that help:
- Count rows, stuff pumpkins, hold stems while I secure them. Big smiles every time.
Bold sunflower ring with a textured center
Sunflowers make a bright, happy focal point. The popcorn or bobble center looks fancy, but it is easy once you get the rhythm.
What I do:
- Crochet a flat circle center using popcorn or bobble stitches for a nubby seed look.
- Work petal rounds in golden yarn. Use double crochet to keep petals full.
- Layer petals, two rounds or more, for a lush flower.
How many to make:
- Three large sunflowers or five medium ones fill a 12 to 16 inch ring.
- Add tiny leaf motifs in olive or sage for a natural frame.
Placement ideas:
- Arrange flowers slightly off center for a modern look.
- Stagger heights a bit so it feels garden fresh, not too perfect.
Works best on a wrapped base:
- Wrap the ring in a neutral, like oatmeal or deep green.
- Pin flowers first. Adjust spacing, then stitch or glue in place.
Quick pointers:
- Use a darker gold for the back petal round and lighter gold for the top round. It adds depth.
- A chocolate center makes the yellow pop from the street.
Falling leaves and tiny acorns for a woodland vibe

This one looks like a leaf pile in motion. It is playful and perfect for kids to help with sorting and layout.
Color plan:
- Two greens, like olive and spruce.
- One warm accent, rust or mustard.
- A touch of brown for the acorns.
How I make the pieces:
- Leaves, simple maple and oak motifs in single and double crochet.
- Acorns, small amigurumi balls for the nut, with a separate cap stitched in brown. Sew the cap on, leave a short chain stem.
Layout options:
- String a mini garland across the wreath with leaves and acorns.
- Cluster on one side with the heaviest group at the lower left or right.
Kid friendly tricks:
- Sort leaves by size in small bowls. It turns into a fun game.
- Use brown pipe cleaners to shape leaf veins. Twist them gently through a few stitches to hold the curve.
Finishing notes:
- Mix leaf sizes for a natural look.
- Add three acorns together, then a single acorn a few inches away. It looks like a real scatter.
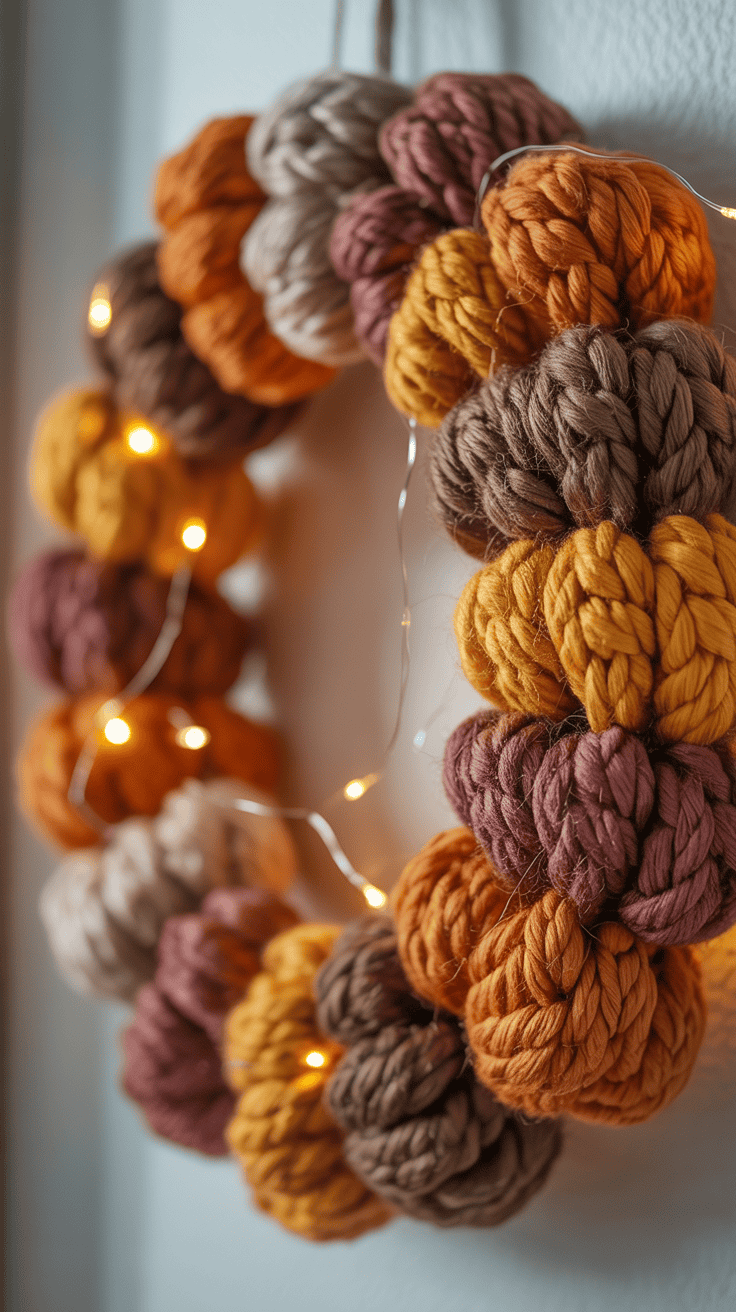
Cozy plaid bow wreath in chunky yarn
A plaid bow feels classic and tidy. It finishes fast and looks store bought, which is wild for how simple it is.
Base setup:
- Wrap the base in a solid color. Deep green, charcoal, or cream all work well.
Bow method:
- Crochet a wide rectangle in back loop only for soft ribs.
- Stripe the rows to build plaid. Two row stripes look clean.
- Wrap a small band around the middle to cinch.
If plaid feels tricky:
- Crochet a solid ribbed bow, then add plaid lines with surface slip stitches. It looks great and takes the pressure off counting.
Placement and extras:
- Place the bow at bottom center for balance.
- Add two small leaf sprigs, one on each side of the bow tails.
- Keep the rest simple so the bow stays the hero.
Time saver:
- Bulky yarn makes this fly. I finish the bow during one cartoon episode.
Harvest farmhouse wreath with cotton bolls and twine
This one reads calm and cozy. It pairs well with a grapevine base and stays up from early fall through Thanksgiving.
Color palette:
- Cream, brown, olive. Keep it simple and grounded.
Cotton bolls:
- Make small white puff stitches for fluffy cotton.
- Add brown sepals, four little points under each puff, stitched or glued in.
Assembly on grapevine:
- Tie clusters on with twine or floral wire. Skip heavy glue if you can.
- Weave twine in a loose spiral for extra texture.
- Add olive leaves or tiny eucalyptus shaped ovals for contrast.
Finishing touch:
- Step back and fluff. Spread the bolls so they are not all in one spot.
- Keep the cluster at the lower third for balance. It looks effortless and polished.
Why I love it:
- Neutral pieces blend with any porch color.
- Everything ties on, so I can switch to pinecones when winter hits without starting over.
Ready to try one with your kids this weekend? Pick your favorite, lay out yarn, and set a 30 minute timer. You will get more done than you think, and your door will look so happy.
Finishing, styling, and care so your wreath looks great all season
The fun part starts here, the final polish that makes your Crochet fall wreath look pulled together and porch ready. I keep it simple, fast, and kid proof. These are the tricks I use with my boys at the table, snacks nearby, and a tiny window before bedtime. You will get a clean layout, sturdy finish, and easy care that lasts all season.
I plan for balance first, then secure everything with smart ties, and top it off with door safe hardware. When the season ends, I store it flat and keep every little piece ready for a quick swap. It saves time and money, which is my happy place as a busy mom.
Layout and balance that looks pro in minutes
A tidy layout makes the whole wreath look high end. I follow a simple order and it never fails.
- Use the rule of thirds: Picture a tic tac toe grid over the wreath. Place the main cluster where a line meets, usually the lower right or lower left.
- Build large to small: Start with the largest motif, set the anchor piece off center, then tuck in medium pieces, and finish with small fillers.
- Repeat colors: Bring each color in at least two times. Three is even better. Space them so the eye moves around the ring.
- Check with a quick photo: Snap a phone pic from a few steps back. Gaps jump out on screen. Add one more leaf or shift a pumpkin if needed.
- Bow goes last: Place the bow only after your clusters feel balanced. It should sit with the flow, not fight it.
If you want a fast layout routine, try this:
- Place your hero piece off center.
- Add two medium accents near it, one above and one below.
- Fill with three to five small leaves or berries.
- Step back, take a photo, and tweak.
- Add the bow if you want extra charm.
Small tweaks that help:
- Angle leaves slightly, not flat. It adds life.
- Keep heavier items lower on the wreath. It looks stable and classic.
- Leave a little breathing room. White space lets the details shine.
Weatherproofing and washable options
I want my wreath to hold up through kids, wind, and porch life. Removable and washable wins every time.
- Prefer ties and wire over glue: Use floral wire, pipe cleaners, or yarn ties so pieces come off for cleaning. Hide ties behind petals or leaves.
- If you must glue: Add a few glue dots on the base, not on delicate motifs. Think anchors, not full coverage.
- Light fabric protector: A gentle spray can help repel dust. Test on a scrap first. Spray lightly, then let it dry fully before hanging.
- Avoid direct rain and harsh sun: Hang under a porch roof if you can. Rotate the wreath once mid season to even out light exposure.
- Easy cleaning routine: Shake it outside, then spot clean. Acrylic yarn is easiest to wipe with a damp cloth. Blot, do not rub, then let it air dry flat.
When I know a storm is coming, I do a quick porch check. I pull the wreath in, prop it by the door, and put it back out the next morning. It takes one minute and saves the finish.
Hanging hardware that does not scratch your door
Let’s keep the door pretty. I use soft hangers and a little padding so nothing scuffs.
- Wide ribbon loop: Tie a strong loop around the wreath and hang it. The wide ribbon spreads weight and looks sweet.
- Wreath hanger with felt pads: Stick felt pads on the top and back of metal hangers. No scratches, no clinks.
- Command hooks: Great on smooth doors. Clean the spot first, then press and hold. I like the clear ones for a tidy look.
- Felt strip on the wreath back: Glue a thin felt strip at the top back of the wreath. It acts like a bumper and protects paint.
- Storm door check: Measure clearance for glass doors. The wreath should not touch the glass. If it does, use a slimmer base or shorter bow.
Quick tip for renters:
- Hang from a ribbon loop tied over the top of the door, then anchor with a Command hook inside. It is secure and door safe.
Smart storage and easy seasonal swaps
The right storage keeps everything fluffy and ready for next year. I pack it once, then I am set.
- Shallow box or garment bag: Store the wreath flat to avoid crushing. A garment bag hangs well in a closet and is easy to grab in fall.
- Tissue between layers: Add tissue or quilt batting around petals and pumpkins so they keep their shape.
- Cedar block for freshness: Toss in a cedar block or sachet to keep it fresh. Avoid strong scents that cling to yarn.
- Labeled zip bags for motifs: Keep extra leaves, acorns, and bows in separate bags. Label them so you can swap pumpkins for leaves or turkeys in minutes.
- Notes for next year: Stick a small card in the box. Write what worked, what you would change, and any missing colors to buy.
My quick swap routine:
- Remove fall pumpkins, keep the base and leaves.
- Add turkeys or a thankful banner for November.
- Switch to pinecones and a plaid bow for winter.
- Store off season pieces in their labeled bags, ready for the next round.
With a little planning, your wreath stays pretty, kid proof, and easy to refresh. You get a polished door piece that lasts all season, and it only takes a few thoughtful steps.

Conclusion
Fall at our house smells like cinnamon, sounds like giggles, and looks like a Crochet fall wreath we made side by side. I keep it simple so we can make memories in the margins of real life. One base method, one pattern idea, and a half hour after dinner is enough. Pick your base, foam wrap, quick yarn wrap, or grapevine, then choose pumpkins, sunflowers, or leaves. Give the kids helper jobs, color picking, stuffing, passing pins, and the bow vote is always a hit.
I want our door to say welcome, we made this together. Handmade pieces hold stories, tiny hands, and proud smiles. Start small, keep it playful, and let the little imperfections be part of the charm. Ready to try one this week?
Choose your base and pattern, lay out yarn tonight, and stitch a few pieces with the kids. Hang it on the door, snap a photo, and enjoy that cozy fall welcome every time you come home!
This post may contain affiliate links. Read the full disclosure here.